I know many of you Budget Byters already cook your own beans but I wanted to make this post for all of the newbies out there. Beans are one of the most economical and nutritious foods available so I try to use them in recipes as often as possible. Canned beans are quick and convenient but with a little planning ahead, dry beans can be just as easy and HALF the cost of canned.
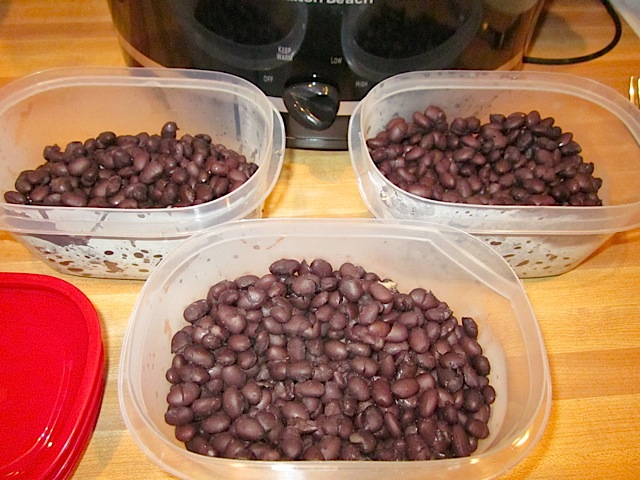
Many people (including myself) shy away from cooking dry beans because it seems like such a daunting chore with the overnight soaking and hours of cooking. What I’ve discovered is that cooking beans can be as easy as “setting it and forgetting it” and, thanks to Kalyn’s recent post, I now know that presoaking is not even necessary! If you cook a large batch, the beans can be divided up into two cup containers, frozen and then pulled out of the freezer as needed. Taking frozen beans out of the freezer is just as convenient as opening up a can!
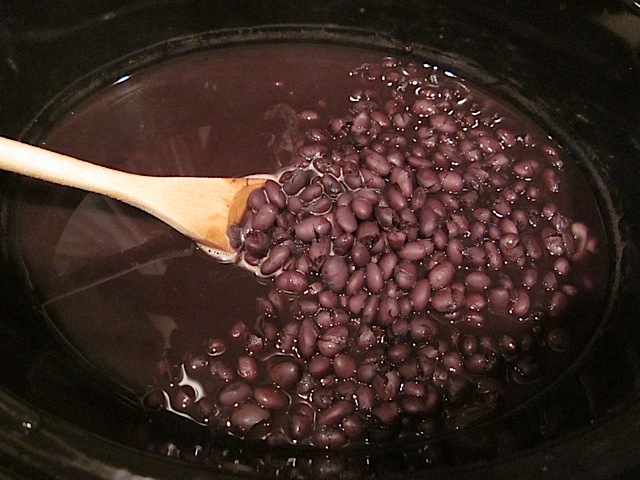
Last night, I cooked up a batch of black beans for today’s soup. The final cost for one can equivalent of dry beans was $0.40 cents. Compare that to a store bought can which usually runs me about $0.79 and I’ve cut the cost in half. Plus, I’ve eliminated salt, preservatives and a lot of wasted packaging. Have I convinced you yet?
*NOTE* This method is not advised for kidney beans or beans in the kidney bean family (like white kidney beans or cannellini) because they contain a naturally occurring substance called Phytohaemagglutnin, which can be toxic to humans and cause severe GI distress. The beans must be cooked in a full boil for at least ten minutes to break down this substance, and most slow cookers do not achieve this level of heat.
How to Kick the Can (of beans)

This post contains some affiliate links, which means that we make a small commission off items you purchase at no additional cost to you.
Here is how it’s done:
STEP 1: Pour one pound (or two for an extra large batch) of beans out onto a baking sheet and sort through to remove any stones or debris. Transfer the beans to a colander to rinse off any dust.
STEP 2: Place the cleaned and sorted beans in a slow cooker and add 6 cups of water for every pound of beans. Put the lid on, set the cooker to HIGH and let her go. Beans that have not been presoaked will take 4-6 hours to cook on HIGH.
STEP 3: Once the beans are tender, pour them into a colander and give them a quick rinse. Divide the beans into containers (re-sealable or zip top freezer bags), label, date and freeze until ready to use! Easy as that.
One pound of dry beans will yield about 6 cups of cooked beans, equal to about 3 cans.

The hands-on time to make these beans was only about 15 minutes. Once they were cleaned and sorted, they go straight into the pot and then I didn’t have to do ANYTHING until I checked them four hours later. Then it’s just a quick drain, rinse and pack into containers.
You can cook beans on the stove top if you don’t have a slow cooker although it takes more attention and care. Just place them in a large pot with a lid (same water/bean ratio), bring it up to a boil then reduce the heat to low and let it simmer until tender. Do not let the beans boil heavily or else the delicate skins will disintegrate and you’ll be left with nothing but bean fragments.
If you have any tips, tricks or notable experiences cooking dry beans, share them in the comments section below!
…the black bean soup recipe should be posted later tonight ;)


Does this work with gigante beans? I’m guessing it would take longer?
This exact method would not work for gigante beans, but they can be done in the slow cooker! Unsoaked gigante beans would likely take closer to 12 hours to cook. Soaked you could probably do in 6-8 but we haven’t tested that to be certain!
Also, can you cook a 12-bean mix in the slow cooker the same way?
Just make sure there aren’t any kidney beans or cannellini beans in the mix!
Do you need to use distilled water or is tap water OK?
I just use tap water, but you may get different results depending on the chemistry and mineral content of your tap water. :)
The cost of a can of beans, even store brand, is well over $1.50 currently, so this process is even more of a money saver. Would this work for dried chick peans?
Yes! xoxo -Monti
Great post and should be linked to in every recipe that calls for canned beans. “eliminated salt, preservatives and a lot of wasted packaging.”, you can stop at eliminated salt and I’m all in. If you’re not doing it by batches then the storage requirement is far less than keeping cans on the shelf. If I have multiple meals planned for the week I’ll store for up to a week in the cooking liquid and oil in the refrigerator.
I use my rice cooker for re hydrating beans. I start with a 2-4 hour pre-soak on “warm”. I’ve played with different settings but “brown rice” on my Instant Pot Zest seems to work well for most beans. Kidney beans are the hardest because as noted “the delicate skins will disintegrate”. A shorter cycle like “white rice” seems better. I’ve had hit and miss luck with re hydrating beans in our Instant Pot pressure cooker. One thing I’ve learned is NEVER use quick release because the sudden change in pressure breaks all the skins. Likewise with the rice cooker you want to let it cool naturally to avoid breaking the skin. That said, I have found a few recipes that let you add dried beans in the Instant Pot at the beginning of the cycle and they’ve come out great. The ultimate in easy! But that only works for long cook times of close to an hour or more. NO SALT==NO CANS… Live by it!
Does a pressure cooker correctly process kidney beans?
According to this article, the high temperature and pressure inside of a pressure cooker is enough to destroy the phytohemagglutinin, which is what I would have expected because the temperature is actually higher than what it would cook at if boiling on the stove top.
If you cook beans from scratch, a tip: don’t pour the final ‘bean/legume broth’ (the water in which beans are cooked) down the drain!! It’s a perfectly usable, delicious broth! Chickpea broth is similar to chicken broth and can be used pretty much anywhere, black bean broth is perfect for chilis, pinto bean broth for minestrone, etc. Depending on the type of legume and duration of cooking, the broth will have some starch from the beans in it. You can strain it if you want a clear, non-thickening broth or keep it as it is if you want a thickener for stews, chilis, etc.
Also, if you have a piece of parmesan rind, put it to cook with the beans! It makes the broth tastier. I also usually add a bay leaf and a sprig of rosemary, and some black pepper.
This can also be an easy, tasty ‘no onion no garlic’ broth if you don’t use any onion or garlic with the beans.
And I forgot, it can be frozen just like regular broth! If you make about a lb of legumes you will have about 2-3 cups of free bean broth from it.
Nice tip. And to think I’ve been pouring it down the drain and using powdered chicken stock… doh, head slap. We keep veggie trimmings to make stock but that’s a long process and usually only make enough to do something like a big batch of split pea soup that we are going to freeze for lunches after the main meal. The starch will be great for making gravy… mmm, gravy ;-) Yet another great reason to kick the can. “If you make about a lb of legumes you will have about 2-3 cups of free bean broth” & free is a very good price.
Best info on how to cook beans for best flavor and texture (Spoiler alert-in the oven!): https://www.latimes.com/food/dailydish/la-dd-dont-soak-dried-beans-20140911-story.html#page=1
Hi
I’m new to cooking & eating beans. What other beans can I use instead of black beans please?
You could try it with pinto or black eyed peas. This method is not advised for kidney beans or beans in the kidney bean family (like white kidney beans or cannellini) because they contain a naturally occurring substance called Phytohaemagglutnin, which can be toxic to humans and cause severe GI distress. The beans must be cooked in a full boil for at least ten minutes to break down this substance, and most slow cookers do not achieve this level of heat.
Relieved of the fear of cooking soft boiled eggs since my wife’s death. Your recipe worked wonders for my psychy as well as my belly. Thanx
Happy to hear it worked for you!
How many cups is a pound of beans? I don’t have a scale. :(
2 cups of dried beans equals a pound :)
Thank you for this. I always found I’d burn some of my beans cooking them the traditional way (and that’s all on me), but I’ve done them in the slow cooker now a good four times (garbanzo, black x2, and pinto) and it’s a life saver.
My mom would cook two pounds of beans on a slow simmer on the stovetop, but she added the soup to the beans in the freezer container to avoid them being dried out in the freezer. We always had ham hock or leftover Christmas ham in them and it basically sufficed as soup with homemade white cornbread with lots of butter. Boy, I miss those days…
Would you put salt or seasoning in the water? And roughly how many cups is 1 lb of dried beans?
It’s best to add salt after cooking because you’ll get more of a punch with less salt. Herbs, spices, and aromatics, on the other hand, can be added before cooking. The volume of dry beans per pound will vary with the type of bean, since they’re all different shapes and sizes.
Beth, my wife and I use an electric pressure cooker. Cuts your cooking time down to 30 minutes and cool down for 30 minutes. One hour and they are done. Just passing it on.
John: Is the recipe the same in the IP though? 6 cups per pound of dry beans? Then set it to what?