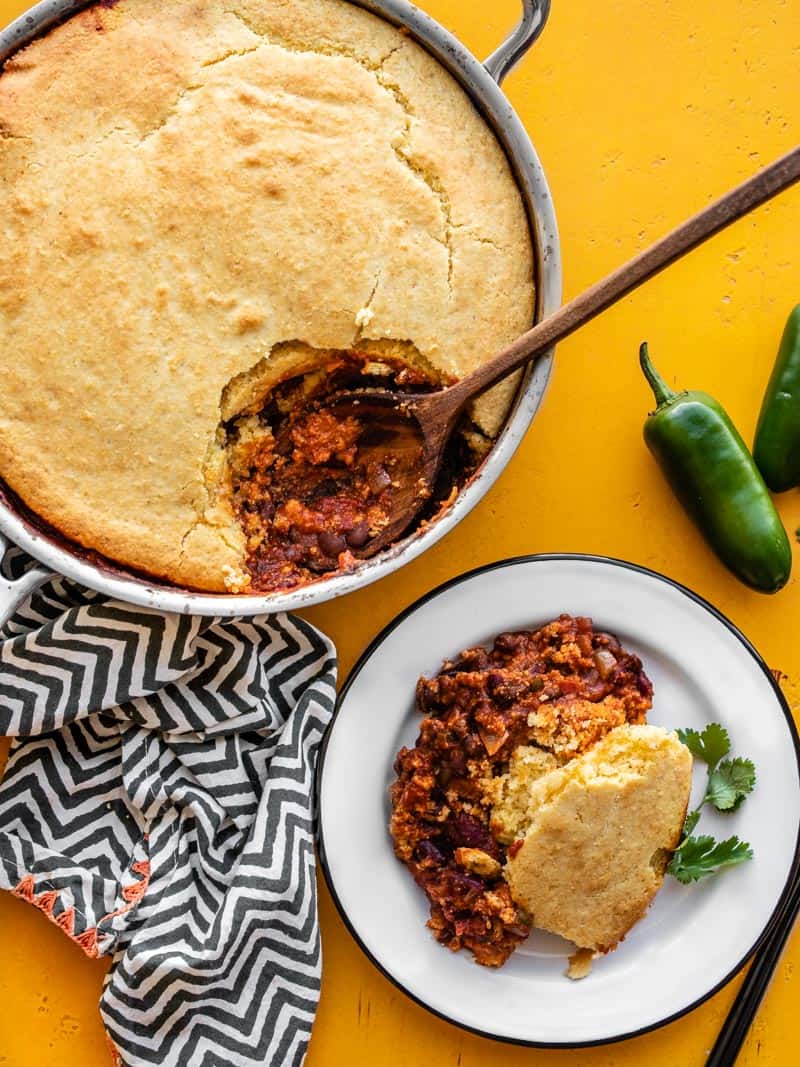
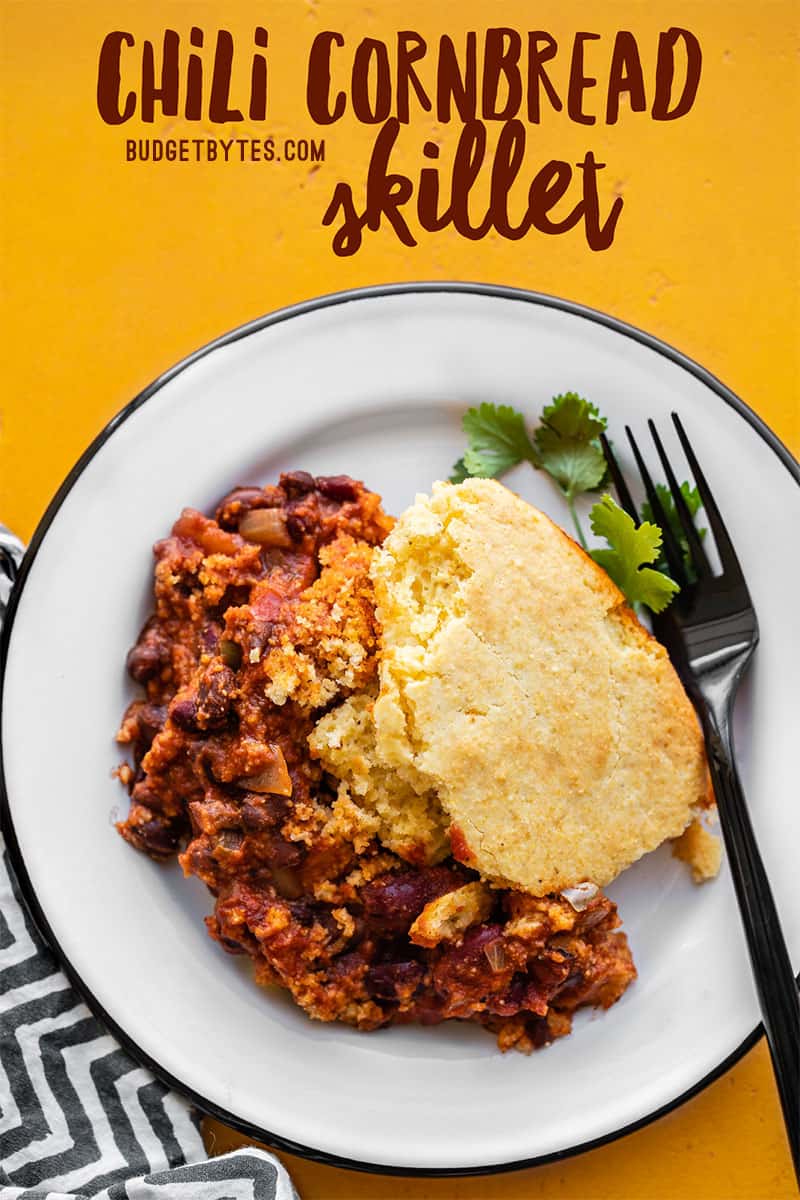
Some nights you just need something warm, comforting, and easy to help melt off the stresses of the day, like a big bowl of chili. And maybe some cornbread, too, for good measure. This easy Chili Cornbread Skillet has all the comfort of a pot of chili, with homemade cornbread baked right on top to avoid excess dishes. Oh, and I hid a layer of gooey cheddar cheese between the chili and cornbread, too. Because cheese makes everything better!🧀
This post contains some affiliate links, which means that we make a small commission off items you purchase at no additional cost to you.
What Kind of Skillet Should I Use?
You’ll want a deep, 4-quart skillet for this recipe. I used my 10″ 4-quart Oxo stainless steel skillet for this recipe. If needed, you could also use a smaller wide soup pot or Dutch oven. Using an oven safe skillet or pot is the best option, but read on if you do not own an oven safe skillet or pot.
What if I Don’t Have an Oven Safe Skillet?
If you only own teflon skillets, skillets with plastic handles, or skillets that have other non-safe parts, you can still make this recipe. Simply let the chili simmer in your skillet or pot while you make the cornbread, and then transfer to a 4-quart casserole dish before topping with the cornbread batter and baking.
Can I Add Meat to the Chili Cornbread Skillet?
Absolutely! I made a vegetarian version this time around because it’s quite cost effective and it makes the meal more pantry-staple friendly, but you can always add meat if you have it on hand or prefer your chili con carne. Simply replace one can of beans with one pound ground beef or turkey. Brown the meat in the skillet before adding the onion, garlic, and jalapeño in the beginning.
Meal Prep and Freezer Friendly
This Chili Cornbread Skillet holds up extremely well in the refrigerator, and is also freezer friendly. As with any meal prep recipe, make sure to divide the dish into single serving portions right after cooking and get it into the refrigerator as soon as possible, so it cools quickly. Once cooled, the chili cornbread will keep in the refrigerator for about four days, or can be transferred to the refrigerator and kept frozen for about 3 months. You can see some of my favorite meal prep containers here.
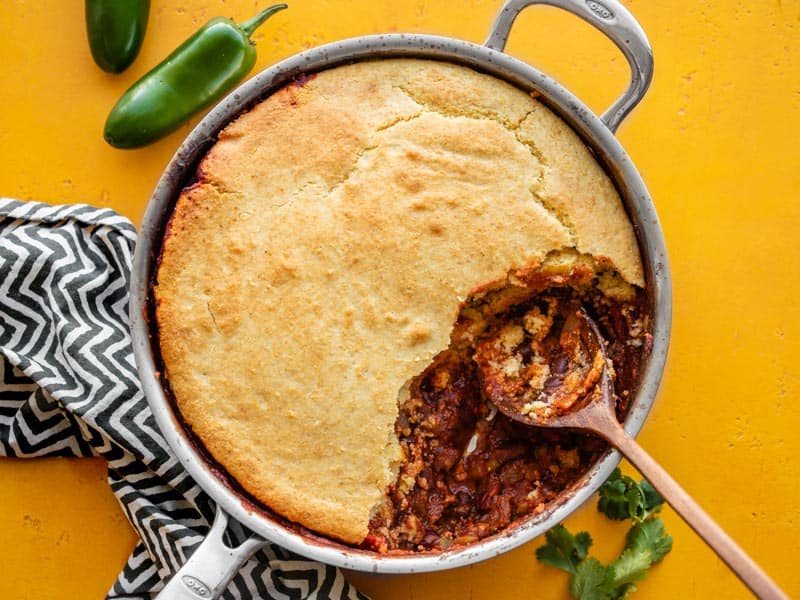
Chili Cornbread Skillet
Ingredients
Chili
- 1 Tbsp cooking oil ($0.04)
- 2 cloves garlic ($0.16)
- 1 yellow onion ($0.32)
- 1 jalapeño (optional) ($0.15)
- 1 15oz. can fire roasted diced tomatoes ($0.89)
- 1 6oz. can tomato paste ($0.39)
- 3 15oz. cans beans (kidney, pinto, black) ($2.67)
- 1 Tbsp chili powder* ($0.30)
- 1 tsp ground cumin ($0.10)
- 1/2 tsp dried oregano ($0.05)
- 1 tsp salt ($0.05)
- 1 cup water ($0.00)
- 1 cup shredded cheddar ($0.85)
Cornbread
- 1 cup yellow cornmeal ($0.24)
- 1 cup all-purpose flour ($0.15)
- 1/4 cup sugar ($0.20)
- 4 tsp baking powder ($0.24)
- 1/2 tsp salt ($0.02)
- 1 cup milk ($0.31)
- 1 large egg ($0.23)
- 1/4 cup cooking oil ($0.16)
Instructions
- Dice the onion and mince the garlic. Slice the jalapeño lengthwise, scrape out the seeds, and then dice the pepper. Add the cooking oil, onion, garlic, and jalapeño to a large 4-quart oven safe skillet. Sauté over medium heat until the onions are soft and translucent (about 5 minutes).
- Drain the canned beans then add them to the skillet with the tomato paste, diced tomatoes, chili powder, cumin, oregano, salt, and water. Stir to combine.
- Allow the chili to come up to a simmer. Let the chili continue to simmer, stirring occasionally, as you prepare the cornbread topping.
- Begin to preheat the oven to 425ºF. In a large bowl, stir together the cornmeal, flour, sugar, baking powder, and salt until very well combined. In a separate bowl, whisk together the milk, egg, and oil. Pour the milk mixture into the bowl with the cornmeal mixture and stir just until everything is moistened.
- Sprinkle the cheddar cheese over top of the simmering chili. Carefully pour the cornbread batter over the chili and cheese, and spread it around until the surface is evenly covered.
- Transfer the skillet to the fully preheated oven and bake for 25 minutes, or until the cornbread is golden brown on the surface. To serve, simply scoop the cornbread and chili beneath onto a plate or bowl, and enjoy!
See how we calculate recipe costs here.
Notes
Nutrition
Love chili? Check out my Simple Homemade Chili recipe with tons of ways to customize the flavors to make it your own!
How to Make Chili Cornbread Skillet – Step by Step Photos
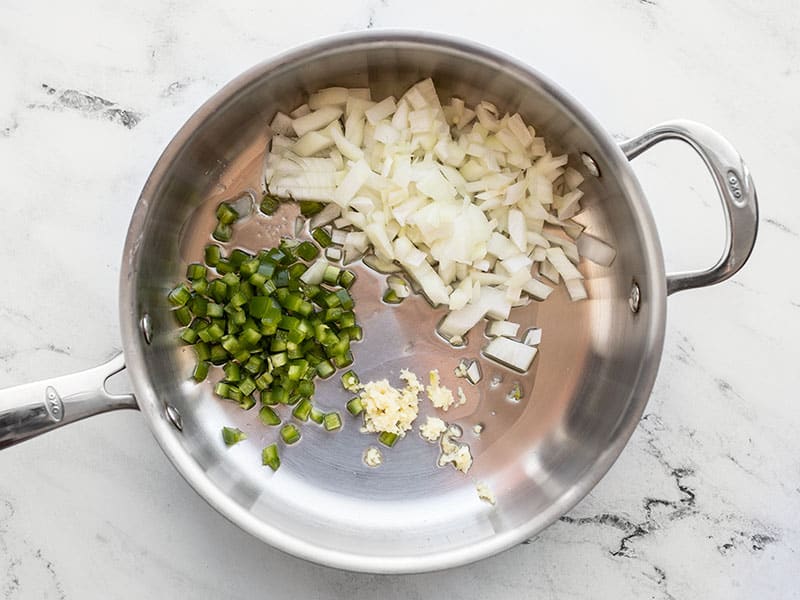
Dice one yellow onion and mince two cloves of garlic. Slice the jalapeño lengthwise, scrape out the seeds with a spoon, then dice the remaining pepper. Add the onion, garlic, and jalapeño to a skillet with 1 Tbsp cooking oil. Sauté over medium heat until the onion is soft and translucent (about 5 minutes).
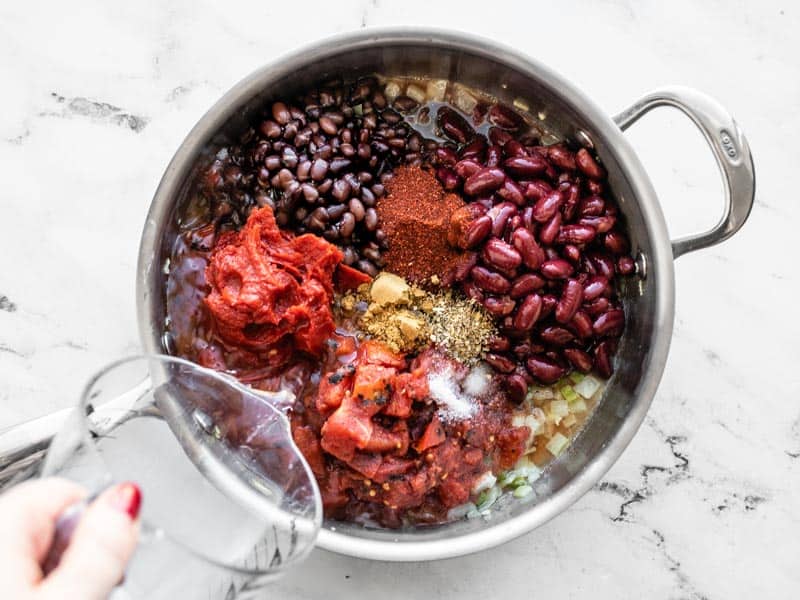
Drain three 15 oz. cans of beans (any combo of kidney, black bean, or pinto—I used two black beans, one kidney). Add the beans to the skillet along with one 15 oz. can of fire roasted diced tomatoes, one 6 oz. can of tomato paste, 1 Tbsp chili powder, 1 tsp cumin, 1/2 tsp oregano, 1 tsp salt, and 1 cup water. Stir to combine. Allow the chili to come up to a simmer over medium heat. Continue to simmer the chili, stirring occasionally, as you prepare the cornbread batter.
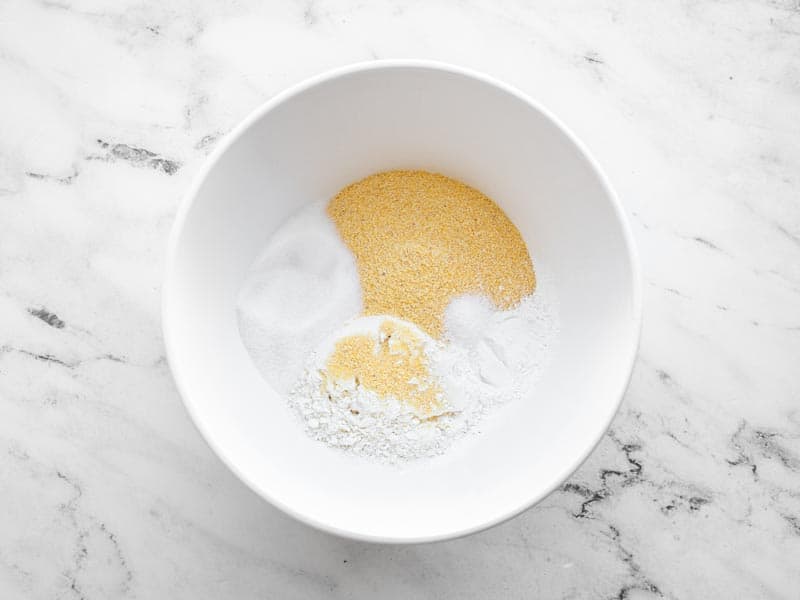
Begin preheating the oven to 425ºF. Combine 1 cup cornmeal, 1 cup all-purpose flour, 1/4 cup sugar, 4 tsp baking powder, and 1/2 tsp salt in a large bowl. Stir until they are very well combined.

In a separate bowl, whisk together 1 cup milk, 1 large egg, and 1/4 cup cooking oil. Pour the bowl of whisked wet ingredients into the bowl with the cornmeal mixture and stir just until the batter is combined (don’t over stir).
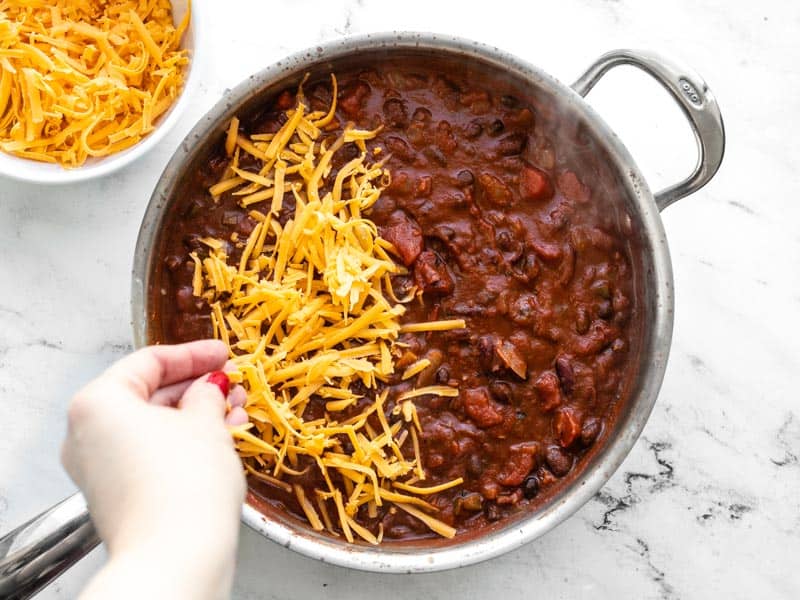
Before adding the cornbread batter to the chili, sprinkle 1 cup of shredded cheddar over the surface of the chili.
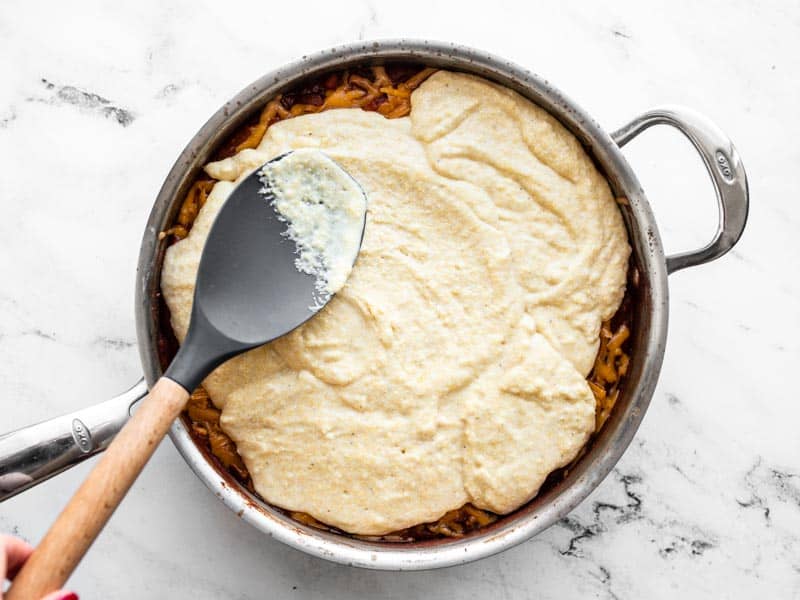
Carefully spread the cornbread batter over the surface of the hot chili, making sure to spread from edge to edge.
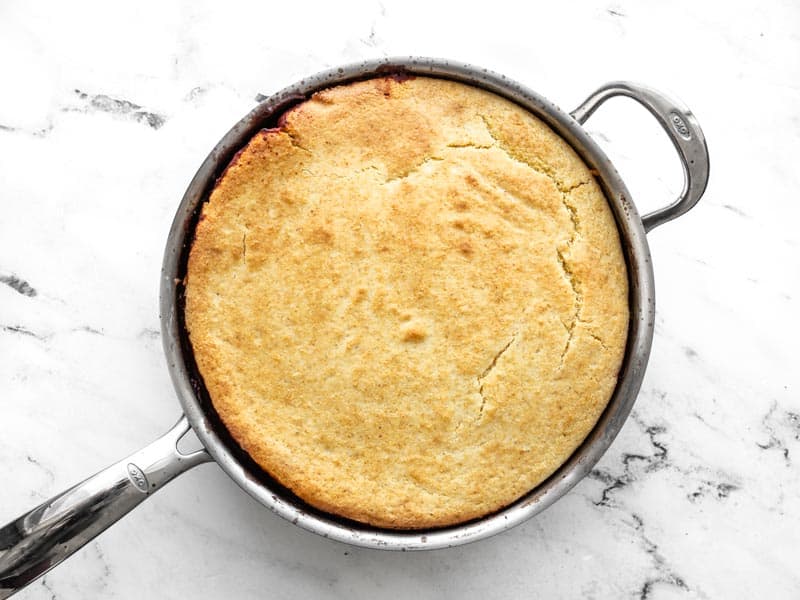
Bake the Chili Cornbread Skillet in the fully preheated 425ºF oven for about 25 minutes, or until the top of the cornbread is golden brown.
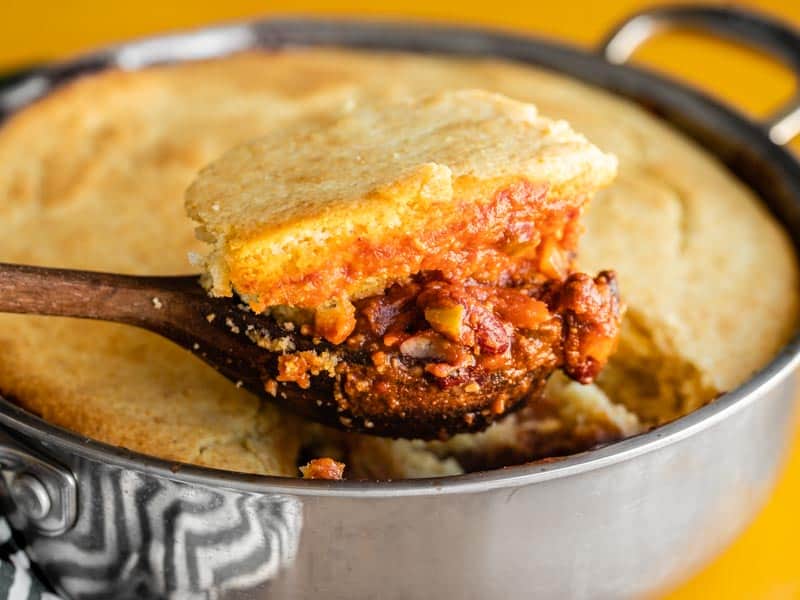
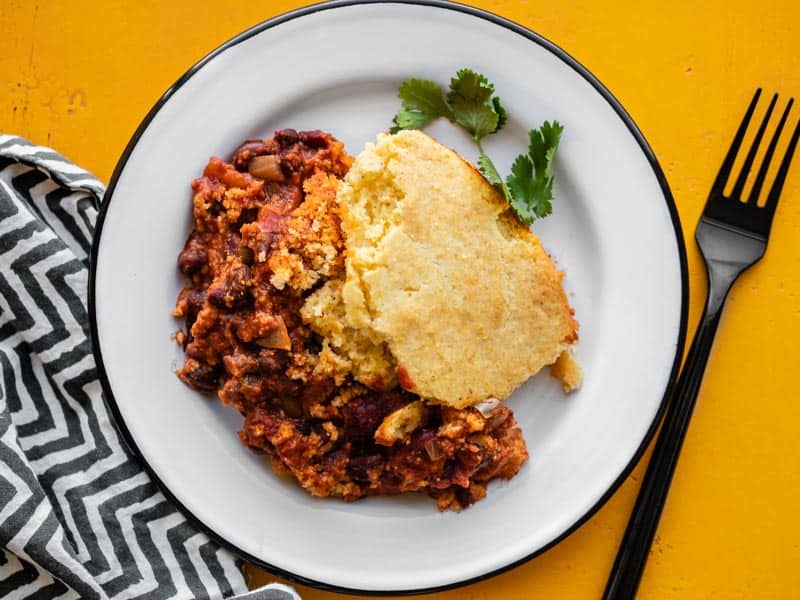
To serve, simply scoop the cornbread and chili beneath out of the skillet and onto a plate or bowl.
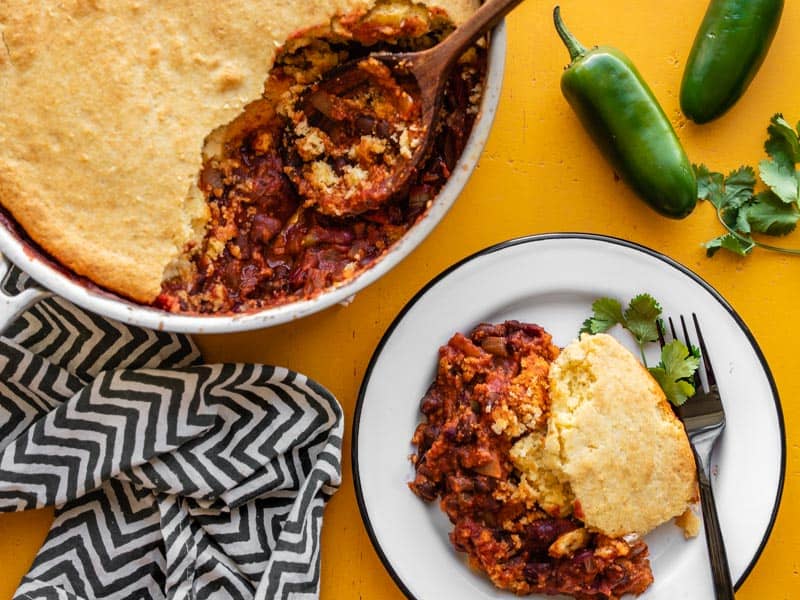
COMFORT FOOD.


This is super yummy!! I had to make a different recipe for gluten free + egg free cornbread but it turned out delicious!!
This has become one of my and my husband’s favorite dishes. Took make the recipe a bit quicker (and because I swear by Jiffy) we replace the homemade cornbread with two boxes of Jiffy cornbread mix. I also highly recommend putting a scoop of sour cream in the bottom of the your bowl to make the chili extra creamy! 11/10!
To make this a little quicker for a busy night, I premade the chili on meal prep day and used a box of jiffy mix cornbread. Just dumped the layers in a big casserole dish and popped it in the oven.
My husband loves this recipe!! The cornbread on top is such a fun touch to the dish. I usually use a box of Jiffy cornbread to make it even easier, but I don’t think it makes as much batter as your recipe would. Thank you so much!
Made it for a Sunday lunch with the family and OMG!! Incredibly delicious, the spicy chili topped with the sweet corn bread. A love story. Everyone loved it
Yummmmmm nothing like cornbread and chili. Definitely inspired choice to just put the cornbread on top with a layer of cheese in the middle. I followed the bean and spice ratio as stated but didn’t use jalapenos. Also didn’t know where to get roasted diced tomatoes, but a chili is a chili is a chili and a chili is a good for me.
Concept 100% delicious. I’ll be honest I did not make this cornbread and I added many many things to the chili to make it more flavorful but I would not have ever attempted to bake corn bread over chili it’s an amazing concept for a meal. I did make it vegetarian same beans ratio no meat. Husband loved it!
This was so yummy!! My cornbread didn’t cook all the way through so I had to keep putting it in the oven but man!! Thank you for sharing this recipe and inspiring me to make it, I kind of made it my own on a few ingredients but Overall stuck to your recipe. Soo delicious.
Love this Recipe!! My kids call it Cowboy Pie :)
I used Lamb’s stoneground cornmeal to make the cornbread topping and it was awesome!
I made this the other night, but I subbed out a can of beans for a lb of hamburger. It was very good!! I will be making it again, however, I found the ratio of cornbread to chili to be off – too much cornbread and not enough chili. I’m not sure whether to double the chili or halve the cornbread, so I will play with it until I get it figured out. Thank you Budgetbytes! Excellent recipe with lots of flavor, and the perfect amount of heat!
Omitted the jalapeño, added cayenne to taste and used one box of America’s Favorite “Jiffy” cornbread mix instead of making my own.
OBSESSED. I actually hate chili and was not thrilled when my bf asked for this recipe for dinner…but now I crave this! Our daughter is in love with it too.
Idk what people are talking about with tripling spices cause it’s perfect as written seems like it’d be wayyyyy too much happening. Just let it simmer and taste it before you triple the spices or add anything else, cause it’s truly fantastic to me.
Could I do this in the crockpot or stove top ?
I haven’t tried this in a slow cooker, so I’m not sure how that would turn out. I don’t think you’ll be able to get the cornbread to bake correctly on the stove top, though.
I don’t know if this is solely your recipe or if you were inspired by another recipe however this is the best chili/cornbread recipe ever! I make chili and I make cornbread; I cover my chili with cheese and then I break up my cornbread and place it in my chili and eat it. In this dish it’s already done. Of course I changed the recipe for my likings, such as adding ground beef and adding more heat with a serrano pepper along with the jalapeno pepper; oh and adding twice the amount of cheddar cheese.
For the cornbread, I reduced the baking powder to 3 teaspoons and added 3/4 teaspoons baking soda. Dumb me, I forgot to mix the oil in with the egg/milk mixture and added it after the batter was already mixed; fortunately it still worked.
But what an inspiring recipe, thanks!
You can cook cornbread in a microwave. It will be less crispy, but still very tasty.
This was really good, and great idea! Baking the cornbread on top of the chili makes the cornbread nice and moist!
Some notes — I agree with the person who said to triple the spices. It seems like a ton, but I tasted while making it, and it definitely needs the extra spices. I also added a pinch of cayenne in there too. — I also agree with the person who said to bake on 400F for 20 minutes. I did it at 425 and the top got crispy but the center of the bread didn’t bake all the way, so make sure you do it lower for longer to cook the cornbread through.
—- And for those who are wondering about pan sizes: I successfully made this with a 12″ Lodge pan, but it was a REALLY close call. I put a pan underneath it, and the chili did dribble out a little bit. The chili basically fills the entire pan.
This was incredible! I tripled the spices, added Italian seasoning, and replaced one can of beans with one pound of ground bison, otherwise followed the recipe exactly. The chili to cornbread ratio was perfect for us. Loved the flavor and it was super quick and easy to throw together! It fed the two of us for three nights. Served with avo and sour cream on the side.
Made this to recipe (minus jalepenos) for me and my older parents and was impressed by the multiple ways this one is “beefed up” (without beef) with things like the beans, cheese, and cornbread. It was really satisfying, if a little “tame” for this particular spice-fiend (my parents, on the other hand, thought it was perfectly spiced). The temps and timing were perfect, as others pointed out, and it made more than enough for everyone to have extra helpings! This would be great for a small family with young kids too! Thanks for another great taste adventure :)
This was DELICIOUS. I have zero skills in the kitchen and continuously budgetbytes recipes make adult-eating accessible to me. Thank you!
I should probably mention something for people cooking this. I did go a bit heavier on the seasoning because historically that’s what I need to do with these recipes. Every other measurement was spot on though, as was the timing.
This was me! I just forgot to mention that I was too lazy to buy a can of diced tomatoes or tomato paste, so I used 3-8 oz cans of tomato sauce and a handful of grape tomatoes I had on hand. It was still delicious but a bit runnier than Beth’s recipe (obviously this is 100% my fault though!). Just know that if you’re trying to burn through some pantry stuff, these alternatives can work.
I made this for my family and we feel that both the chili and the cornbread are bland. This is, however, a good base recipe that people can play with and add to.
The one star review a couple posts back is completely unwarranted. Any time you follow a recipe you absolutely need to adjust seasoning to taste. That’s just cooking 101. That being said, this is a great recipe that I’ll absolutely be making again with some tweaks.
Things I changed:
Dry beans instead of canned. Takes way longer, but the texture is better IMO and it helps to cut back the almost 2kmg of sodium per serving you get as listed.
El pato instead of tomato paste. Adds a little more flavor and a little more liquid, which was necessary for my increased cook time with the dry beans.
Substitute Chipotle for chili powder. Has a great smoky flavor that really punches things up. This will go a long way to satisfy the appetites of any picky meat eaters you may have around the table. This one was a happy accident because I didn’t have chili powder. I think next time I would do .5tbsp chili powder, .5tbsp Chipotle.
Habanero instead of jalapeño. A single habanero was just enough spice for the whole pot. Pleasant without being too intense.
Things I would change next time:
The cornbread was good, but a little too fluffy for my liking, and a hair bland. I think next time I would put a little more salt, and less baking powder. The cornbread raised so much that there was way more cornbread than chili in a serving scoop, so I kind of had to dig more chili out from under the cornbread to get a whole serving, and by the time I get to the end of the pot I’ll probably have some cornbread left over.
I have never made cornbread as in the UK before but this plus the chili was great! I used slightly less tomato paste as I ran out and my kidney beans were already in a chilli sauce and it was fantastic. My partner is American and has asked me to make this more often – sign of a good meal!
This needs way more seasoning. It was lacking flavor in a major way. Almost all the other reviewers made massive adjustments to the recipe before cooking and reviewing. If you follow the recipe to the word, taste everything before putting it in the oven. The next time around, I would double or triple the seasoning in the chili and double or triple the seasoning/sugar in the cornbread. Be prepared to serve with either hot sauce, lime and cilantro, or maybe sour cream.
I was skeptical but Leslieeh is right. Double up on the seasoning, at the least.
I agree, it needed way more spice but you, as a home cook, need to adjust the recipe to your taste. This is inspiration for you to build on and I did; my first time making it, I made my modifications and it turned out amazing. When I make it again, it’ll be even better thanks to her inspiration.
Don’t give it a 1-star just because you can’t see its potential.
Thinking of making this in 2 separate dishes and freezing one for the cold hard winter ahead. Would you freeze it in cornbread topping unbaked? ir freeze just chili and do 1/2 of cornbread topping later?
I wouldn’t freeze the cornbread unbaked, but it freezes really well after baking! So if you’re going to make it in two separate dishes anyway, go ahead and cook all of it, then separate and freeze half.
This recipe is the most delicious thing I have ever made from your recipes (and I have made A LOT). The flavors are SO good and it is such a hearty and filling dish. Everything we make always turns out amazingly and everyone always asks us where we get such yummy meals (we are vegetarians, so I love your new and interesting ideas). Thank you!!! =)
I made my chili extra soupy (and extra large) by adding more beans, an extra can of tomato, an extra onion, some celery, a carrot and a bell pepper… And the cornbread sort of sunk into my soupy chili and ended up steaming on top like dumplings. I skipped the cheese because I was out. Omg. It was absolutely perfect. Done this way, the cornbread cooks up moist and flavorful and the chili is the perfect hearty but healthy accompaniment. Thank you budgetbytes for the recipe formula, and the consistent dinner inspiration!
NICE! So Chili dumplings. I may have to try that mistake.
Love this recipe, the first time I made it, I didn’t realise the recipe didn’t ask for mince.. I added it anyway and it was delicious…
Awesome. I love your Web site.
My husband and I loved this recipe! It was so flavorful yet simple. We added some ground pork because we are meat lovers and it turned out great!
Had some vegan chorizo chili in the freezer from months ago, this was the best way to repurpose. I only had about 4 servings so I just halved the cornbread recipe and put it in a large ramekin. Came out perfectly!
I wish there was a way to make this cornbread chili recipe without having to use an oven. I live in an SRO, and don’t have access to an oven.
Just a thought–maybe make it a little soupier as another reviewer did and dollop in the cornbread batter and cook as dumplings–you probably wouldn’t get the nice cornbread crust texture but the dumplings would be nice anyway. Good luck. :)
I was looking for a recipe to use up a box of jiffy mix and this was perfect. Makes a ton of food. I cooked in a large cast iron which worked well. 25 min bake time was just right.
Ive tried this twice – once using Budget Bytes recipe and once using a different recipe for a very similar dish – and I have to say, never again. The flavors themselves were good. But there was just so much more cornbread than chili. I could barely eat my single serving so I don’t know how we’re going to deal with these leftovers!
I followed the comments and did add more liquid to the chili, which I’m sure helped but still it all came out too dry or “bready” for me. I wondered “where did all my chili go!?”
I’d say this is good if you want cornbread with some chili accent, rather than chili with a cornbread accent.
This was a huge hit in our house! We were able to get 8 servings. I cut the amount of cornbread in half and there was still PLENTY of cornbread.
YUM YUM! We did 1 can of kidney beans and 1 pound of browned hamburger (we are big meat eaters) and added the 1 cup of beef broth per other commenters and this turned out perfect. We will for sure make again!
Kids loved it and so did I. Like others, I used 2 boxes of Jiffy Cornbread mix instead of making from scratch, and it worked great. I made it in a dutch oven instead of the skillet; also worked fine. The chili is really good on the second day after the flavors have had a chance to play together overnight. YUM.
Delicious! I agree with a lot of the comments–I will probably add more liquid next time, and while we were surprised by the chili-cornbread ratio, we really liked it. We’re pretty big eaters, but I think we’ll get eight servings from this instead of the six Beth suggests.
Really yummy!
Would using a “Just Add Water” cornbread mix from the grocery store work with this?
I would think that would work, although I haven’t tested it to be sure. :)
Hi Ashton and Beth, I used 2 boxes of jiffy corn bread mix and 2 cans of cream corn to make a corn souffle topping. Came out great!
That’s awesome to hear Jess. Thank you for sharing this is helpful!
One question. For that souffle, did you also use rest of ingredients listed on box directions, OR JUST the creaned corn.
I made this last night with two boxes of Jiffy mix, and it was totally delicious!
Follow up: I went with 2 packets of the Martha White Cotton Country Buttermilk Cornbread Mix and it turned out great!
I had an issue cooking the corn bread.
4 stars because it was missing something in flavor. Recipe is easy to follow, except I messed up the corn bread somehow, bit I dont think that was the recipes fault
I’ve only ever made this with Jiffy – I only use one box. The layer of cornbread is a little thinner, but I think it’s enough. I think the Jiffy probably makes this marginally cheaper, too.
Beth: Could you use a cast iron skillet or a Dutch oven for this? I don’t have a stainless oven safe skillet but I do have a Dutch oven and two sizes of cast iron skillets.
Thanks in advance!
Hi KT! Yes it would be great in either!
I make something similar but more taco style with taco seasoning and add a can of corn – it’s good! One issue I always have is that the bottom of the cornbread layer never seems to quite cook – you don’t seem to have that issue so maybe I just need to cook it a tad longer!
Hmm, yes, try cooking a few minutes longer and make sure that chili is simmering hot before adding the cornbread. The heat from the chili actually helps cook the cornbread from the bottom up. :)
Would like to make this gluten free. Could I substitute the one cup all purpose flour for a gluten free flour?
Hi Carla! Yes I’ve used the Cup4Cup and the Bob’s Red Mill GF All Purpose Mix a few times and had good success.
Huge hit with the family and very easy. I read the reviews and made the following tweaks:
-added extra liquid (about 2 cups beef stock, just what I had on hand)
-substituted 1 lb ground beef for 2 cans of beans (my husband is a carnivore)
-substituted canned chopped green chilis and 1 tsp chipotle chili powder for the jalapeño (there were no jalapeños at the store today, weird)
The family loved it. We love cornbread, and the chili as written is definitely too dry to stand up to the amount of batter in the recipe. Adding extra liquid to the chili perfectly fixed that.
This is definitely going into the rotation for winter!
Great swaps! Thank you for sharing.
Please only use 1/2 teaspoon of chipotle at most! It’s the only thing I could taste…
I think my chipotle powder is pretty new, so if you buy a fresh one or if you are sensitive to spice, definitely decrease!!
That should say old, my chipotle powder wasnt new! 🤦♀️
How do you think this would freeze? Thank you!!
I do think this one would freeze well. :)
My luck with freezing cornbread has not been ideal.
You’re better off just freezing the chili – the cornbread won’t freeze well. When you thaw out the chili, make a fresh batch of cornbread batter to throw on top.
Had this for the first time this Sunday afternoon. Both my wife and I thought it was simply wonderful. We used a 12″ cast iron skillet as the 10″skillet barely held the the three can’s of beans.
I agree with the folks that said that this had a of cornbread, which is fine by us. The bean/vegetable mixture cooks down so that when we cut into the dish, there was a thinner layer of chili and a thicker layers of cornbread. The chili was so flavorful that the tastes between the chili and the cornbread balanced out perfectly.
Another budget bytes winner!
Tasty chili and cornbread. Definitely will make again. There was probably a little more cornbread than the chili needed, making the dish a bit on the dry side, so I’ll probably cut down the cornbread recipe by about 1/3 next time. Other than that, delicious!
If prepared right , one can’t go wrong with jiffy cornbread mix and a can of wolf brand chili with an extra can of kidney beans. Use your own imagination. Add jalapeno peppers, shredded cheese , chopped onions and garlic, real bacon bits,and shoepeg corn. This is a three times a day meal. Delicious
This is one of my favorite recipes of yours- I LOVE it during the cold weather! It’s the best comfort food
Made this night for 4 of us and it came out real good. I say the recipe is good for 6 people with avg appetites, but I didn’t serve it with anything else.
I followed the recipe, but I subbed 2 cans of beans for 1# ground beef. Next time I would try it with ground turkey. Also added a sprinkles of cayenne.
The recipe tasted great, but I felt there was too much cornbread and not enough chili.
The chili was excellent by itself. The cornbread was very light, but a tad sweet for me. Next time I will cut the sugar a little.
I’m generally not a huge fan of tomato-y chili so I was weary but loved the cornbread idea. I followed your recipe (almost doubling most of the spices cause I like it with a kick!). I also added my mom’s secret ingredient to the chili, chocolate chips. It cuts the tomato flavor and adds a bit of richness. Only add a few though until the tomato is the right level, chocolaty chili is weird… Maybe other people didn’t need it because it was a sweeter cornbread, but I used a box mix :o
I also should have added more water to the mix like she said. So don’t ignore that tip!
Will this recipe fit into a Lodge 12″ skillet?
I used a 10″, so if you use a larger skillet the bread will be not quite as thick and may cook faster.
Trying this on Sunday! Subbing 2 cans of beans for 1# of ground beef.
All I can say is Mmmm…partly because my mouth is currently full of 5 his delicious dish, and partly because my mind is blown from the combination of flavors! New favorite for sure!!
Hi! I thought the chili part was fab! Lovely flavor on its own tho I added some ground brisket burger for my parents who eat meat. Was awesome but the chili is great on its own with just the veggie. But I had a problem with my cornbread. I went to serve it and it was still pretty gooey in rh middle. It took much longer to set which was a drag because I didn’t really want to keep cooking the chili which was so perfect. Did I do something wrong with the cornbread? Thanks!
Hmm, was the oven fully preheated? It sounds like maybe your oven either runs a little cold or it wasn’t fully up to temp before it started baking. That’s my best guess!
This was a big hit here this week. I had never heard of fire roasted tomatoes before – they really add a lot of flavor. We used venison in our chili along with the beans because we had some in the freezer but other than that we stuck to the recipe and it was great. So hearty and good.
Oh yes, I think I might go with a little less sugar in future but I’m the only one in my household who thought so.
Really nice and a clever idea. I’ve made it both in a skillet and cast iron dutch oven (lid off). The only thing I’d change is halving the sugar in the cornbread. 1/4 cup is a bit too sweet. Rest is perfect though – thank you!
I made this last night and it was a huge hit! The next time I make it, I’m going to increase the spices and maybe use pepperjack instead of shredded cheddar.
This was just the idea I was looking for. I made a big pot of beef and bean chili/stew and used a portion of that for the bottom layer. The cornbread crust absorbed up a good deal of the liquid so I wound up adding some of the the original stew to the serving bowls. The cheese layer was OK but I’d consider leaving it out next time.
Ooo I like your approach with the cost breakdown! Frozen chili leftovers will taste great redone this way. Bookmarking your blog and looking up favourite dishes for your take on it in the near future!
Working my way through BB back catalogue. I have no previous experience with cornbread, but I think I am going to cut down on sugar and baking powder next time.
Super delicious! I made it tonight for my son who is vegetarian..awesome!
Followed the recipe and it came out perfectly and exactly like the photos. DELICIOUS and I already want to make it again!
This was delicious! I didn’t think there was enough room for the cornbread in my 10in Lodge, so I put everything in a 2.5 qt round casserole dish. I was still a little leery, but it all fit perfectly. I will definitely make this again.
Yes! Thanks for this, I was looking for an alternative since I don’t have a skillet. Might use two glass pie plates and save the other one for another day.
Mine took a lot longer to cook. It was still gooey in the middle after 25 min. I put foil over the top and cooked 10 more min hoping it wouldn’t burn on the top. It was a little dry but mixed with everything it was still pretty good.
This was fantastic! I tweaked it a bit because I had leftover bacon. I chopped the bacon, sauteed it until crispy, removed it to a paper towel-lined plate, and then sauteed the veggies in the bacon fat. I added the bacon back in with the seasonings.
Hi!
This recipe looks great. Do you know if it’s possible to make it gluten-free? My husband is Coeliac.
Thank you!
I wish I knew, but unfortunately I’m very inexperienced when it comes to gluten free cooking.
I used gluten free corn bread mix :-)
I just use Pamela’s Baking Mix for the flour in any recipe that is not gluten free and it is A-M-A-Z-I-N-G. My family is Celiac and eats Gluten Free. Pamela’s Baking and Pancake Mix and Bread Mix is THE BEST OF GLUTEN FREE FLOURS!
Do you have to use fire roasted tomatoes? They are tricky to find. :)
You don’t have to, although they add a little bit of smoky flavor. They’re fairly common in major grocery stores these days (right next to all the other diced tomatoes).
Ridiculously delicious – I could eat this every day for the rest of my life.
How would you suggest reheating this? My SO and I loved this for dinner last night so we are just going to eat the leftovers for dinner tonight.. and I figured it would probably reheat well in the oven rather than the microwave?
Any suggestions on temp/time?
Try 350, and maybe cover it with foil so that the cornbread doesn’t get too dry or brown on top. :) I have no idea how long, though, because that will depend on your dish, how much is left in there, etc.
I didn’t get your reply in time so I just tried what I thought would work.. 375, 25 minutes with foil on and 5 with foil off for anyone wanting to know :)
Thanks, I was just wondering the same thing. Having my leftovers tonight! Love this recipe!!
Thanks for this — I came here to scroll through comments and find out how to reheat!
So good! I didn’t have cornmeal on hand, so I just used a box of jiffy. I also added a dash of vinegar to the chili (… because everything tastes better with a bit of vinegar no? ;). But so good! I’m never making plain chili again. Thanks for sharing :D
This is my favorite recipe ever! I double the cheese, 2 cups is just right.
I make this in a Dutch oven over a campfire! Super delicious, it’s always a hit!
Oh. My. WOW. I’m working on slashing our grocery budget to pay down debt, and came across your website through Pinterest last week. I assembled a list of recipes for the first half of June, and this was the first I made last night. LOVE. I used ground turkey (already had some in the freezer) and it was fantastic. We brought leftovers as our lunch today, and my husband text me and said, “You were right, this does get better overnight. Holy crap this stuff is good!” He also asked for it to be put on regular rotation for my meal plan (thank you, ZipList!). Tonight is One Pot Stroganoff, and I can’t wait!
Awesome! I’m glad you found your way here :)
Am I crazy or did this recipe used to have sweet potato in it? It’s one of the first recipes I made from your site, and I remember sweet potatoes! I have to thank you for helping me learn to cook. When I got pregnant with my 1st, I became a stay at home mom on a budget and needed the pictures to guide me!
Haha, you had me wondering for a second, too… then I remembered this Vegetable Tamale Casserole, which is pretty much the same concept, and has sweet potatoes in it. :)
Fun fact: I made this for a potluck-style gathering at the home of an acquaintance, and received rave reviews. Unfortunately the host came down with a nasty case of encephalitis shortly afterward, and spent several days in a coma, though he is now recovering nicely.
Anyway, I ran into him this week. He couldn’t remember my name, but he did remember this dish. Thanks for such a memorable recipe!
Ha! That’s amazing. And I’m glad he’s okay :)
I made this last night and my husband and I loved it!
We loved it! I used ground turkey plus one can of kidney beans. Also skipped the jalapeño since I used fire roasted tomatoes with green chiles and was feeling lazy.
I’ve made and enjoyed many recipes from your blog, and the honey wheat biscuits from your cookbook are a family favorite. Thanks so much!!
I’ve made this twice since discovering your website. Which, by the way, is great! Every recipe I’ve made has turned out well and I keep coming back to try new ones, which is rare for me and a food blog.
The first time I made this I stuck to the recipe, the second time I used some vegetarian chili I had made on a previous night and topped it with the cheese and used the cornbread topping.
I’ve read a few posts here and I can actually relate. I am in love with Marie Callender’s cornbread.
They are simple to make and super yummy, especially with honey butter. I’ve been a fan of MC’s ever since I was a little girl, and have fond memories of eating it with my family back in San Jose, CA. Check out their website http://www.mccornbread.com to order your cornbread mix. They also stock a variety of gourmet products I’m sure you will enjoy.
If you wanted to add ground beef or turkey, when do you suggest browning the meat? Before or after you sautéed the onions/jalapeño/garlic?
I would brown the meat first, then add the onions/garlic/jalapeño and continue to sauté until softened.
Just wanted to say that this is my absolute all-time favorite recipe! So easy, so delicious!!
First, thank you so much for this website! It’s my go-to for almost every meal I make! It has reduced my grocery bill by $40/week. I’m so grateful. Every single recipe is delicious!
So on this one, my corn bread mix was way thick. I followed the recipe but it didn’t look like yours. I’m wondering why… It’s cooking right now. Hope it turns out!
Hmm, when something goes wrong like that the first thing I do is double check all of my measurements. There’s still a chance that you measured to the wrong line on the measuring cup or something like that, but unfortunately you’ll never know!
I have been meaning to make this for a while now (ever since it was posted) and finally decided to today because of the freezing weather. WOW it is delicious. I accidentally forgot the cheese before pouring the cornbread mixture on, but being the type of person that can’t simply leave out the cheese altogether, I just sprinkled a little on top before putting it in the oven. This made the cornbread all crusty and cheddary on top- SO good. Thanks for this recipe and all your recipes, Beth! Great addition to the repertoire.
This recipe is just fabulous! loved it! Hubby was not feeling chili for dinner tonight but I can safely say that he changed his mind during his second bowl! :)
Thanks for another wonderful recipe. You do not disappoint!
Made this for dinner tonight and was very pleased! I even ground unpopped popcorn kernels in my grain mill to make cornmeal. So delicious!!!! Forgot the cheese but didn’t miss it. It was so good. My 8 and 10 year old bean hating sons ate it without complaint too. Doesn’t get better than that!
I made this tonight and it was SO good! I used ground chicken and 2 cans of black beans and served with a dollop of sour cream. Delicious and will make great lunches too!
I have been given the task of feeding about 30-35 people in a few weeks, so I have been looking for a dish I could make in bulk. I have made this in my skillet before and it was DIVINE! How easily could I make this using a big casserole dish? Or would you recommend I just do several smaller casseroles? Thanks for your advice! :-)
I think you could do a double batch in a 9×13 dish without any major changes (maybe a few extra minutes on baking). So maybe do a few of those?
Awesome! Thank you!
I put this through the low sodium wringer, cut back the cheese (mozerella instead of cheddar), used ground beef and substituted truvia for the sugar. Awesome.
Loved it! I used black and kidney beans and found fire roasted tomatoes at Aldi. My boys love your recipes. I have the lentil & sausage stew in the crock pot for dinner tonight.
Oh so tasty comfort food! I added jalapeño & cheddar to the cornbread too (from your recipe). Sooo good!
Fun and easy. I used ground beef and 1 can of pintos. Only change was I didn’t have any fire roasted tomatoes so used regular diced tomatoes and 1/4 tsp smoked paprika to add that hint of smokiness. Also doubled the chili pepper so it didn’t taste like spaghetti sauce. :)
Happy belated Birthday!!!!!
Thanks for the amazing receipts.
This looks delicious! I’m trying to find some vegetarian recipes I can incorporate in my weekly menu to cut down on the grocery bill. Hopefully it’ll past the husband test as he likes his meat…
Made this the other day with leftover chili. It was glorious! I cant believe I never thought of this before! I have often made cornbread with chili. Great cornbread recipe as well.
Made this last night. It was so good and fun to make. I didn’t have canned tomatoes, so I used fresh instead, and it was great! I will definitely make this regularly this Fall/Winter.
I made this last week, and it was SO good! I don’t have a cast iron skillet, so I made it in my Dutch oven. Thanks for all your work on this site!
Very flavorful and hearty. Will make it again soon. Yum.
Had it on my list since you posted it, and finally made a big batch of chili, so today I had chili in the fridge, a cube of cheddar to grate and all the ingredients to cover it all up under a cornbread layer.
It was delicious, will definitely make it again! (also a great way to serve chili to guests).
Amazing! Rave reviews from the husband, 8 yr old and 15 yr old! I was able to whip this up before work (I work 12 hr night shifts) and had it for dinner with the family. Hubby ate nearly all the leftovers the next day, and I enjoyed them for my lunch too. My last two chili recipes i attempted did not turn out as planned so was very pleasantly surprised this one was so simple yet so good!
Only changes: forgot to add the cheese before the corn bread so we all sprinkled it on our dishes.. Added 1/2 lb hamburger I had precooked in the freezer.. Oh and added a can of corn for good measure :)
Mmm.. Adding this into the regular rotation! Thank you! :-)
another keeper for the recipe file! it reminded me strongly of frito pie! i’m already thinking of ways to modify – add a can of stock to make it more like a stew, or use it as an enchilada filling with corn tortillas and red sauce…. YUM!
NOM! I had some leftover canned chipotle chillies languishing in my fridge, so I added a little of that, but I can tell it would be just as tasty without it! Thanks again Beth for keeping this non-starving student alive!
We were going to wing it in a casserole dish because we didn’t have a cast iron skillet; happened across a 12″ for $17, snapped it up. Made this dish tonight with ground beef, incredible. Love that skillet and this dish. Thank you for sharing.
Delicious! Made this with home-cooked beans, sweet dumpling squash, and a sweet potato. It was excellent!
LOVED this. This is a very generous recipe; makes a lot of food so best to use a BIGGG dish. The cornbread recipe is perfect. For the chilli, I added mushrooms and green peppers and doubled the chilli powder & cumin amount.
I will be making this again for sure, keep them coming Beth, love your blog!
I made this last night for dinner and it was tasty. My skillet was 12″ rather than 10″ so I increased all the ingredients by 1/4 EXCEPT the egg (I used 2) and I left the oil amount the same (extra egg will make up for less oil). I used a quart of vegetarian chili that I had in freezer, added about a pint of fresh corn, 2 sauteed diced poblano peppers and several diced tomatoes. I used double the amount of cheese, half cojack and half pepper jack. It cooked in the same amount of time you listed, did not need longer. We served it with plain non fat yogurt. I had a piece for breakfast today.
Hi Beth! Just curious, are fire roasted tomatoes spicy? I’ve never used them before and I’m not a big fan of spicy food. If they are spicy would a plain can of diced tomatoes be ok? Thanks!
Nope, they’re not spicy at all. :) They just have a hint of smokiness, which I like. If you can’t find fire roasted tomatoes, a can of regular diced tomatoes will do the job!
tried this for the first time tonight, we did add 1/4 tsp cayenne and a small amount of finely diced ghost chili, (husband and i like it hot) this is a most amazing meat-less dinner, ALL the flavors!!!, all we can say is
WOW, we have tried so many of your recipes already, and look forward to many more. YUM YUM
YUM! Made this earlier this week. We particularly enjoyed the cornbread – it seemed like the perfect flavor/texture. Would it stand alone? Or would proportions need to be increased?
That’s the exact recipe that I use when making cornbread on its own. You won’t need to change a thing :)
Well then, I guess I know what to make to go with the leftover white chili we’re having for Sunday lunch tomorrow! AND THEN we’ll be having Beth’s beef stew for dinner, mmmmmmmm!
Made this for dinner tonight and it was delicious!! I follow a lot of food blogs and make a couple new recipes from them a week. This is probably the best new recipe I’ve made all year! Thanks for sharing and thanks for the food inspirations!
Beth, just want to say thank you for this website! As a mother of 3 we sometimes struggle for groceries, and life is so insane I don’t know what the heck to make! These recipes are so easy, inexpensive, healthier, and delicious! Love how you lay out the steps too! Keep doing what you’re doing, I’ll be sure to share your site!!
This feels brilliant!
I have leftover chili in the fridge now – so I’ll just warm that in the skillet & top with the cornbread batter… dinner is done :)
Can you use maseca in this? What’s the difference between that and corn meal? Think it would work
I’ve never heard of maseca, so I went and looked it up. I don’t think they’re the same thing. Maseca is a brand and they make several products. I think the one you are talking about is a corn flour used for making tortillas. It’s more finely ground than cornmeal and is sometimes pre-cooked (then dried), so it will have a different texture and physical properties when cooking.
OMG that looks delicious! I want some immediately :D
Got no beans on hand right now tho darn it.
I am putting the missing ingredient down on the shopping list so I can have a go at making it after pay day :D
If I baked it in smaller containers eg pyrex bowl or some ramekins would I be able to freeze them and reheat at a later date? Or would you freeze them before baking in the oven, but with the topping poured on?
I would be making the recipie into a single-two serves situation
I would bake and then freeze. :)
Looks very good!!!!!!gotta try this ….my family luvs chili n cornbread
If I use a casserole dish, what size do you recommend?
An 8×8 or 9×9 inch dish. Round or square, doesn’t matter. :)
Lady, you have made my mouth water. I throw together meals in my cast iron skillet on the stovetop all the time, never considered putting it in the oven. Definitely will be trying this.
Typo alert! “bread down” = Break down, I assume! ‘love your blog! Unless bread down is a break down during which one eats too many bread-related carbs!
Thanks!! (even though your definition of a “bread down” was still pretty accurate!)
I often make chili and cornbread. I would never ever eat chili without cornbread. They go together like two peas in a pod! Although I make the two often, I have never made them together. Wow! I ‘m going to have to try this recipe!
Oh, wow! This looks brilliant. I’m always looking for ways to use my cast iron skillet.
this is a wonderful dish for those hurry-up hungry days. my mom used to make something like it that she called ‘tamale pie’. while the onions and filling items are in the saute stage, and the oven pre-heats, you can easily whip up the corn bread topping, then it all goes in to bake while you make a salad or just sit down with a glass of wine.
it’s very handy for using up bits of this and that, too. mince a limp carrot, chop that scant half cup of green beans, cut the kernels off that last sad corn on the cob. very warming and filling and tasty and a budget winner!
I agree! I have some savoury mince I made up a lot of a while back in the freezer and I think adding the spices here, some more Vege and the beans I can make it into a ‘new’ dish I want to eat!
Thanks for your take on it-I won’t have to start from scratch to try it out :D
Oh my! This looks amazing! Thanks for the recipe.