“Oh no she didn’t…”
Oh yes, yes I did.
I’ve had so much fun over the past year playing with different variations of the no-knead bread that when I discovered a few left over chocolate chips in my pantry, I knew *exactly* what I was going to do with them.
This recipe only takes a few hours as opposed to the long ferment time of the no-knead focaccia. I literally made it one morning while I was running around finishing errands before company came over. You can totally do this in the background of your “real life.”
I basically used the same technique as I did for this cinnamon raisin bread, except that I mixed all of the cinnamon and brown sugar right into the dough. It’s so good and so easy… it will be your new secret weapon!
Did I mention how good this is toasted with peanut butter for breakfast? But, I guess I didn’t really have to, now did I? ;)
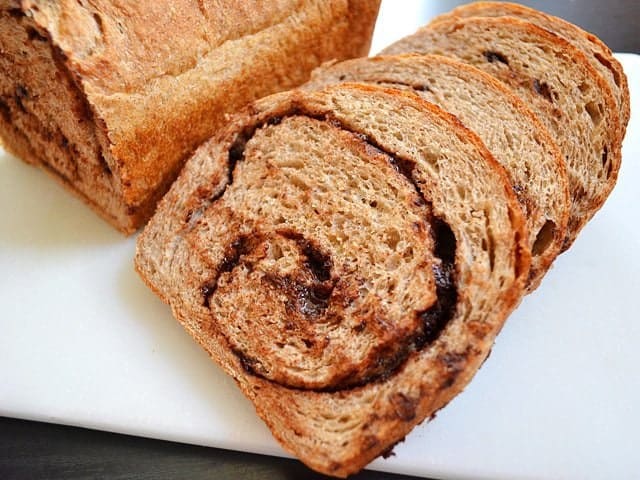
Chocolate Cinnamon Swirl Bread
Chocolate Cinnamon Swirl Bread
Ingredients
- 1 1/2 cups whole wheat flour ($0.24)
- 1 3/4 cups all-purpose flour ($0.26)
- 1 1/4 tsp salt ($0.06)
- 1 packet 2 1/4 tsp instant or bread machine yeast ($0.18)
- 1 Tbsp cinnamon ($0.15)
- 2 Tbsp brown sugar ($0.04)
- 1 - 1 1/2 cups water ($0.00)
- 1/2 cup chocolate chips ($0.67)
Instructions
- In a large bowl, combine the dry ingredients: flour, salt, yeast, brown sugar, and cinnamon. Stir until there are no clumps.
- Add 1 cup of water. Stir and add more water, a few tablespoons at a time, just until the dough forms one ball with no dry pieces on the bottom of the bowl. It is okay if the dough is wet and sticky. Cover the bowl loosely and let it rest for two hours at room temperature.
- After two hours, sprinkle some flour on the expanded dough and on a clean work surface. Flour your hands and transfer the dough to the work surface. Give the dough just a few quick “kneads” just to make sure it is evenly mixed (honestly only 3 or for turns/folds). Shape the dough into a long rectangle with the short end the same length as your bread pan (see photos).
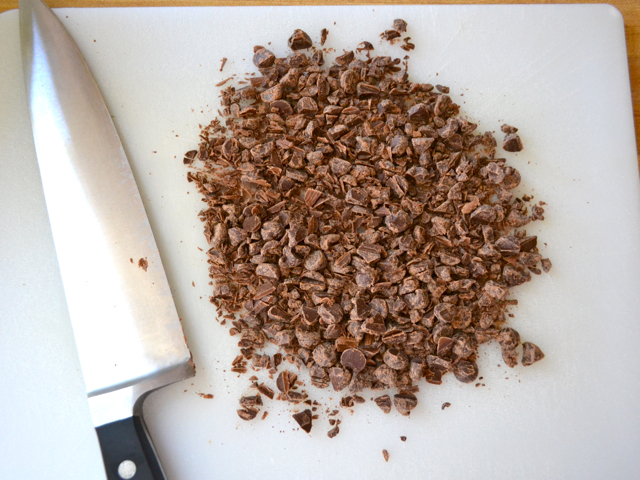
- Roughly chop the chocolate chips into small pieces. Sprinkle them over the surface of the bread dough. Working from the short end, stretch and roll the dough up with the chopped chocolate inside. Stretch the dough as you roll and roll tightly so that there as much “swirl” as possible.
- Place the rolled up dough, seam side down, in a bread pan coated with non-stick spray. Cover loosely and let rise until double in size (about one hour).
- Preheat the oven to 400 degrees, place the risen loaf inside, and bake until deep golden brown on top (about 35 minutes). Remove the baked loaf from the pan and let cool on a wire rack before cutting open. Enjoy!
See how we calculate recipe costs here.
Nutrition
Step By Step Photos
Start by mixing the dry ingredients in a bowl (flour, salt, yeast, cinnamon, and brown sugar).
Next, add just enough water until it forms one piece of dough. This will probably be somewhere between 1 and 1.5 cups of water. Start with one cup and work up from there. It is okay if the dough is wet and sticky, just as long as there are no dry bits on the bottom of the bowl. Let the dough sit, loosely covered, at room temp for two hours. (Sorry about the weird lighting, it was still dark out when I started the bread)
After two hours it will have expanded into something like this. It’s fluffy, sticky, and not so pretty… but it gets better, promise.
Since the dough is wet and sticky, you’ll want to dust the dough, the work surface, and your hands with flour to keep it from sticking.
Give the dough just a couple of kneads just to make sure it’s mixed evenly and then shape it into a long rectangle. Make the short side of the rectangle the same length as your bread pan and the long side as long as you can possibly make it. The dough will be pretty elastic so you’ll need a little patience.
Oh yeah, at some point chop the chocolate chips into smaller bits.
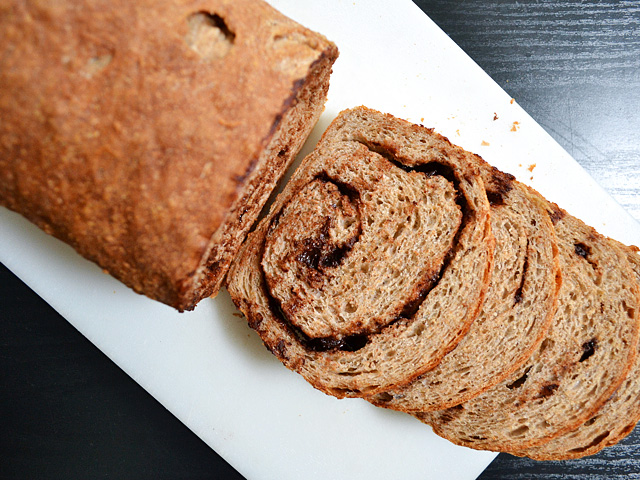
Sprinkle the chocolate on the dough. The thinner the chocolate is spread, the less the finished bread will want to “separate” at the swirl marks. Roll the dough up, stretching as you go so that it “rolls” as many times as possible before reaching the end. The more it’s rolled, the more swirl marks you’ll have.
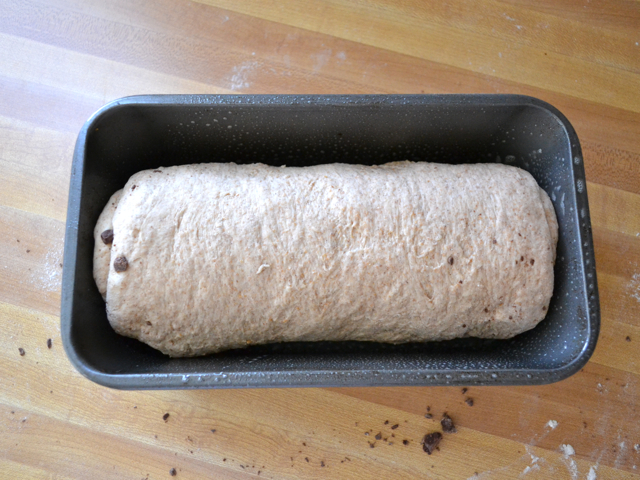
Place the rolled up dough in a bread pan (I spray mine with non-stick spray). Let it rise until double in size, approximately one hour depending on your indoor temperature.
When it looks something like this, begin to preheat the oven to 400 degrees.
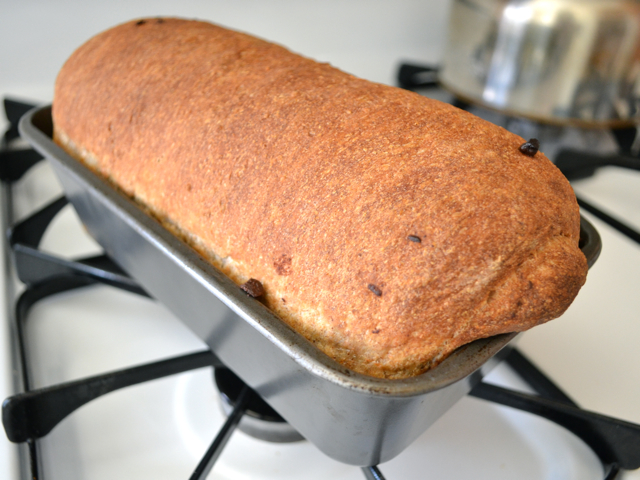
Bake the bread until it is a deep golden brown on top (about 30-35 minutes).
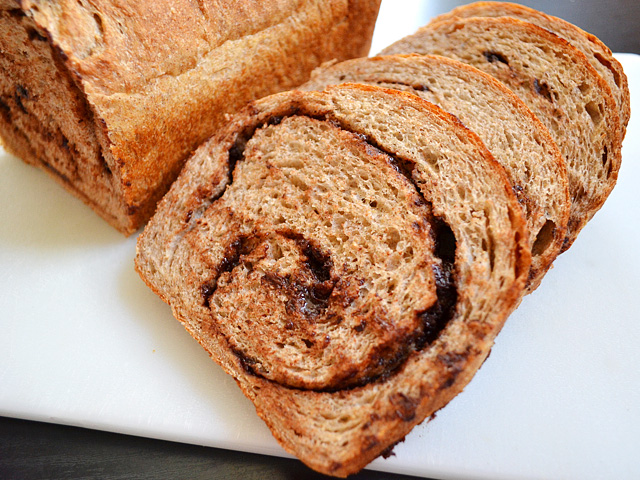
Remove the loaf from the pan and let it cool completely on a wire rack before slicing… or else the melted chocolate will smear all over the bread as you slice… like mine did! And this was about 75% cooled! If you try to slice it right out of the oven not only will the chocolate get all over but the bread will be gummy… so let it cool a good bit, at least!
Mmmmm, I’m day dreaming about breakfast tomorrow morning because I can’t wait to have this again!







Beth, you freaking genius. I made a loaf of this last night on a whim (with chopped-up Trader Joe’s mini peanut butter cups, because I didn’t have chocolate chips and added an extra swirl of cinnamon because I’m a cinnamon freak) and it is BRILLIANT. I’ve been eating it slathered with chocolate peanut butter because too much of a good thing is WONDERFUL.
Hello, je découvre votre blog, en visitant celui de LA PETITE CUISINE D’ISA. Votre pain est magnifique, je vais le préparer rapidement.Merci pour la recette.
Un grand bonjour de la PROVENCE en FRANCE
Does that bread taste good the next day? I made a cinnamon raisin bread the other day and it was only good warm and fresh. The next day it was hard and not very tasty. Since it’s only me and my 2 year old who eats it I’m thinking maybe I should make the bread from the half of the ingredients so it’s eaten the same day and won’t get bad.
Anon – the bread will probably be more dense and heavy, but it might still work out! If at all possible, I’d try to use part all-purpose and part whole wheat.
Hi Beth, just a quick question. I only have light whole wheat flour and was planning on getting some all purpose flour, can i just substitute the light whole wheat flour for regular whole wheat flour or would that change or affect the recipe…??
My daughter and I are enjoying this right now!! My bread did not rise as much as yours… But it is still so yummy. Thank you for your wonderful recipes!
Just made this n it’s on the rack cooling now, so excited to try it it smells amazing! Thanks for the recipe!
Star – I toasted mine every morning and it was okay. I think as long as you don’t leave it on a high setting it won’t burn.
I’m a little concerned about the chocolate melting … is this stuff safe to throw in the toaster in the morning?
So glad to hear it came out well adding wild garlic is a wonderful idea, I’ll have to try it!
For those who are wondering how a dough with more whole wheat flour comes out, I made mine with only one cup of white flour, using whole wheat for the rest (because I ran out of white flour but REALLY wanted to make this bread anyway). I feel the end result is probably a little denser than Beth’s loaf, but it’s still really good. I’m eating a slice right now.
Very cool Beth! Thank you for the info. I will have to experiment and let you know how it works out!
GDUMAS – Since every oven is different, I would try increasing your heat by 50 degrees to see if that helps. If your bread is dry and pale, it may have cooked very slowly. Cooking it faster (or at a higher temperature) will brown the outside before the inside gets so dry. Although, if it cooks too fast, the outside will be browned and the inside will be gooey… so you’ll have to experiment! 50 degrees shouldn’t be too much of a jump, though.
I would just keep instant yeast on hand. You can use instant yeast in place of any of the other kinds, the only difference being that you don’t have to dissolve it in water first like the active dry. Bread machine yeast is the same as instant, btw. Here is a link to an article that I wrote about the different types of yeast, if you’d like more info: http://foodreference.about.com/od/Ingredients_Basics/a/Yeast-Varieties.htm
So yummy! I stayed up late just to make this last night so I could have it for breakfast this AM and it was so worth it. I had two questions though since I am totally new to baking (always been more of a cook) and I have to say I was intimidated by the idea of baking bread previously –
1. My bread was not as golden as your’s – more brown and dry. What can I do differently next time to get a more moist texture? Not bake it as long? Use more white flour than wheat? Add more water?
2. I had to go to the store to get “instant or bread machine” yeast since all I had on hand was active dry yeast. Could I have used that instead? Can you tell me what the difference is between Active, Rapid Rise and Instant/Bread Machine yeast and do I have to keep all of these different yeasts in my pantry or fridge at all times if I want to continue to make bread?
Thanks in advance!
Thanks in advance
Jennifer – no I haven’t done a 100% whole wheat no-knead bread. No-knead bread can be a bit on the dense side and so can 100% ww breads so I didn’t want to combine the two and have a brick loaf :P Hahha, okay, I’m sure it wouldn’t be *that* bad, but I’m happy with 1/2 and 1/2 so I never bothered trying. If you do, let me know how it turns out!