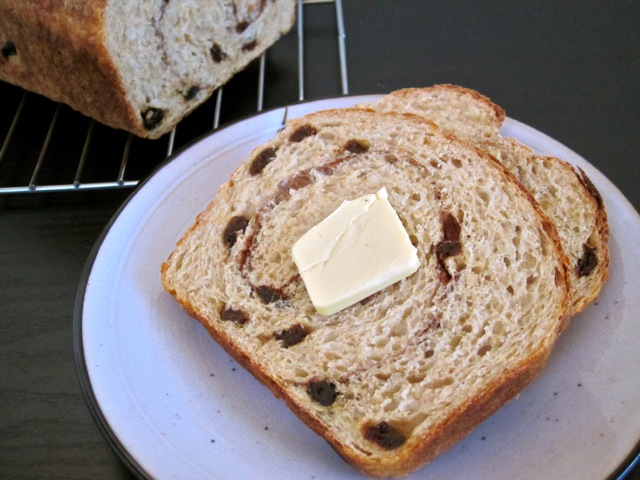
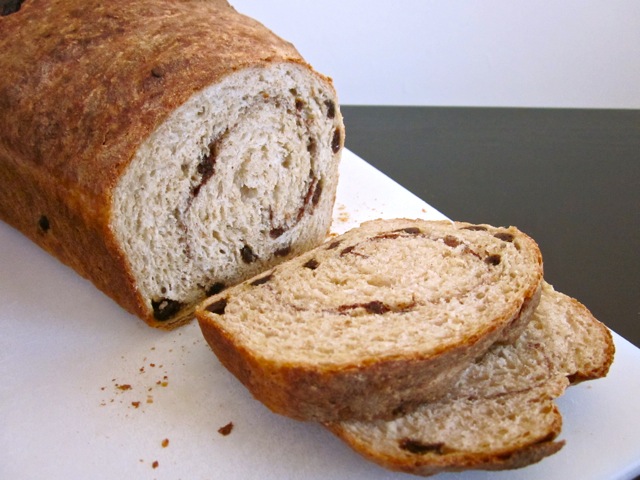
I saved the best for last this week, folks. As good as the black bean burgers were, this bread is simply indulgent (without the guilt).
With the success of turning the regular no-knead bread into a delicious cranberry walnut loaf, I got to thinking… What about cinnamon raisin? Yep, it was just as easy and even more delicious than all of the other no-knead loafs that I’ve made so far. I felt like I just threw all of the ingredients in a pot, forgot about it for a few hours and then I suddenly had this gorgeous loaf of incredibly fragrant and delicious cinnamon raisin bread. Pure magic, I tell you.
I’m not into super sweet things so I added just a touch of brown sugar to the dough and let the cinnamon and raisins do most of the work. If you’re used to a super sweet, almost dessert like, grocery store type of cinnamon raisin bread, you might want to add more brown sugar.
You’ll need a few hours but next to no thought or effort to make this bread so please promise me that you’ll try to make a loaf this Saturday morning while you’re hanging out in your PJ’s.
Cinnamon Raisin Bread
Cinnamon Raisin Bread
Ingredients
- 1 cup whole wheat flour ($0.16)
- 2 1/4 cups bread flour ($0.33)
- 2 Tbsp brown sugar ($0.04)
- 1 1/4 tsp salt ($0.05)
- 3/4 Tbsp instant yeast ($0.20)
- 1/2 cup raisins ($0.31)
- 1 Tbsp cinnamon ($0.15)
- 1 1/4 cups warm water ($0.00)
Instructions
- In a large pot or bowl, combine the flours, brown sugar, salt, yeast and raisins. Stir everything until evenly mixed (break up any raisin clumps).
- Add the warm water and stir. If the dough does not come into one cohesive ball (with no dry bits left at the bottom of the bowl) add a little more water, one tablespoon at a time, until it all comes together (see photos below). Loosely cover the bowl and let it rest for 2 hours at room temperature.
- After two hours the dough will have risen and grown to about twice the size. It will be a rough looking, shaggy ball of dough. Turn it out onto a floured surface. Give it maybe one or two turns or “kneads” in the flour just to work in enough flour to keep it from sticking to your hands. Flatten and stretch the dough into a long rectangle. The short side of the rectangle should be the same length as your bread pan, the long side double that.
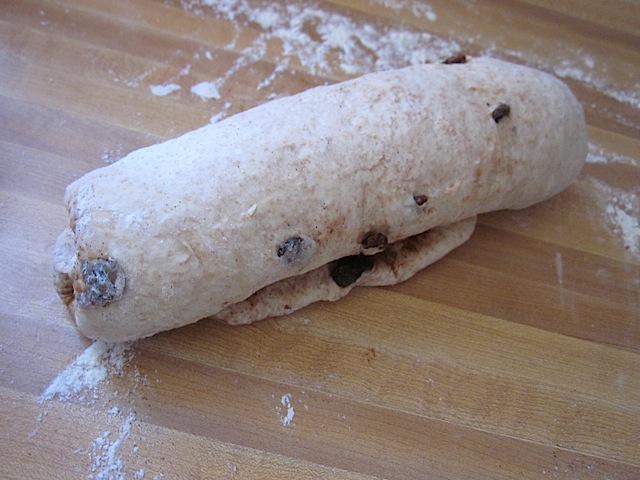
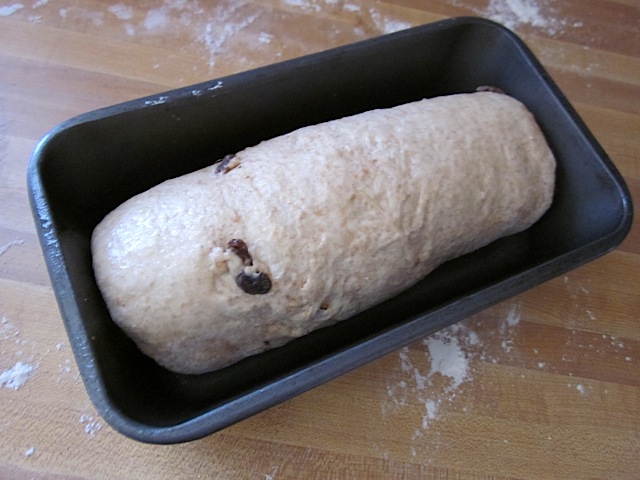
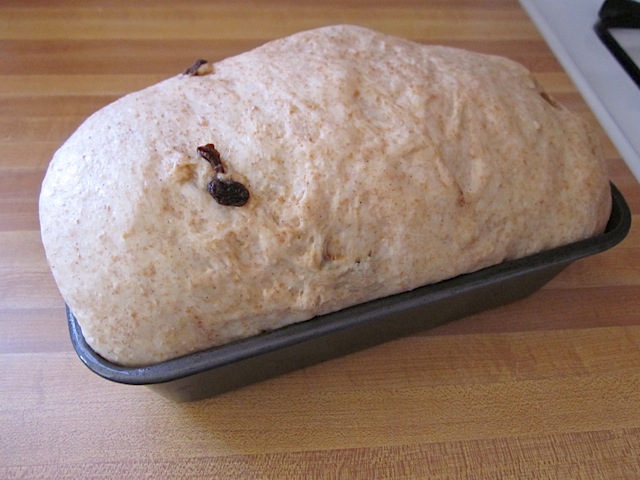
- Sprinkle the cinnamon over the surface of the rectangle. If you want a sweeter bread, you can sprinkle on some additional brown sugar with the cinnamon. Roll the rectangle up and place it in a bread pan coated with non-stick spray. Let the bread rise for 1.5 hours or until it has risen up and out of the pan.
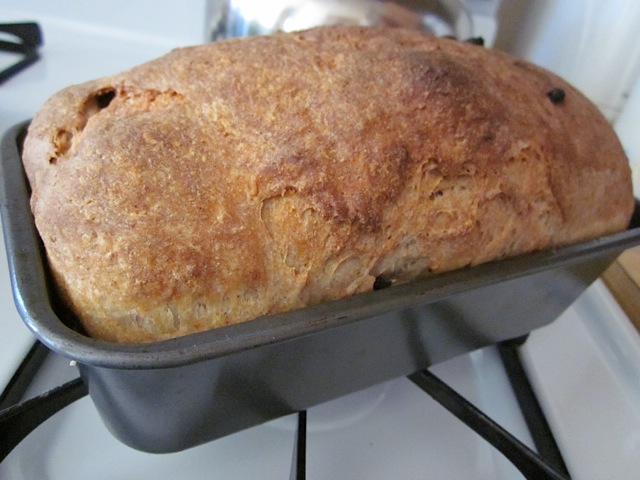
- Preheat your oven to 425 degrees. Brush the top of the bread with water and bake for approximately 30 minutes or until the top is a deep golden brown. After baking, turn it out of the bread pan onto a wire cooling rack. Let cool completely before slicing.
See how we calculate recipe costs here.
Nutrition
Step By Step Photos
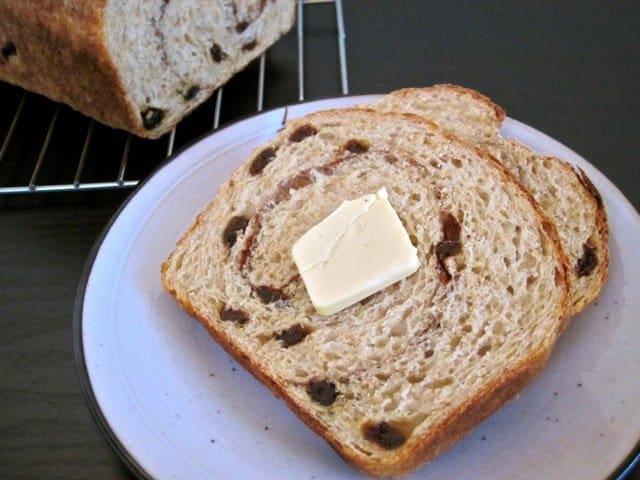
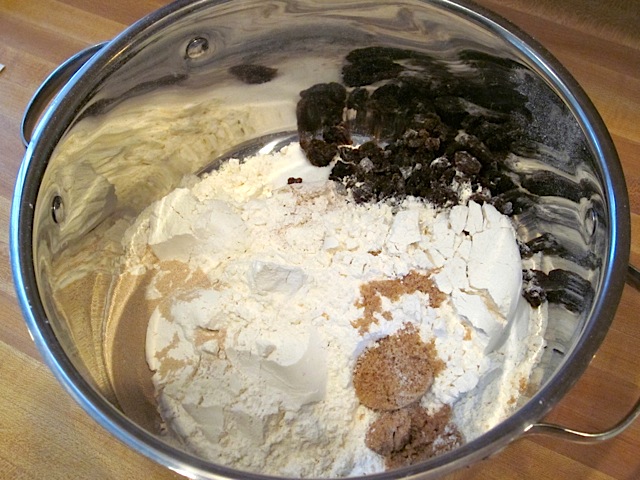
Put all of the dry ingredients in big pot or bowl. Mix them all up until evenly combined. This takes about 5 minutes, I did it while I was making my morning coffee.
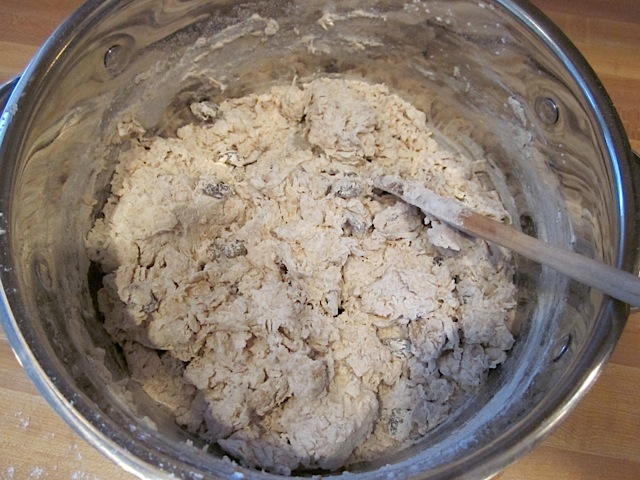
Add the 1.25 cups of warm water. My flour must have been really dry because the mix was still all dry and crumbly. If you need more water, add one or two Tbsp at a time until it comes together in one ball. It is better to be a tad too wet than too dry.
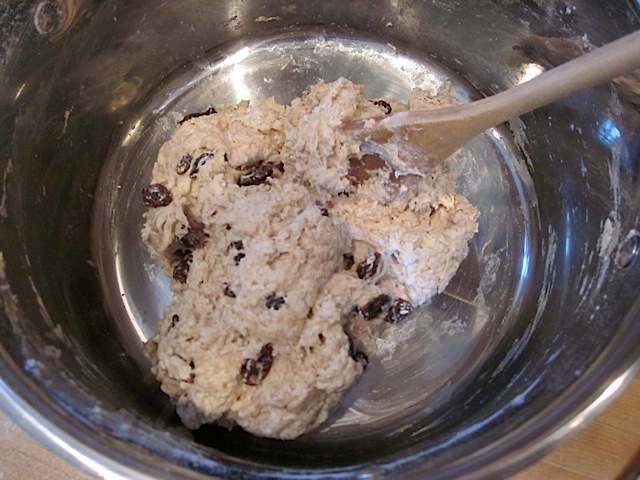
After adding a little more water, it was perfect – all in one ball. See, no more dry bits on the bottom of the pot. Loosely cover and let sit for two hours at room temperature.
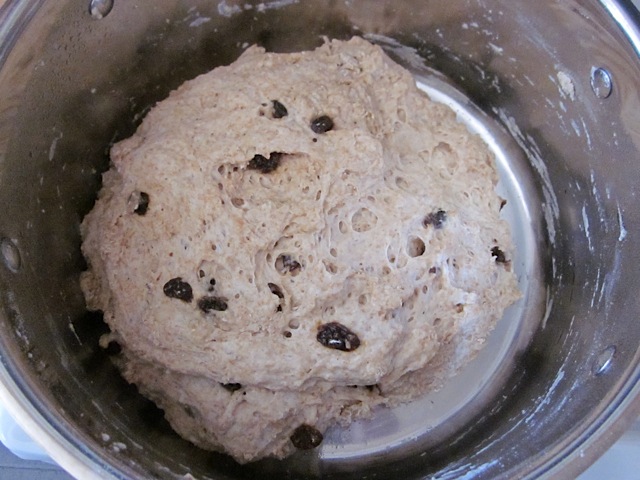
After two hours it will look like this (above); big, shaggy, expanded.
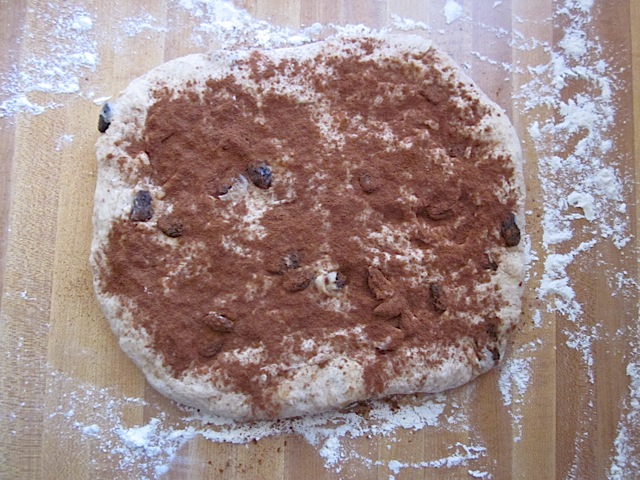
Turn that shaggy, sticky ball of dough out onto a floured surface and knead it maybe one or two times (no more necessary, seriously) or just until it’s not sticking to your hands. Work the dough into a long rectangle with the short side being the same length as your bread pan. Sprinkle the cinnamon over the surface. If you want sweeter dough, sprinkle some brown sugar on there too.
Roll the dough rectangle up.
Place the rolled up dough in a bread pan coated with non-stick spray.
Let the dough rise for another 1-1.5 hours… or however long it takes to get to this size (this will depend on how warm your house is). Go enjoy your Saturday while the bread does it’s own thing.
Preheat your oven to 425 degrees, brush the top with water and bake for about 30 minutes or until the crust is a deep golden brown.
Turn the bread out of it’s pan onto a wire rack to cool. Let it cool completely before slicing (or risk squishing your bread… you decide. I know it’s hard to resist warm cinnamon raisin bread).
This bread is so good that I might just make it every weekend for the rest of my life. I’ve eaten it toasted with butter (yummy), then toasted with peanut butter (OMG, YUM) and then as a peanut butter & banana sandwich (WHHHAAAT? TOO DELICIOUS TO HANDLE!). That really was my thought progression.
**EDIT**
– The bread pan is 4″x 8″ and about 3 inches deep (the top flares out a bit and is more like 5×9).
– When you roll the dough up, stretch as you roll… the more it’s rolled, the more swirl you’ll have.
– I sprayed the top of the loaf lightly with non-stick spray before letting it rise so that the top would stay pliable and allow it to expand.
– You can use all regular flour instead of a mix of whole wheat and bread flours but I think the whole wheat gives it more texture and flavor.
– A few chopped nuts would also be AH-MAZ-ING in there… mix them in with the dry ingredients in the beginning.


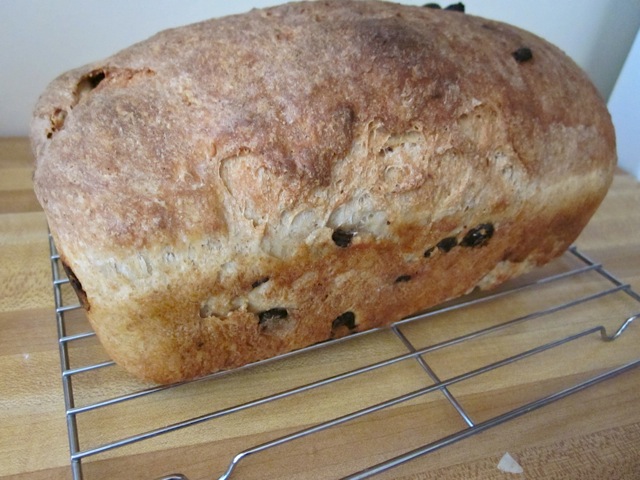
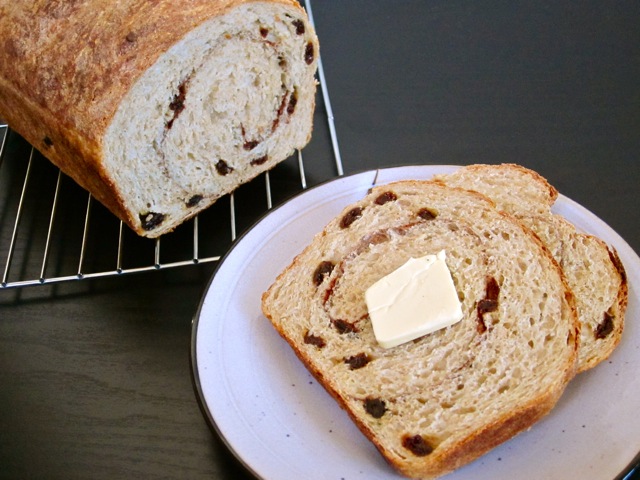
Made this bread today and turned out fabulous! I did add an extra 2 TB of brown sugar to the dough and then an extra 1 TB of brown sugar to the filling (I like things sweet!) and it turned out perfect! I cooked the loaf in my stone loaf pan. Can’t wait to toast it in the morning! Thank you so much for another winner!!!
I know this is many years later, but thank you for the recipe. I got rid of my bread machine years ago during a crazy gluten free phase (what was I thinking?!) and this recipe was super easy and wonderful. And can I tell you how much I appreciate you putting the recipe at the TOP. I read through all posts, BUT after I’ve made it once and come back to the same page I love being able to just reference it up at the top. :)
I LOVE this recipe! I’ve made it several times now and have to practice a lot of restraint to not eat the entire loaf immediately. I put a lot more raisins (maybe 1.5 cups instead of 1/2 c) and cinnamon than called for. It also seems to take a bit more water. I’m going to try the cranberry walnut bread next and I expect it will be just as amazing. My husband made your beans and rice recipe yesterday and is a big fan! Keep the great recipes coming!!
I make this weekly and it is delicious! Today I’m making it with dried cranberries and slivered almonds.
This turned out so well. I made it last night and it made our whole apartment smell amazing.
I’m making the chocolate coconut granola right now and I can’t wait to see how it turns out!
I absolutely love your website! I have never really liked cooking, as it just seemed easier and tastier to get takeout or something frozen. Your recipes are so fun and easy, and I love that so many are vegetarian. My husband is still shocked when I tell him I’d rather eat leftovers of one of these recipes rather than get Chipotle. :)
Anyway, this is the one recipe that I just can’t seem to get right. Every time I try to make it, it rises beautifully the first time, I roll it up, put it in the pan, it rises a little, busts open at the top and stops rising. It doesn’t seem to matter what temperature it is in the house or whether I spray the top with cooking spray. Any thoughts? It still tastes delicious, if a little dense. I would love to figure out how to get it as beautiful and fluffy as yours.
Again, thank you for all of the recipes!! I can’t wait to see what you come up with next!
Hmmm, I’ve never had that happen before. I wonder if maybe the dough is too dry? It will be a little more difficult to work with the dough when it’s a bit more wet, but it might help it expand when rising. OR, just throw out all the rules and bake it after the first rise. It might just be fine! :)
I guess I’ll just have to keep baking this over and over until I get it right. I’m sure my husband and 2 year old will be very disappointed. ;-) Thanks for the suggestions!
Extra moisture did the trick! In all, I added 1 and 3/4 cups of water. It was a little more difficult to handle, but it expanded just like yours did in the pictures. It’s in the oven now. I can’t wait to cut it open and see how it turned out!
Awesome!! I’m so glad you had success. :)
hai i dont have bread flour what can i substitute it with?
All-purpose flour will work okay, too.
Hi Beth! I made this last week and LOVED it. I want to make it again, a loaf for myself and one for a friend. Does making 2 loaves just involve doubling the ingredients? Should I also adjust the time to rise and time to bake?
Just double the ingredients, then split it into two loaves before rolling it up with the cinnamon. The rise time and baking times should remain the same. )
Extra yummy made this over the weekend. I made some honey butter to put on it also. I had to stop myself from eating the whole loaf
Yum-o, I made this several times and loved it. I realized that I was out of raisins a little too late so I used dried cranberries and threw a little orange zest on top of the cinnamon before I rolled it. Turned out good as well. Thank you for the awesome recipes!
I tried this recipe – put everything in the bread maker…it was amazing. I will make this again! So good! Thank you for sharing.
Anita – Oh, wow, I just noticed that I did not specify “instant” yeast for this recipe. I’ll go back and add that in. Instant yeast doesn’t need proofing and can be added straight in dry, but other yeasts (like active dry) need to be proofed. Sorry about that error!
I was so bummed that this did not rise for me :/ We’re in a warm summer climate & yet it did not rise well the first time [left to sit for 6 or so hours] & it didn’t rise very well in the pan either [left for 4 hours or so]. Tastes great, just flatter & more dense. I followed the directions/ingredients precisely. I wonder if proofing the yeast first would have made the difference for me?
Lindsay – Kneading does make a difference. When you knead bread it helps the gluten (protein) molecules line up and form a matrix that gives the bread support as it fills with gas and rises. So, it helps make the bread light and fluffy. The no-knead bread recipes work because letting the dough sit for extended periods of time (2 hours to a few days) also allows the gluten to line up. That being said, I think kneading *always* does a better job, but the no-knead versions are definitely still enjoyable :)
Oh, another reason the no-knead works is because it takes advantage of steam leavening. The dough tends to be more moist than traditional bread doughs and the oven set to a hotter temperature. So, steam forms quickly and helps the dough rise even more despite the weaker gluten matrix.
I made this bread and it was great! I am seeing a lot of no-knead bread recipes around the internet nowadays. Is kneading really necessary for traditional bread recipes? What would happen if I did not knead the dough?