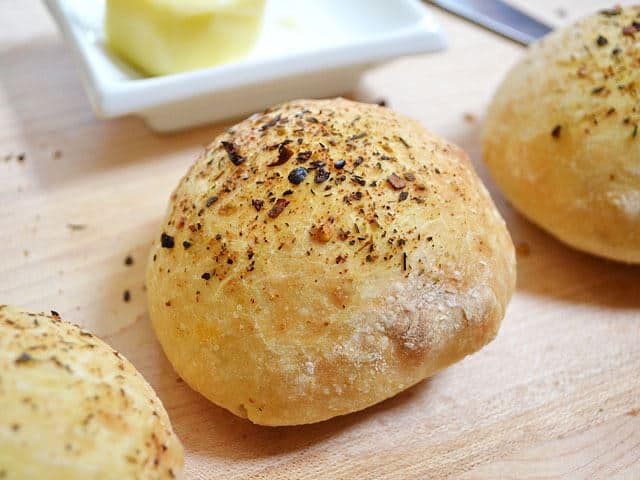
If I haven’t convinced you yet to try no-knead bread, perhaps this post will. These easy little Focaccia Rolls are so good that I’ve had to stash them in my freezer just so that I won’t eat them all up. Sure, they’re just 30 seconds in the microwave away from being warm and delicious again, but at least the freezer has slowed me down a little ;)
Also check out our classic no knead focaccia bread recipe!
No-Knead Focaccia Rolls

This post contains some affiliate links, which means that we make a small commission off items you purchase at no additional cost to you.
Trade Effort for Time
These Focaccia Rolls are really easy, but they do need to take their sweet time. You’ll need to start them the day before, so plan ahead. Actual hands-on time is probably less than 30 minutes, most of which is dedicated to shaping the dough into the rolls. All of the “work” is done by the yeast as the dough ferments overnight.
Flavor Your Focaccia Rolls
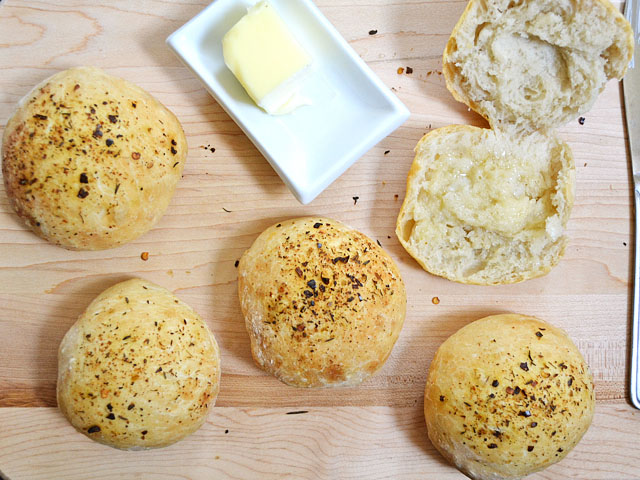
I brushed each roll with olive oil and then sprinkled Italian seasoning on top. I love the texture that the olive oil gave the rolls, but you could certainly make them without if you want. Also, you could mix dry herbs right into the dough (with the other dry ingredients in the beginning) and have an herb-infused roll. There are so many possibilities. Run with it!
Freeze for Later
As I mentioned above, I love freezing these Focaccia Rolls! Just make sure to cool the rolls completely at room temperature to prevent condensation, then place them in a gallon-sized freezer bag, and pop them in the freezer. Then you can just take a couple out at a time to thaw as needed. They thaw quickly at room temperature, or if you want to rewarm them, just wrap them in foil and pop them in a hot oven for a few minutes. Done!
No-Knead Focaccia Rolls
Ingredients
- 4 cups all-purpose flour ($0.59)
- 1/2 Tbsp salt ($0.05)
- 1/4 tsp instant yeast ($0.02)
- 2 cups water ($0.00)
- 2 Tbsp olive oil ($0.24)
- 2 Tbsp Italian seasoning ($0.30)
Instructions
- The day before (about 18 hours ahead of time) combine the flour, salt, and yeast in a large bowl. Stir until well mixed. Add the water, starting with 1.5 cups, and add a little more at a time until the flour forms a cohesive, wet ball. There should not be any dry flour left on the bottom of the bowl. The total amount of water you’ll need will vary, but should be between 1.5 to 2 cups. See the photos below for more info.
- Loosely cover the bowl with plastic wrap and let it sit at room temperature for 16-18 hours to ferment.
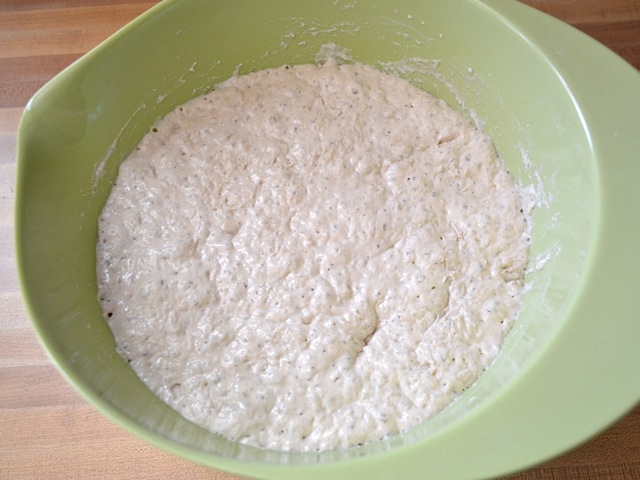
- After 16-18 hours, the dough will look like a large, bubbly mass. Sprinkle with enough flour to be able to scrape it out of the bowl without it sticking to your hands. Place the dough on a well floured surface. Cut the dough into 12 pieces. Shape each piece into a small ball. The dough will be quite wet, floppy, and sticky, so sprinkle liberally with flour as you work.
- Place the rolls on a baking sheet covered in foil and lightly sprayed with non-stick spray (I used two baking sheets). Brush the top of each lightly with olive oil. Sprinkle the Italian seasoning over top. Let rise for 30 minutes to one hour or until doubled in size.
- While the rolls are still rising, preheat the oven to 425 degrees. Once it is fully preheated, place the rolls in the oven and bake until the surface is a light golden brown (about 25 minutes). Serve warm!
See how we calculate recipe costs here.
Nutrition
Video
Scroll down for the step by step photos!

How to Make Focaccia Rolls – Step By Step Photos
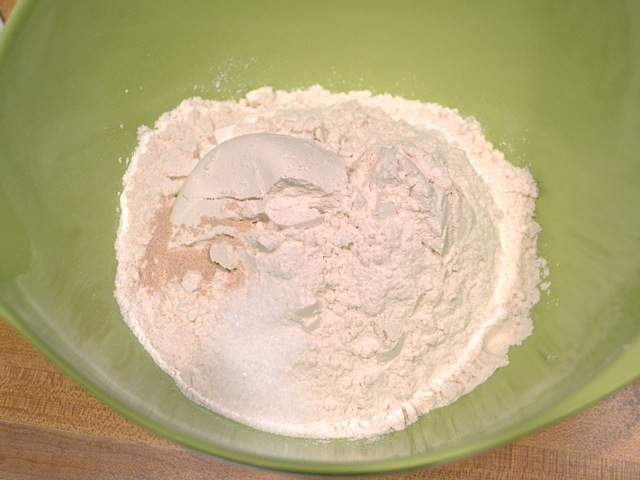
Begin a day ahead of time by stirring together the flour, salt, and yeast.
Starting with 1.5 cups of water, add just enough to form a wet, sticky ball of dough. There should be no dry flour left on the bottom of the bowl or on the surface of the dough. It is better for the dough to be slightly too wet than too dry at this point.
Loosely cover the bowl with plastic wrap and let it sit for 16-18 hours to ferment. After that time, it will have expanded into this big, frothy mass.
Sprinkle the dough liberally with flour so that you can scrape it out of the bowl without it sticking to your hands. Turn the dough out onto a well floured surface. The dough will be very loose, soft, and sticky.
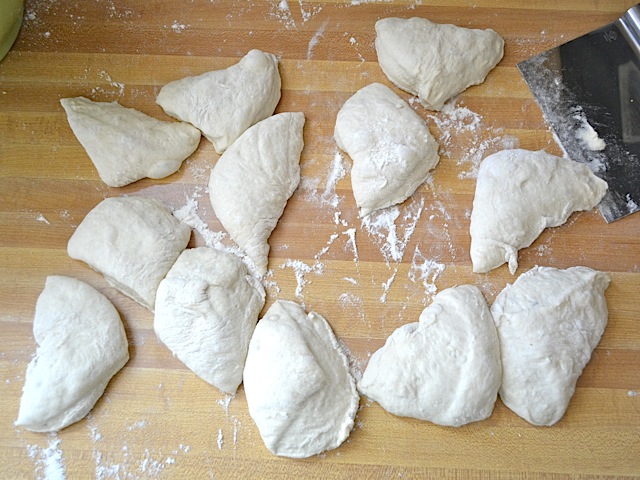
Cut the dough into four equal parts and then cut each quarter into three pieces to yield 12 pieces total.
Shape each piece into a ball, sprinkling with flour as you go (the dough will still be quite sticky). Place the balls on a baking sheet covered with foil and lightly coated with non-stick spray.
Lightly brush each roll with olive oil and then sprinkle with Italian seasoning. Let rise for about one hour or, if your kitchen is warm and you’re impatient like me, let rise for 30 minutes.
Towards the end of the rise time, begin to preheat the oven to 425 degrees. Once it is fully preheated, place the rolls in the oven and bake until they are light golden brown on the surface (about 25 minutes). Serve hot!






Worked great! Husband thought it was the best I have made yet :) Thanks!
I’ve always made bread with my mixer, but I just moved into a dorm and so it stayed at home.. and I’m lazy. this was fab. And people wonder why I hate spending money on sandwich buns!
I’m making my second batch of these right now! The first ones came out so wonderful and I impressed a bunch of people with these. This time I’m using rosemary and thyme and I hope they turn out just as good!
I think I did a few things wrong, so mine are probably going to turn out more like flatbreads than like rolls, but this was a really fun and easy recipe nonetheless! I also didn’t have Italian seasoning so I used za’atar spices instead, which means they should be perfect for hummus!!
I made this recipe twice and couldn’t figure out why the second rise wasn’t happening too well, and just realized I’m using dry active yeast. Even though they still came out delicious, I can’t wait to try them again!
Amanda – I regularly freeze my rolls after baking. They’re still really good but they loose their crisp crust. Just make sure to let the cool completely before freezing. I just freeze them in a gallon sized zip top bag.
Any ideas on freezing these before or after baking? I want to make them for a party but I don’t want to have to do too much work that day.
Awesome! I’m so glad they still semi-turned out :) This recipe has become a staple for me. SO good and SO easy.
Hi again! I was the one that added too much yeast, here with an update. I’m usually a decent cook but making this was a series of unfortunate events for me. First the yeast, then I let it rise a few hours too long, and then I baked the rolls a few minutes too long. All things considered, these turned out nicely and taste pretty good. This recipe was very forgiving! I will make these again and hopefully won’t have any more mishaps.
Anon – Instant yeast is definitely best here. The major difference between active dry and instant is that instant does not need to be mixed with water prior to adding to a recipe. If you use active dry, I would suggest mixing the yeast with the water instead of mixing it with the flour. I hope that makes sense!
Can i use dry active yeast?
Anon – Yes, 1/4 tsp is plenty :) Because it sits so long, that little bit of yeast has plenty of time to grow and multiply. In regular bread recipes the yeast only has about two hours to grow so you have to add more. I hope your rolls turn out great!
Will 1/4 tsp of instant yeast really be enough? I just mixed this but used the whole 1/4 oz package… then I re-read the directions and I’m worried it’s not going to turn out at all. I guess I’ll find out in the morning if I have a huge mess. I’ll post an update if these even make it to the baking stage.
you can substitute this with whole wheat flour, but to obtain the same soft integrity of the rolls you need to be sure to use whole wheat PASTRY flour rather than just straight flour. whole wheat pastry flour acts like all purpose for most recipes and did this time for me. i also have a lot of experience with almond flour and if you were to use almond flour you would have to, for this recipe, replace only 1 cup of the flour with almond flour and the rest (3 cups) would have to be either all purpose or whole wheat pastry flour. :)
Has anyone tried using almond flour? I don’t usually eat bread, but these look amazing – I try to keep things as gluten free as possible…..