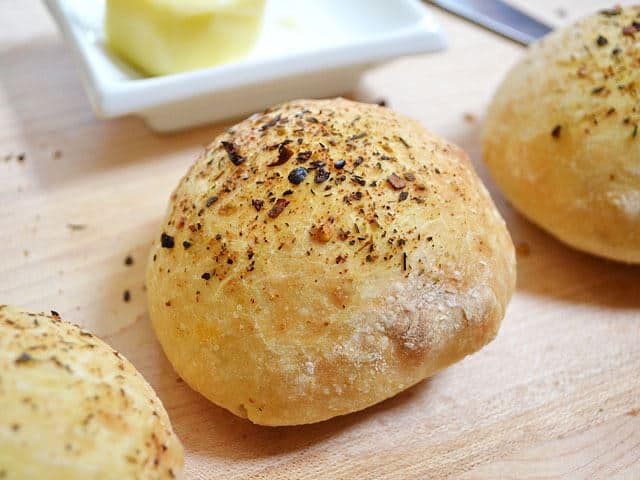
If I haven’t convinced you yet to try no-knead bread, perhaps this post will. These easy little Focaccia Rolls are so good that I’ve had to stash them in my freezer just so that I won’t eat them all up. Sure, they’re just 30 seconds in the microwave away from being warm and delicious again, but at least the freezer has slowed me down a little ;)
Also check out our classic no knead focaccia bread recipe!
No-Knead Focaccia Rolls

This post contains some affiliate links, which means that we make a small commission off items you purchase at no additional cost to you.
Trade Effort for Time
These Focaccia Rolls are really easy, but they do need to take their sweet time. You’ll need to start them the day before, so plan ahead. Actual hands-on time is probably less than 30 minutes, most of which is dedicated to shaping the dough into the rolls. All of the “work” is done by the yeast as the dough ferments overnight.
Flavor Your Focaccia Rolls
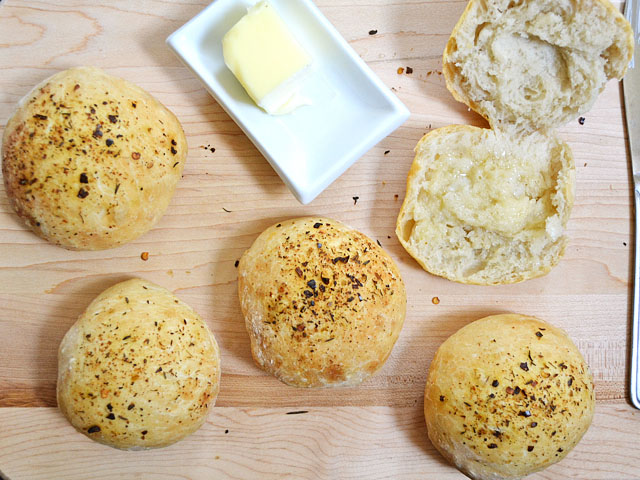
I brushed each roll with olive oil and then sprinkled Italian seasoning on top. I love the texture that the olive oil gave the rolls, but you could certainly make them without if you want. Also, you could mix dry herbs right into the dough (with the other dry ingredients in the beginning) and have an herb-infused roll. There are so many possibilities. Run with it!
Freeze for Later
As I mentioned above, I love freezing these Focaccia Rolls! Just make sure to cool the rolls completely at room temperature to prevent condensation, then place them in a gallon-sized freezer bag, and pop them in the freezer. Then you can just take a couple out at a time to thaw as needed. They thaw quickly at room temperature, or if you want to rewarm them, just wrap them in foil and pop them in a hot oven for a few minutes. Done!
No-Knead Focaccia Rolls
Ingredients
- 4 cups all-purpose flour ($0.59)
- 1/2 Tbsp salt ($0.05)
- 1/4 tsp instant yeast ($0.02)
- 2 cups water ($0.00)
- 2 Tbsp olive oil ($0.24)
- 2 Tbsp Italian seasoning ($0.30)
Instructions
- The day before (about 18 hours ahead of time) combine the flour, salt, and yeast in a large bowl. Stir until well mixed. Add the water, starting with 1.5 cups, and add a little more at a time until the flour forms a cohesive, wet ball. There should not be any dry flour left on the bottom of the bowl. The total amount of water you’ll need will vary, but should be between 1.5 to 2 cups. See the photos below for more info.
- Loosely cover the bowl with plastic wrap and let it sit at room temperature for 16-18 hours to ferment.
- After 16-18 hours, the dough will look like a large, bubbly mass. Sprinkle with enough flour to be able to scrape it out of the bowl without it sticking to your hands. Place the dough on a well floured surface. Cut the dough into 12 pieces. Shape each piece into a small ball. The dough will be quite wet, floppy, and sticky, so sprinkle liberally with flour as you work.
- Place the rolls on a baking sheet covered in foil and lightly sprayed with non-stick spray (I used two baking sheets). Brush the top of each lightly with olive oil. Sprinkle the Italian seasoning over top. Let rise for 30 minutes to one hour or until doubled in size.
- While the rolls are still rising, preheat the oven to 425 degrees. Once it is fully preheated, place the rolls in the oven and bake until the surface is a light golden brown (about 25 minutes). Serve warm!
See how we calculate recipe costs here.
Nutrition
Video
Scroll down for the step by step photos!

How to Make Focaccia Rolls – Step By Step Photos
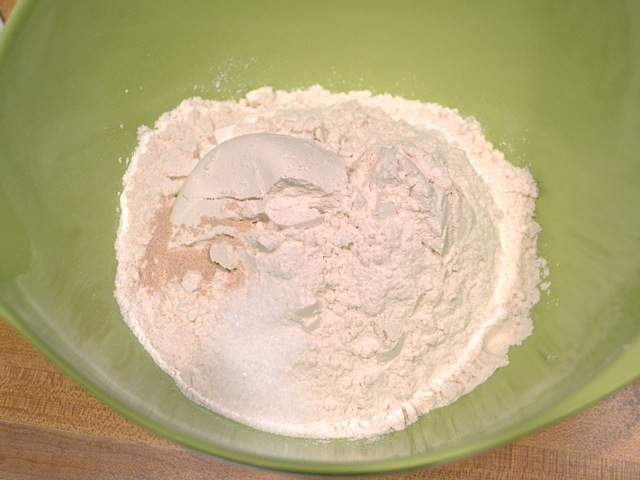
Begin a day ahead of time by stirring together the flour, salt, and yeast.
Starting with 1.5 cups of water, add just enough to form a wet, sticky ball of dough. There should be no dry flour left on the bottom of the bowl or on the surface of the dough. It is better for the dough to be slightly too wet than too dry at this point.
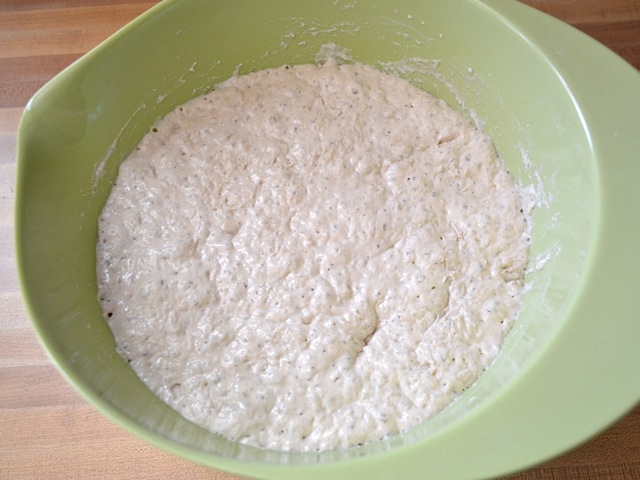
Loosely cover the bowl with plastic wrap and let it sit for 16-18 hours to ferment. After that time, it will have expanded into this big, frothy mass.
Sprinkle the dough liberally with flour so that you can scrape it out of the bowl without it sticking to your hands. Turn the dough out onto a well floured surface. The dough will be very loose, soft, and sticky.
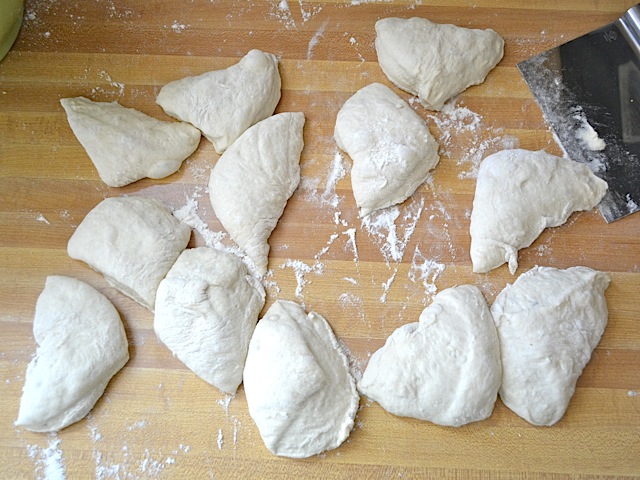
Cut the dough into four equal parts and then cut each quarter into three pieces to yield 12 pieces total.
Shape each piece into a ball, sprinkling with flour as you go (the dough will still be quite sticky). Place the balls on a baking sheet covered with foil and lightly coated with non-stick spray.
Lightly brush each roll with olive oil and then sprinkle with Italian seasoning. Let rise for about one hour or, if your kitchen is warm and you’re impatient like me, let rise for 30 minutes.
Towards the end of the rise time, begin to preheat the oven to 425 degrees. Once it is fully preheated, place the rolls in the oven and bake until they are light golden brown on the surface (about 25 minutes). Serve hot!






aloha beth
just made these rolls, and they are wonderful. they are a bit flatter than the ones shown here, so perfect for sandwiches.
no spray oil in the house, so i just smeared some oil on the foil–worked great. also, no italian herbs, so i used herbs de provence–delish! and i used a cup of whole wheat flour to replace a cup of white–again, very nice flavor, texture, color.
these will be a standard in my weekly baking now! thanks so much.
i’ve upped the whole wheat to half the flour, and they make very tasty, but flatter, rolls, like ww hamburger buns. seems the ww flour keeps them from rising up, but they’re still light, soft, and disappearing!
also, last time i smeared olive oil on the foil and just used my oily hands to shape the rolls–worked great, no extra flour needed. i still swabbed a bit more oil on the tops, to help secure the herbs.
great recipe! thanks again.
425degree……………..??????? is how mutch degree of Celsium,je supose……….LOL!!!
Tricia – No, I’m sure you’re right, it probably just needs a little more salt. It’s amazing what a pinch of salt can do to really make other flavors pop. The amount listed above was right for me, but everyone is different, so you might need a little more :)
These were delicious, but they came out a little bland for me, as if I needed more salt. Besides the obvious, is there anything else I may have done wrong to have them taste like that? I used oregano and parmasean on the top, which was a great combination!
Anon – Hmm, it’s hard to say without having watched you do it, since there are so many places wehre something could have happened, but my first guess would be that you didn’t use instant yeast? If you accidentally used “active dry” yeast, the recipe won’t work because that type of yeast has to be proofed in warm water before adding to a recipe. Instant yeast (also known as bread machine yeast) can be added dry to a recipe and it will magically spring to life when you finally add water to the dough. If you want to read more about the different types of yeasts, there is a link to an article about it in the ingredient list.
I hope that’s what the issue was!
Ok I love your recipes, but for some reason with this one I ended up with hockey puks. Any thoughts? I thought I followed the recipe exactly? Hmmm. Not a complete loss since I’m turning my hockey puks into your apple bread pudding:-)
Olive oil is one of the many ways we know God loves us. I highly recommend. :) And I can’t want to try this! I’m seriously baking-challenged, so I’m hoping this works. Seems straightforward.
Yep, you can brush on any oil that you’d like!
My family does not use olive oil (I know, we’re weird) and I was wondering if the seasoning would stick without it? Maybe a quick mist with cooking spray?
oh my god, beth, these rolls are amazing! I made them last week and since then I can’t stop thinking about them so I will have to make them again tomorrow :) they taste exactly like the little rolls they serve in my favorite italian restaurant (and that’s a huge compliment)!
also: I love your blog, I’ve recommended it to all of my best friends and we can’t wait for your cookbook! I wish you all the best and a great 2013!
Belle – Yep, bread flour would work fine for these :)
Would anyone happen to know if I could use bread flour for these rolls? I picked up a bag and I’m trying to finish it off.
I used all bread flour, came out amazing. slightly flatter than Beth’s but scrumptious.
All I can say is Yum! These were amazing! I used active dry yeast because it’s what I had on hand, and the only thing I did differently was that I mixed the yeast with the water before adding it to the flour. I will definitely be making these again!
Jeanne – They’re definitely smaller than a hamburger bun… mine were maybe 2/3 that size? I hope that helps!!
How big are these rolls? The picture on the baking tray looks hamburger bun sized, but then compared to the butter dish in the last picture, they now look small. Since they sound so delicious, I’m trying to figure out if my guest will want to eat one or two or five (!) rolls.