If I haven’t convinced you yet to try no-knead bread, perhaps this post will. These easy little Focaccia Rolls are so good that I’ve had to stash them in my freezer just so that I won’t eat them all up. Sure, they’re just 30 seconds in the microwave away from being warm and delicious again, but at least the freezer has slowed me down a little ;)
Also check out our classic no knead focaccia bread recipe!
No-Knead Focaccia Rolls

This post contains some affiliate links, which means that we make a small commission off items you purchase at no additional cost to you.
Trade Effort for Time
These Focaccia Rolls are really easy, but they do need to take their sweet time. You’ll need to start them the day before, so plan ahead. Actual hands-on time is probably less than 30 minutes, most of which is dedicated to shaping the dough into the rolls. All of the “work” is done by the yeast as the dough ferments overnight.
Flavor Your Focaccia Rolls
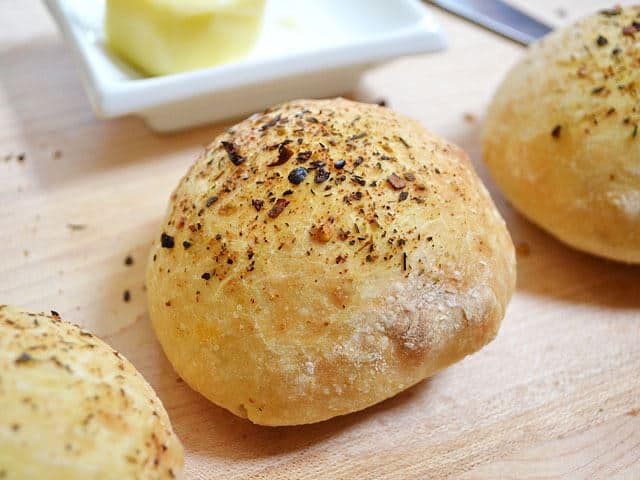
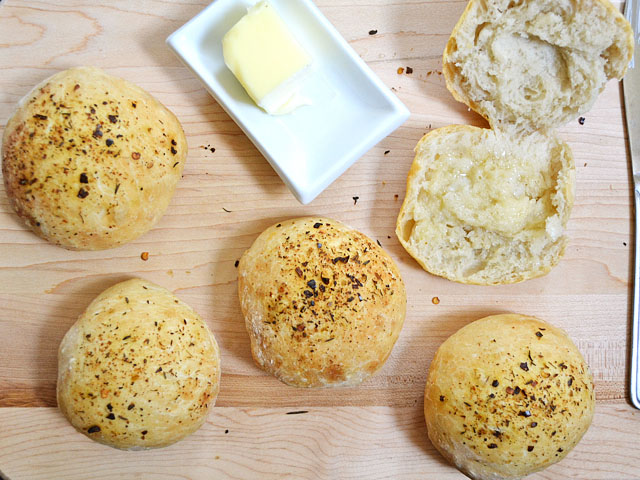
I brushed each roll with olive oil and then sprinkled Italian seasoning on top. I love the texture that the olive oil gave the rolls, but you could certainly make them without if you want. Also, you could mix dry herbs right into the dough (with the other dry ingredients in the beginning) and have an herb-infused roll. There are so many possibilities. Run with it!
Freeze for Later
As I mentioned above, I love freezing these Focaccia Rolls! Just make sure to cool the rolls completely at room temperature to prevent condensation, then place them in a gallon-sized freezer bag, and pop them in the freezer. Then you can just take a couple out at a time to thaw as needed. They thaw quickly at room temperature, or if you want to rewarm them, just wrap them in foil and pop them in a hot oven for a few minutes. Done!
No-Knead Focaccia Rolls
Ingredients
- 4 cups all-purpose flour ($0.59)
- 1/2 Tbsp salt ($0.05)
- 1/4 tsp instant yeast ($0.02)
- 2 cups water ($0.00)
- 2 Tbsp olive oil ($0.24)
- 2 Tbsp Italian seasoning ($0.30)
Instructions
- The day before (about 18 hours ahead of time) combine the flour, salt, and yeast in a large bowl. Stir until well mixed. Add the water, starting with 1.5 cups, and add a little more at a time until the flour forms a cohesive, wet ball. There should not be any dry flour left on the bottom of the bowl. The total amount of water you’ll need will vary, but should be between 1.5 to 2 cups. See the photos below for more info.
- Loosely cover the bowl with plastic wrap and let it sit at room temperature for 16-18 hours to ferment.
- After 16-18 hours, the dough will look like a large, bubbly mass. Sprinkle with enough flour to be able to scrape it out of the bowl without it sticking to your hands. Place the dough on a well floured surface. Cut the dough into 12 pieces. Shape each piece into a small ball. The dough will be quite wet, floppy, and sticky, so sprinkle liberally with flour as you work.
- Place the rolls on a baking sheet covered in foil and lightly sprayed with non-stick spray (I used two baking sheets). Brush the top of each lightly with olive oil. Sprinkle the Italian seasoning over top. Let rise for 30 minutes to one hour or until doubled in size.
- While the rolls are still rising, preheat the oven to 425 degrees. Once it is fully preheated, place the rolls in the oven and bake until the surface is a light golden brown (about 25 minutes). Serve warm!
See how we calculate recipe costs here.
Nutrition
Video
Scroll down for the step by step photos!

How to Make Focaccia Rolls – Step By Step Photos
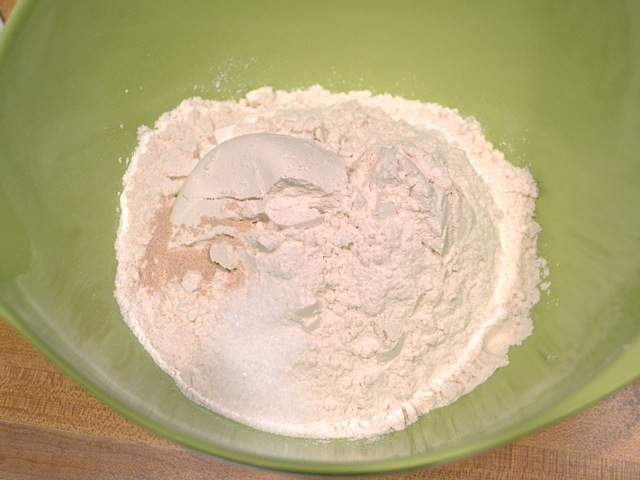
Begin a day ahead of time by stirring together the flour, salt, and yeast.
Starting with 1.5 cups of water, add just enough to form a wet, sticky ball of dough. There should be no dry flour left on the bottom of the bowl or on the surface of the dough. It is better for the dough to be slightly too wet than too dry at this point.
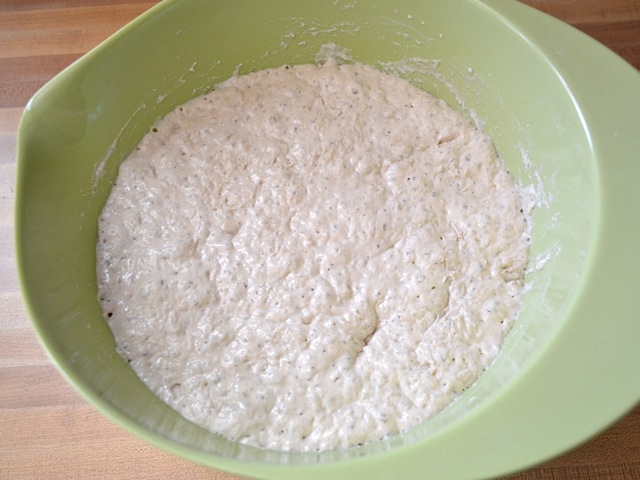
Loosely cover the bowl with plastic wrap and let it sit for 16-18 hours to ferment. After that time, it will have expanded into this big, frothy mass.
Sprinkle the dough liberally with flour so that you can scrape it out of the bowl without it sticking to your hands. Turn the dough out onto a well floured surface. The dough will be very loose, soft, and sticky.
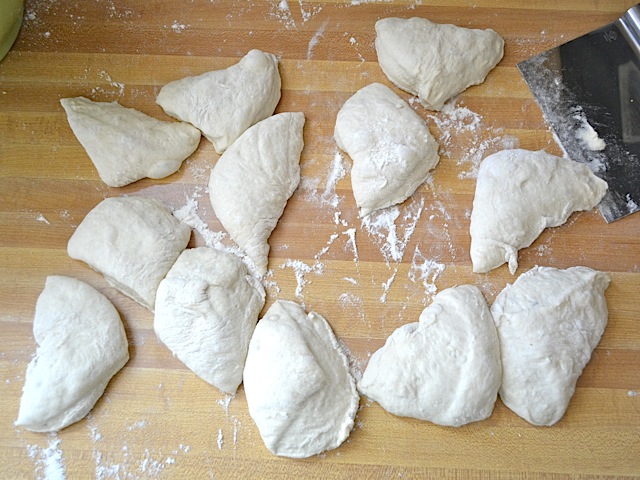
Cut the dough into four equal parts and then cut each quarter into three pieces to yield 12 pieces total.
Shape each piece into a ball, sprinkling with flour as you go (the dough will still be quite sticky). Place the balls on a baking sheet covered with foil and lightly coated with non-stick spray.
Lightly brush each roll with olive oil and then sprinkle with Italian seasoning. Let rise for about one hour or, if your kitchen is warm and you’re impatient like me, let rise for 30 minutes.
Towards the end of the rise time, begin to preheat the oven to 425 degrees. Once it is fully preheated, place the rolls in the oven and bake until they are light golden brown on the surface (about 25 minutes). Serve hot!






My typical bread recipe has been failing be recently. My old standby has been turning out tasteless loaves, so I thought I would give this one a go – thinking that the long rise time would yield lots of flavor. Unfortunately while the rolls looks beautiful – there was no taste to speak of (apart from the seasoning on top). What am I doing wrong?
Try adding a bit more salt. Sometimes it’s surprising how a little bit of salt can really make flavors pop out. I find this to be especially true with bread.
I have never made yeast anything in my life (except one miserable failed attempt at sticky buns which didn’t get as far as the oven), but I made this recipe, and it is the best focaccia I have ever eaten! Since it’s just me, I looked up how to freeze dough, and have 10 in the freezer, one in the fridge for dinner, and one in my post-breakfast stomach. Not having Italian seasoning in the house, I topped the one That went in the oven with olive oil, chopped rosemary and kosher salt. I am forever in your debt. For my next trick, I will attempt raisin bread. Stand back, everyone, a yeast monster has been unleashed!
Yum! Chewy and delicious. Hoping they freeze well. Next time I would add some sea salt and crushed red pepper to the toppings. My only compliant is that 2 tablespoons of Italian seasoning was way too much. I used about 1/2 to 1 tablespoon. Unfortunately, I had to throw the rest out since I had pre measured it in a pinch bowl and stuck my fingers in it. Didn’t want to risk keeping it.
It always deletes my rating upon post back (post comment button). I am on an iPad, if you need to know for tech support.
Trying one last time.
My dough is in the processing of rising for this recipe. 5 hours in. Is the amount of yeast correct..1/4 tsp? Seems like a low amount.
Yep, 1/4 tsp. Because the rise time is so long, the yeast has plenty of time to reproduce, so in the end the content in the dough is similar to what it would be if you added a lot and let it rise only a couple hours.
Than know s for replying. The rolls worked perfectly. Definitely will be doing these again.
Made these lovely rolls tonight. I was low on unflavored olive oil, so I used melted butter in place of both the olive oil and the cooking spray. Outstanding! Even my “bread skeptical” toddler approves, and he’s tough. I’m tripling the recipe for Thanksgiving on my aunt’s farm. Although it takes a chunk of time, the labor involved is so minor that I almost feel guilty. Almost. I’ve never commented but have made many a recipe from this site. Thank you so much. Happy Thanksgiving!
I messed up the recipe but it came out great anyway!
There were many things I did wrong…the active dry yeast (NOT instant) that I spilled too much of into the bowl, the extra pinch of salt I added to compensate for too much yeast, the water that I heated up before I mixed it into the dough since I didn’t have instant yeast. My kitchen was also really warm while the dough was sitting out.
I admit, I was winging it with the ingredients that I had and my very limited knowledge of baking chemistry.
However, it cut the fermentation time down to about 6 hours. I noticed that my dough looked like the “after” picture already, so I decided the heck with it, and baked it early. It came out well. Just a tip for those who can’t let it ferment that long.
Does anyone have any idea why this worked?
I hope I can repeat this method, because this recipe is a keeper!
A second batch of thoughts–this is a spectacular recipe, and the long fermentation is what makes it so wonderful. Terrific sandwich rolls, IMO. It is definitely part of my keeper collection–loved the suggestion for adding steam to the oven and substituting some WW flour
I’m going to be making these for a dinner party and am wondering if I can add fresh rosemary to these? My husband loves rosemary bread and I wanted to give him that. Thank you in advanced!
I would think you could, but then I’m not sure how the rosemary would do during the fermentation time. My only concern is that there may be some (naturally occurring) bacteria or yeast on the rosemary that might flourish and cause a problem food safety-wise. It’s not a problem with regular doughs that only rise for two hours or so, but the long fermentation gives bacteria enough time to go crazy. :)
Perhaps infuse some olive oil with chopped fresh rosemary, then brush that on during the “brush the rolls with olive oil” step.
You could always add some Rosemary at the end–instead of or in addition to the Italian seasoning sprinkled on the top. Spectacular recipe!
Hi, I have to say I just took these out of the oven, my first batch…..these are fantastic! And that is an understatement. I am addicted
i couldn’t find instant yeast anywhere at my local stores, will just regular active yeast work?
Probably not as well. The difference is that active dry must be dissolved in water and allowed to proof before adding to a recipe (this activates it), whereas instant or bread machine yeast can be added dry.
if you use active dry yeast (vs instant), you just need to “proof it” first.
I set aside about about 1/4 of warm water (of the 2 cups for recipe) and add the yeast, along with a pinch of sugar (and sometimes a pinch of flour). I mix it up and let it sit for about 5 minutes until it gets a bit frothy on top. Finally, I add the rest of the water (stirring so I don’t leave behind any yeasties) and then mix it into the rest of the ingredients.
It’s noteworthy that you can probably just add the 1/4 tablespoon of yeast to the full 2 cups of water (without the sugar or flour), but I find that it doesn’t appear to have activated… and even though it’s probably fine, I appreciate the confidence of proofing it in a smaller batch. :-)
These rolls came out of the oven very nicely this morning. so i just prepared a new batch, triple size… gonna put them in the freezer and also gonna make pizza with it tomorrow.
the only thing i do different is i put my spices in the mixture and also the olive oil…
Would there be a way to make this with wheat flour? By the way, love your website! Thank you for sharing such great and easy recipes!
Most bread recipes are okay when substituting up to 1/2 of the AP flour with WW. You can expect more noticeable texture and flavor changes when using all WW flour. I haven’t tried the no knead recipes with all WW flour, though, so I’m not sure how much it would be affected. If you try it out, let us know how it turns out!
I’m not the person who posted the first comment, but I wanted to let you know that I just made these with white whole wheat flour and they turned out great. Absolutely heavenly with garlic butter. Just perfect.
This recipe does not work with regular WW flour, however. At least it didn’t work for me.
WW and White Bread Flour works really nicely for this recipe… and around the holidays it’s nearly 50% off at the grocery store.
I’ve made this recipe a few times now and I have found that swapping out 1 cup of the flour for WW works out nicely without drying it out. (For taste, I prefer wheat breads) I’ve tried doing 50/50, but they turned out chewy in a bad way.
(& in general comment)
For flavor, I also add a bit more salt and 2 tablespoons of olive oil directly to my mix (whisking it with the water first, quickly pouring and mixing everything together, otherwise it gets weirdly distributed throughout in the dough). Adding too much liquid tends to work better than adding too little.
Just made these and they are excellent! Chewy in the middle with a nice crust. I made the recipe with active dry yeast and didn’t change the procedure at all and they turned out nicely.
Beth,
I was a chef for over 10 years and am now a Food Chemistry graduate student. Needless to say that I have tasted a lot of food in my life. This is the best focaccia recipe that I have ever come across. I used a spray bottle to steam the oven at the beginning of baking and about 3 minutes in. The crust it produced was exceptional.
That’s a huge compliment! Thank you and I’m glad you enjoyed it! :D
these were great- everyone in my family enjoyed them (and there are 6 of us!)