October is national pizza month! I don’t remember where I read that or if it is even legit but who cares, it’s a good enough excuse to make some pizza! And since I’m always trying work a little more fiber into my diet, I thought I’d try making some wheat pizza dough.
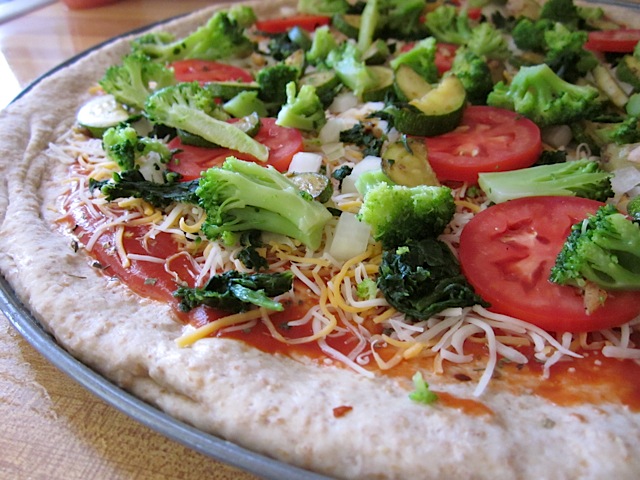
Instead of making normal pizza dough I decided to inject a little (well, a lot actually) of fiber by making a honey wheat dough. The grocery store was out of regular whole wheat flour so I had to buy an itty bitty bag of fancy, expensive stone ground whole wheat flour. In the end, I was really happy with the purchase. The stone ground flour has a lot more texture and flavor than regular whole wheat flour. Feel free to use either one in the recipe.
Some people shrug off making 50/50 wheat/white bread and dough thinking it won’t make enough of a difference. Well, according to the nutrition label on my stone ground flour, 1/4 cup contains 4g of fiber. I used a whole cup in the recipe which means that I injected 16 grams of fiber into the pizza or 2 grams per slice (if cut into 8)… and that’s just the dough, not the vegetable toppings. I think that is significant.
Regardless of the fiber content, I like this dough WAY better than my original pizza dough recipe. It is fluffier with a crisper crust. It was just perfect.
Honey Wheat Pizza Dough
Ingredients
- 1 cup whole wheat flour ($0.25)
- 1 1/2-2 cups all purpose flour, divided ($0.14)
- 1 cup water ($0.00)
- 2 Tbsp honey ($0.21)
- 2 tsp yeast ($0.19)
- 3 Tbsp olive oil ($0.30)
- 1 1/2 tsp salt ($0.05)
Instructions
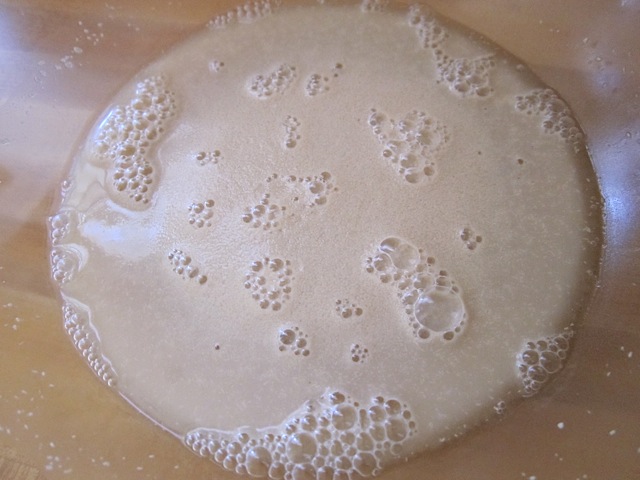
- In a small bowl, stir together the water (warm), honey and yeast. Let it sit 3-5 minutes or until very frothy on top.
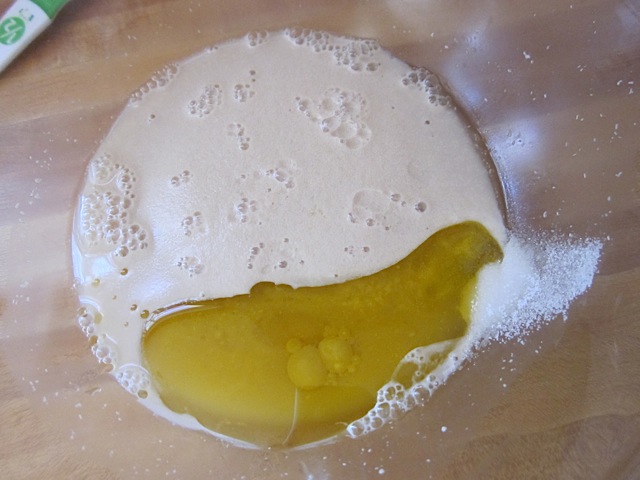
- Stir the olive oil and salt into the yeast mixture. Next, stir one cup of whole wheat flour into the wet ingredients until evenly mixed. Stir in the all purpose flour, 1/2 cup at a time, until you can no longer stir it with a spoon.
- Turn the ball of dough out onto a floured surface and continue to add in and knead the all purpose flour until the ball of dough is stretchy and soft but not sticky (about 3-5 minutes). The total amount of flour needed will depend on how much moisture is already in your flour but it should be between 1-2 cups of all purpose flour.
- Spray a large bowl with nonstick spray and place the ball of dough inside. Loosely cover with plastic wrap and let sit for about 45 minutes or until doubled in size.
- To shape the dough, remove it from the bowl it was rising in and place it on a floured surface. Press the dough down into a large circle. This should be fairly easy since it was pretty circular in shape as it rose. Next, pick the dough up with your hands and transfer it to a pizza pan (coated in non-stick spray or sprinkled with corn meal). Press the dough out even further until it reaches the edges of the pan. Alternatively, you can pick the dough up and stretch it with your fists (this can take practice).
- Top the pizza then bake in a fully preheated, 450 degree oven for about 15 minutes or until the edges are golden brown.
See how we calculate recipe costs here.
Nutrition
Step By Step Photos
Combine the warm water, yeast and honey in a bowl. Stir it up and let it sit until frothy.
Add the olive oil and salt and stir in.
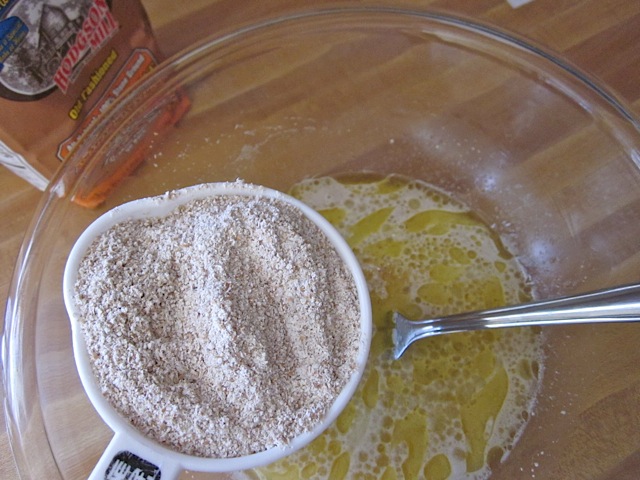
Start by stirring in one cup of whole wheat flour.
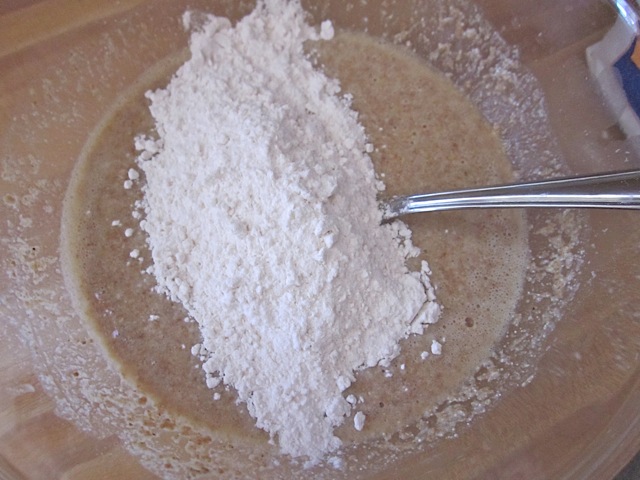
Then, working with 1/2 cup at a time, add the all purpose flour until you can no longer stir it with a spoon.
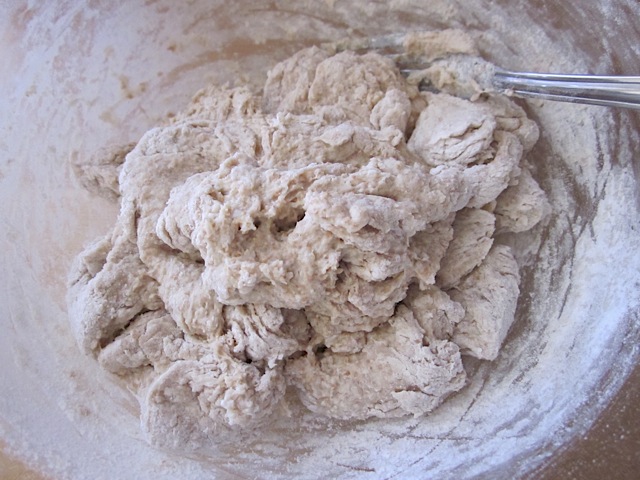
This is what it looked like when I could no longer stir in flour with a spoon. A loose ball of dough.
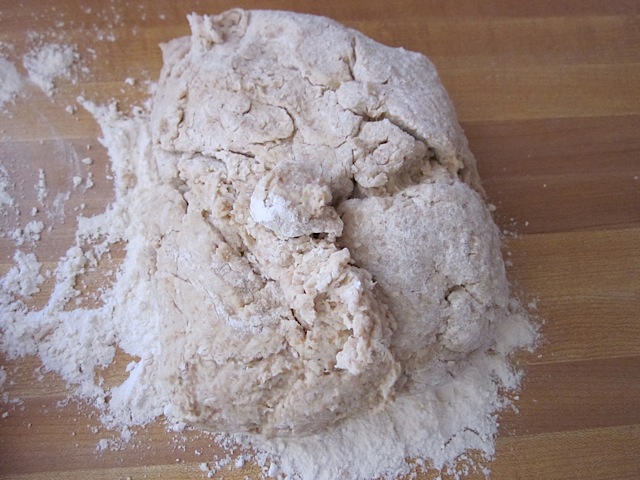
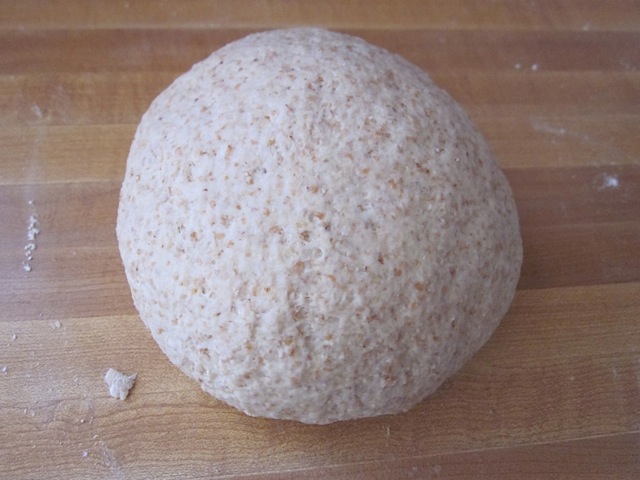
Turn the ball of dough out onto a floured surface and knead in the rest of the flour. Keep adding/kneading in flour until the dough is no longer sticky but still soft and stretchy (about 3 minutes and 1.5-2 cups total flour).
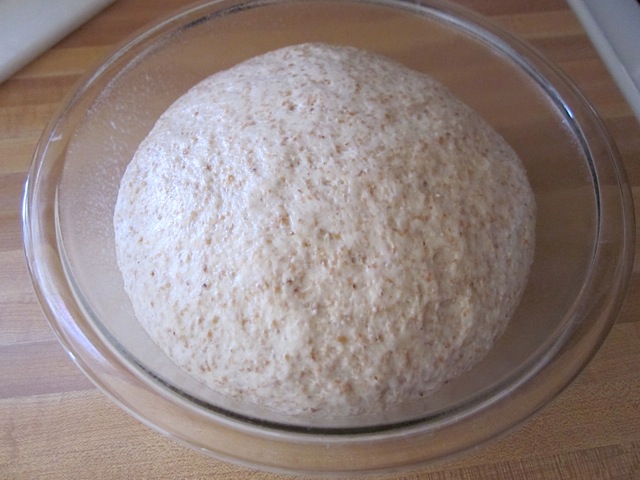
Form the dough into a ball. Oil a bowl and place the dough inside to rise. Let rise until double (about 45 min).
Here is the risen dough. Exciting, I know.
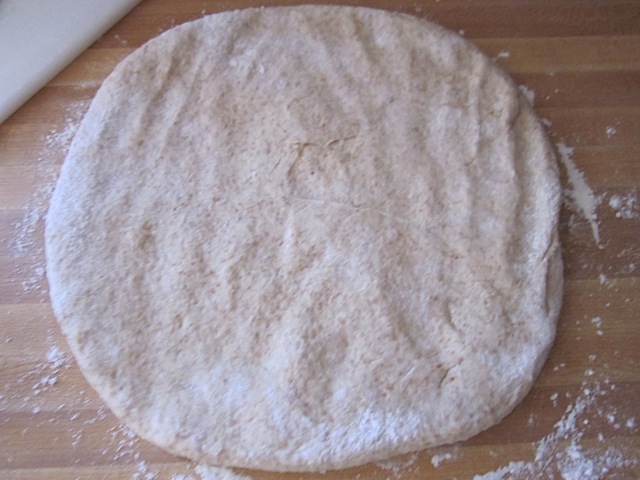
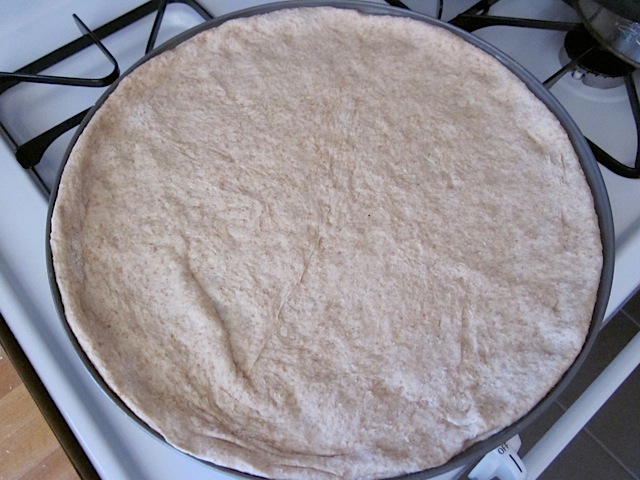
To shape the dough, turn it out onto a floured surface and press it down into a large circle with your hands. Either pick it up and stretch it with your fists or transfer it to your pizza pan and press it out further until it fits the pan.
Coat your pan with either corn meal or non-stick spray so that it doesn’t stick. Preheat the oven to 450.
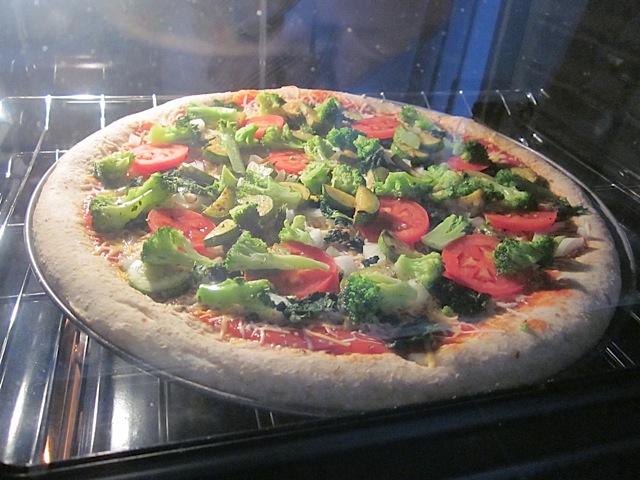
Top the pizza and bake it for about 15 minutes at 450 degrees or until nicely browned around the edges.
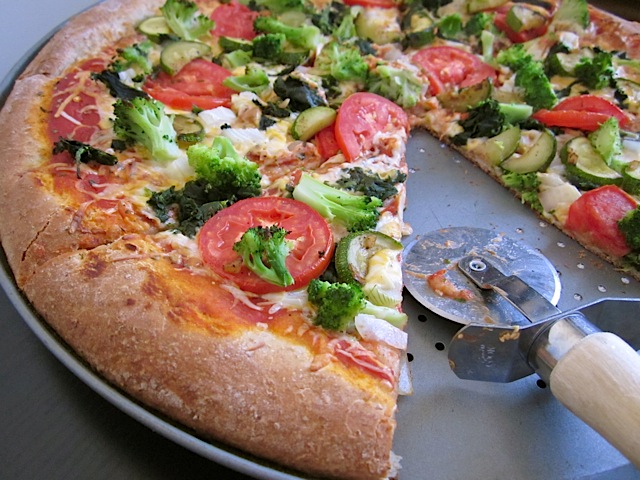
Then dig in!!

This post contains some affiliate links, which means that we make a small commission off items you purchase at no additional cost to you.
I’m not going to let this high cholesterol get me down! A super fiber-ific pizza (with reduced fat cheese) and a glass of wine with dinner every night is a rather enjoyable way to take control of the stituation… if I do say so myself :D


This is THE BEST, and I’ve tried a lot of pizza dough recipes. I brush top of dough with a little olive oil before adding toppings and baking.
I have white whole wheat. Is it interchangeable with whole wheat?
It should be just fine! White wheat flour can be used interchangeably with whole-wheat flour (but the conversion is a little different if trying to substitute with All-Purpose flour). ~ Marion :)
So delicious! My go-to pizza dough
This looks really good and I’ll probably try it this weekend, but I could have sworn there was a recipe for no-knead pizza dough somewhere on this site? In the intro Beth wrote about mixing it in the morning on Fridays before going to work in the lab, then coming home and having Friday night pizza. Am I completely imagining this?
Hi Liana, are you thinking of our no-knead pan pizza? https://www.budgetbytes.com/knead-pan-pizza/ XOXO -Monti
I’ve only recently gotten adept at kneading bread (blame lack of counter space until now) but now that I am I’ve been looking for the right pizza dough recipe (one with some fiber so I feel less guilty) and this is it. I made this last night and it turned out beautifully.
I read a comment that said it made a bit too much for a regular sized pizza pan. Halving the recipe probably would not have made enough so I increased the quantities of everything by 50% then divided the resulting dough ball into two, and it turns out doing that made two perfectly sized crusts for a normal pizza pan. So not only did I make delicious pizza last night but I have another dough ball in the freezer to pull out any time I want.
Me and my sister love this crust! It was easy to make and I admit I was nervous making it since the last pizza crust I made was just terrible. This one came out perfect, very easy instructions and ingredients to work with.
Me and my sister combined your crust with Roasted Vegetable and Ricotta Pizza recipe at: http://www.myrecipes.com/recipe/roasted-vegetable-pizza-50400000111133/
Very excellent combo for a veggie pizza, it was better then the ones we would get at our farmer’s market; and we loved that one!
This is the best pizza crust my family has ever eaten. My son described it as “bouncy”.
I have been making scratch pizza crust for 3 or 4 years now. This is the best crust my family has ever eaten. My son described it as “bouncy”.
WOW! thank you so much! My son and I decided to make pizza’s for our family last night!
We used this dough and topped one pizza with
Re-fried beans (the non fat ones we get for cheep by the case at Costco)
chicken cooked in taco seasoning and water (shredded)(also a Costco find 40 lbs frozen for 1.30$ a lbs)
Cheddar cheese (shredded)
then after cooling added jalapeno ranch dressing fresh tomatoes and shredded lettuce!
The other pizza had ranch dressing
Canadian Bacon
Sauteed chicken and bacon pieces
mozzarella
marinated artichokes
and after baking added a bit more ranch and fresh tomatoes
This is A-MAZING!!! Luv it!!!
I’m trying to cook more and more vegetarian (and even occasionally vegan) meals, but sometimes they go… how should I put this… awry. We always have an “emergency pizza” in the freezer for such occasions (I’m not a bad cook, but let’s face it… not every recipe is a winner, right?). However, after making this crust and topping with sauce, spices and veggies, I think that it’s safe to say that the emergency pizza has been rendered unnecessary. :)
Great recipe!! I have tried lots of whole wheat crust recipes and this is definitely the best one yet! Thanks for sharing :)
Sam’s Club has large containers of instant yeast at a very good price
To make (2) 16” pizzas it calls for 4 tsp of yeast. I use rapid rise instant yeast. Can you be more specific about the yeast you’re figuring to use? Fresh? Active dried? Instant?
Ooni classic pizza dough recipe shows significant quantity difference between yeasts.
Instant or Active dry will both work. Use the amount called for in the recipe for both. XOXO -Monti
Made this pizza dough tonight in the bread machine using all whole wheat flour (fresh ground in my Vitamix) instead of whole wheat and All Purpose and it turned out really really good! Couldn’t be happier with it!
seriously loving this site! thanks for all the great tips and pictures! i didn’t realize that i could let the dough rise in the fridge and that it would add to the flavor! thanks!
I have had this in my bookmarks for literally over a year and kept meaning to make it. We fiiiiiinally made it tonight and it’s amazing! I had a quick no-rise dough that was our go-to, but I’m trying to eat less refined stuff, so I turned to this. Crispy and fluffy indeed! It’s now our new go-to :)
Sarah – the pizza pan that I used was huge… it’s probably enough dough for two regular sized pizzas.
I just made this for dinner. It tasted great!! But mine turned out a good bit thicker than yours looks in the pictures…any thoughts on where I went wrong?
Laura, unfortunately, I don’t have a “print recipe” option. But, if you just highlight the text that you want to print, copy it, then paste it into a word program, you can print a selected area. Hope that helps!
Do you have a way to print the recipe without printing all the blog comments?
Jamie- I didn’t want to spend a bunch of time so I just opened an 8 oz. can of tomato sauce, sprinkled it with some italian herbs (basil, oregano and red pepper flakes) and went with that. Then I used some shredded 2% milk fat cheese. There is a recipe for pizza sauce on this site if you want it:
http://budgetbytes.blogspot.com/2010/07/pizza-sauce-181-recipe-060-per-pizza.html
It freezes well too!
Hey what kind of sauce and cheese did you use on this pizza?
Yep, I’ve been using the jar :D I bought one in July, I think and it’s still going! I didn’t know I can skip the foaming step, thanks! At one point, about ten years ago, I had a 5 lb. bag of yeast that was purchased at a restaurant supply store… it lasted over a year! I wish I could get one of those again.
If you’re going to be making a lot of yeast doughs (you seem to be lately!) you might consider purchasing a jar or bag of yeast – I think it will be A LOT cheaper than the packets in the long run! Also, buy instant yeast instead of active dry, because then you can skip the yeast proofing step. Look for Red Star bread machine yeast (in a jar), or SAF Red Label yeast (in a bag). I keep my jar in the freezer. It is about $5 for a jar/bag, and it usually lasts me over a year (although you do want to replace about once every 12-18 months to ensure freshness).
Brittany – Yep, freeze it just after kneading but before rising because when you’re ready to use it, it will rise as it thaws on your counter top. It will take 1-2 hrs to thaw/rise at room temp after being frozen.
At what point in the process do we freeze it, Beth? Once it’s done mixing?
love your blog.
i’m sure you know this, but others might not. A pizza stone makes the crust come out much better – much cruncher. worth the investment.
Yep, it sure can! If you want two pizzas, divide the dough before the first rise. If you refrigerate it, it must be used within 2 days (it will rise as it sits in the refrigerator). If you freeze it, you can use it for up to 1-2 months, just let it thaw/rise on the countertop until it’s room temperature then stretch it out, top and bake.
Can this dough be refrigerated/frozen for later use? I like the idea of 2 mediums…1 for now and 1 for later
Hahaha, well, I did spend a couple years of my life hand tossing gourmet pies so I’ve had a little practice ;) But thanks!!
Holy cow, you make such a beautiful pizza! Mine is always lopsided or uneven or “rustic” looking, but yours is textbook. I’m impressed *and* inspired!
Thanks for posting this recipe. I can’t wait to try it. It will be my first attempt at homemade pizza. I also want to say how much I appreciate your blog. It’s useful and fun.
This looks amazing, but the first few photos make it look like you’re letting the yeast hang out on the kitchen counter, not in the bowl. :)
I’ll definitely be passing this recipe on to a few friends!