I’m going to start this by admitting that this is the VERY first time that I’ve ever made my own chicken broth. I’ve been meaning to for years… and it’s almost hypocritical of me not to, but for some reason I never got around to trying it.
So, don’t read this post as a “definitive guide” to making chicken broth, but rather a “here is my experience, you should try it too!” Also, because I know there are A LOT of you who have been doing this for years, I’d love it if you’d share your tips, tricks, and experiences in the comments so that we can all learn from each other :)
So what was my experience? OMG, so easy. Seriously, dump it all in the pot and let it go. Come back later and you have a magical golden liquid full of flavor and good for you nutrients. Why wouldn’t you want to do this?! Plus, I always get warm and fuzzy inside when I know that I’ve reduced my waste. By making broth you get to use every last bit of goodness in your chicken and vegetable scraps. I can’t wait to make some vegetable broth too!
A couple good tips I’ve already gotten from readers:
1) Save your vegetable scraps from other recipes in the freezer until you’re ready to make broth. Just make sure they’re well washed first to remove sand and dirt.
2) Theresa suggested making the broth in a slow cooker instead of on the stove top for even less baby sitting. Let it go all night and you’ll have an ultra-amazing broth by morning!
I can’t wait to hear everyone else’s tips!
Homemade Chicken Broth
This post contains some affiliate links, which means that we make a small commission off items you purchase at no additional cost to you.
How to: make chicken broth

Ingredients
- vegetable scraps
- chicken carcass
Instructions
- Pick the skin from the chicken carcass and make sure you’ve gotten all of the good meat off. Leave the cartilage as this will “melt” into the broth, adding flavor and nutrients. Yes, cartilage has nutrients. It’s like taking a joint supplement pill, but it tastes better.
- Make sure your vegetable scraps are clean by rinsing well with cool water. You can use the ends and stems of carrots, celery, herbs, onion skins, or any piece of a vegetable that you normally cut off and throw away. The vegetables WILL effect the flavor, so make sure you use vegetables that “go” together. I used celery, carrots, parsley stems, and onion skins.
- Add the chicken carcass and vegetable scraps to a large pot and cover with water (about 12 cups, depending on how big your chicken was and how many scraps you have). Bring up to a boil over med-high heat, then reduce to low and let simmer with a lid for 3-4 hours.
- After simmering, pour the broth through a colander into a large bowl or pot. Remove the colander and throw away all of the scraps. Cover the colander with a cheese cloth or another clean, lint-free cloth and pour the broth through once more to remove small particles.
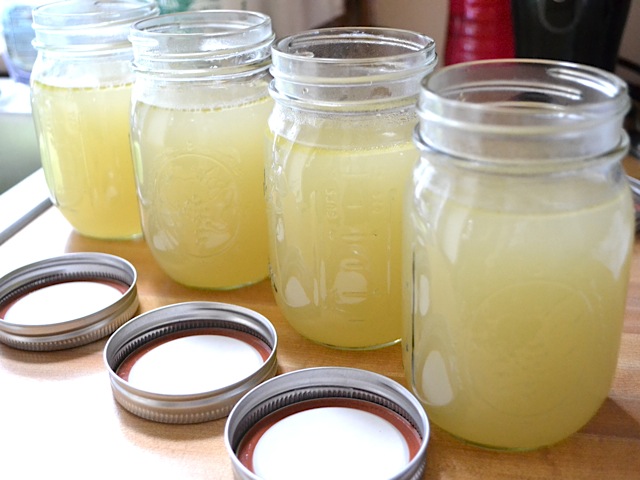
- Divide the broth into smaller containers to help facilitate cooling. Refrigerate until cold and then transfer to the freezer, remembering to label and date each container.
See how we calculate recipe costs here.
Notes
How to Make Chicken Broth – Step By Step Photos
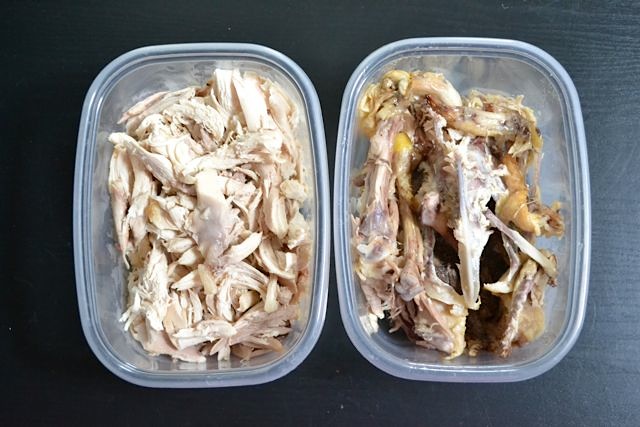
So, I roasted a whole chicken in my slow cooker last weekend, and after it was cool enough to handle I picked the meat off and saved the bones and scraps until I was ready to make the broth.
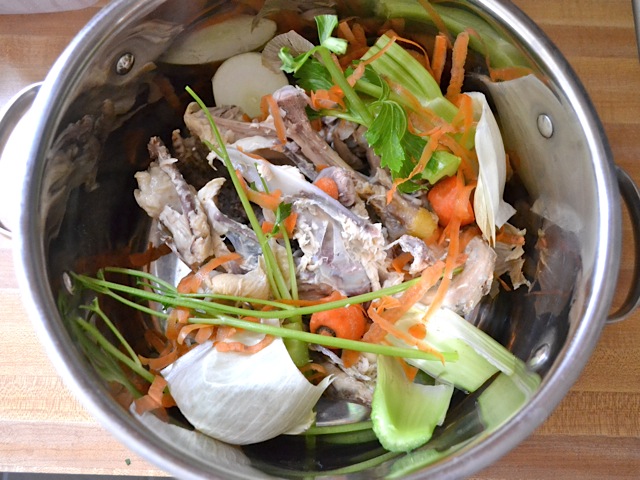
The next day, after I had accumulated some vegetable scraps, I started the broth. First things first, make sure the vegetable scraps are CLEAN. Sand in broth is not good. I had celery tops and stems, carrot ends and peels, onion peels, and some parsley stems. Place them in a large pot along with your chicken carcass.
Cover the whole thing with fresh water. I used 12 cups. Bring the pot up to a boil over medium-high heat and then reduce it to low and let simmer (with a lid) for 3-4 hours.
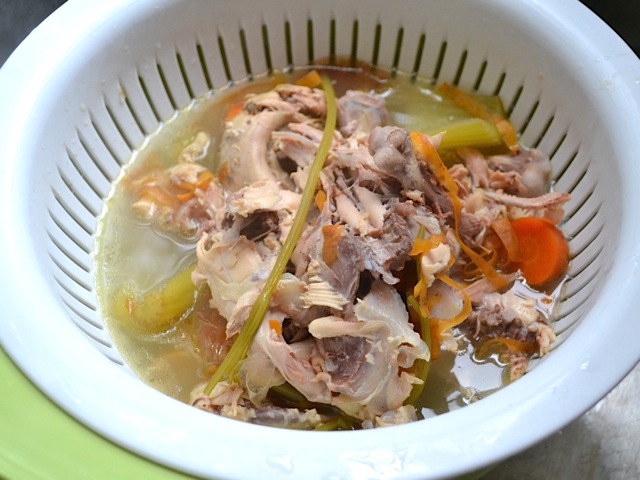
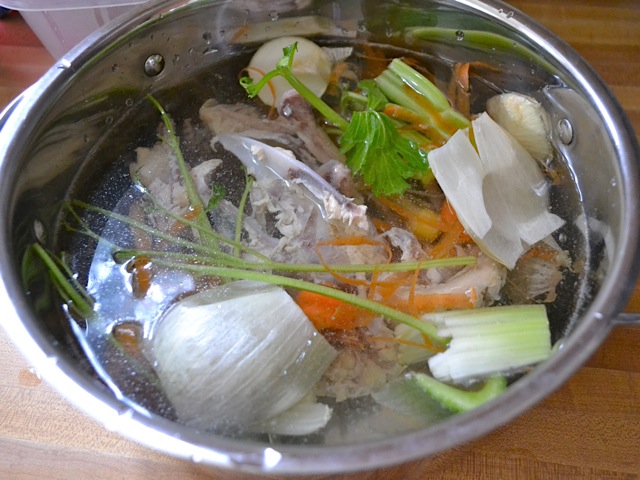
After you’ve simmered all of the goodness out of your scraps, it’s time to strain out the magical golden liquid. Place a colander over a large bowl and pour the whole pot through it. Discard the collected scraps.
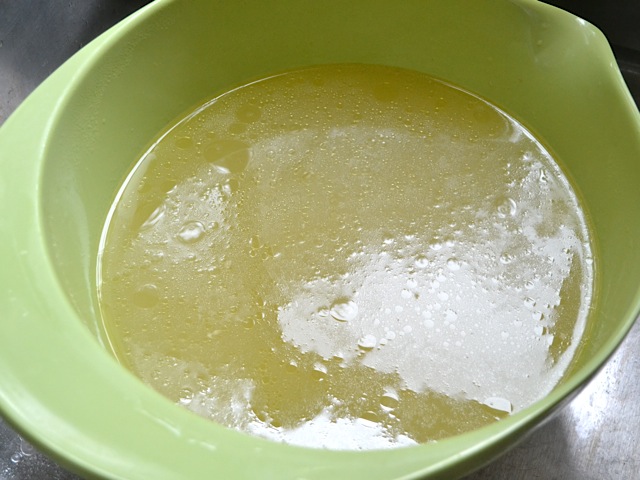
After the first strain, this is what I had. It’s already golden and beautiful. And it smells delightful too.
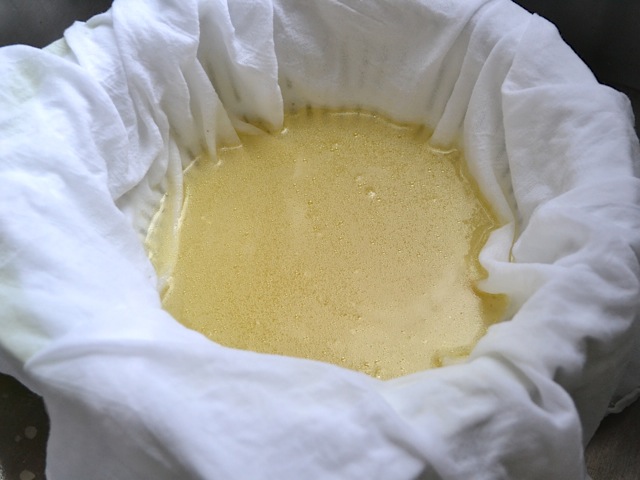
You’ll want to strain a second time through a fine weave, lint-free cloth to remove any small particles that may have passed through the colander. I just laid my cloth out over the colander and poured through again.

It didn’t catch much, but I bet if I had simmered for longer everything would have broken down more and there would be more small particles.
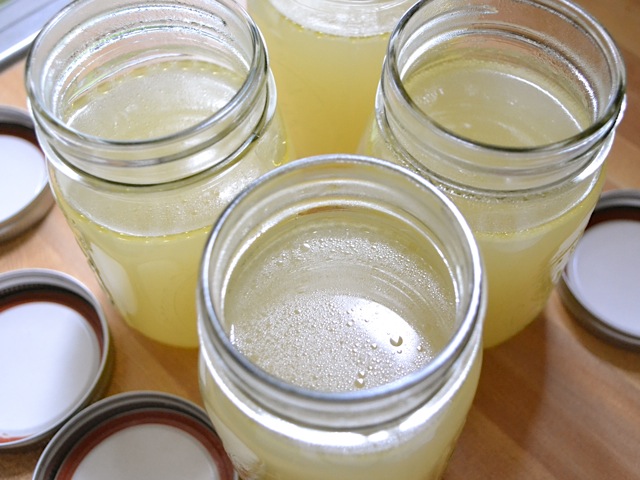
You can season your broth at this point with salt and pepper, but I prefer to leave it unsalted and then just add salt later when cooking with the broth. Adding salt at the end of a recipe allows you to use less and achieve the same flavor punch. Also, it’s always a good idea to divide your broth (or any food) into smaller containers before refrigerating so they cool down faster. Always chill the broth before placing it in the freezer.
I put my broth in jars because they were sitting there on my counter, but I like to freeze sauces and liquids in quart sized freezer bags. You can freeze in glass jars, but make sure to leave room for the liquid to expand as it freezes, or else your container will burst.
i always make my chicken broth from a fresh (uncooked) chicken. I like it best with a whole chicken, cut up into about 10 pieces, plus maybe 6 carrots and 2 big onions quartered. First I boil the chicken pieces in a very little water, barely enough to cover, for maybe 2 minutes. Take it off the heat, run it under cold water and wash off all the blood (grey bit). Then return to pot with veggies and a lot of water, and simmer maybe… 45 mins? That’s all. Salt to taste, bay leaf if you like.
I find it better than cooked-chicken broth, and then you have all this lovely cooked chicken for salad, sandwiches, to eat with the soup, etc etc.
Fabulous! I’ve always heard not to leave the lid on while simmering, though, so evaporation can happen to concentrate the flavors.
Adding a splash (i.e. a tablespoon or two) of apple cider vinegar to the pot at the beginning helps coax out all of the wonderful minerals, such as calcium, from the bones of the chicken as the stock simmers(and does not leave a distinctively ‘vineager-y’ flavor).
If you pour the broth into ice trays then freeze them, you can have 1 oz. portions you can then throw in a freezer bag and keep in the freezer. Perfect for flavoring a small batch of something you are cooking up.
This is a great post and one I will try – as i’ve been meaning to do this. Most days I can only survive on chicken broth and it’s usually canned (gross), bullion (nasty), or organic box from Whole Foods (expensive). Thanks!! This is great!
Tianna @ http://www.alittlebitme.com
Sally Fallon’s recipe in Nourishing Traditions is awesome. If you are low on freezer space, you can reduce it and concentrate it so all you have to do is add water later.
I love home made stocks! Sometimes I add what’s in the bottom of the roasting pan after roasting the chicken. This ends up putting a lot more fat in the stock though, so you will end up having to scrape some off. Also I don’t bother with cheese cloth because that stuff usually settles to the bottom of the bowl and I can easily avoid it. I also save the celery leaves, chop them up, and add them to the soup right before serving.
I save veggie scraps in the freezer, and I usually save stems from fresh herbs to add to broth as well. These can add a lot of flavor. Parsley and thyme stems are perfect. Oregano and rosemary stems can be a little strong, so I use these sparingly.
I do this in my crockpot. Either roast or crockpot-cook the chicken, pick off (most of) the meat, then make the stock on low overnight.
At my grocery the hippie antibiotic-free chicken is about $9-$10, versus the deli counter, Boar’s Head rotisserie chicken deli meat is about $9.50 a pound.
DIY method? QUITE the deal.
I have learned making chicken broth from my Granny, and she alsways advised me, to cook the water first and cook the vegetables with it and when it’s cooking, add the chicken. The Meat will be more delicious than when you cook it from the beginning. I usually use the boiled chicken then with some of the broth to make pumpkin soup. Even my ever hesitating youngest loves this combination :)
I’ve been making my own broth for years now. Its wonderful, cheap, easy and provides our bodies with so many extra nutrients that would normally end up in the trash/compost. My husband did a year of cooking school and taught me this early on in our marraige.
One thing, he says you can simmer a chicken broth for 3-4 hours but vegetable stock should only simmer for 45 minutes. I have no idea why, but I figure he must know what he’s talking about…or at least I’d like to think so ;)
I freeze my stock in the larger twist top ziploc containers, leaving a little space on top for expansion. They work great, and there’s less waste than using the bags as they’re washable. I use a dry erase marker to label the top with the type of stock (or soup) and the date.
I throw in a chicken bouillon cube or two as I’m making the stock for a richer chicken flavor.
In culinary school our chef would use mushrooms instead of carrots, helps the color of the broth. Also fresh veggies were a must. Personally I love adding leeks.
I’m a big fan of making stock, since it’s pretty much getting food for free. One of my favorite tricks is to get extra turkeys during the holidays and break them down – legs/wings get cooked and meat taken off and frozen for use in casseroles, etc., breasts removed and ground for burgers or to stuff into bratwursts, and the remaining carcass shoved in the crockpot to make stock. I love turkey stock for making risotto.
I do this too! I also throw in some garlic and dried rosemary/oregano and a bay leaf. I’ve found it’s best not to use “stinky” veggies (there’s probably a better word for that but I can’t think of it) like cabbage, broccoli, cauliflower, peas, etc in the actual broth making. I’ll add them to the broth after if I turn it into soup, but I think they give the broth a weird muddy flavor.