I’m pretty much a pizza addict. I want it all the time. Thin pizza, thick pizza, frozen pizza, artisan pizza, I want it all. I love exploring the pizza frontier, which is why I decided to test out this No Knead Pan Pizza technique. I’ve seen the technique quite a few places around the web, but this post from Serious Eats has a really excellent tutorial with photos.
The idea is simple. Make a basic batch of no knead bread dough (I used my awesome Focaccia Roll dough), plop it into a well oiled cast iron skillet, top it with your favorite goodies, then bake at a really high heat. The outer crust gets nice and crispy from all the oil, the inside dough is thick and bubbly, and the whole thing is just divine. Plus, as always, it’s super cheap! Hooray pizza night!

As mentioned before, I used the Focaccia Roll dough for my no knead pan pizza (halved to fit my skillet, plus added a little olive oil), I had some left over sauce and cheese in my fridge, and I stopped by the salad bar at the grocery store to get a handful of vegetables for toppings (my salad bar pizza method). This no knead pan pizza is great for using up leftovers, so keep this trick tucked up your sleeve. You can use leftover BBQ sauce as a base instead of red sauce, use up extra beans, cheese, veggies, or meat, whatever you have on hand. Just keep in mind that the dough needs at least 12 hours to do it’s thing, so you have to plan it out at least one day ahead.
No Knead Pan Pizza
Ingredients
DOUGH
- 2 cups all-purpose flour ($0.30)
- 1/8 tsp instant or bread machine yeast ($0.02)
- 1 tsp salt ($0.05)
- 1 Tbsp olive oil ($0.16)
- 3/4 to 1 cup water ($0.00)
PIZZA
- 1 Tbsp olive oil ($0.16)
- 1/2 cup sauce ($0.40)
- 1 cup shredded mozzarella ($0.99)
- Toppings of your choice ($0.84)
Instructions
- The day before, combine the flour, salt, and yeast in a bowl. Stir until they’re very well combined. Add 1 Tbsp of olive oil and 3/4 cups water. Stir until the dough forms a ball. If there is still dry flour on the bottom of the bowl or the dough doesn’t form a single, cohesive ball of dough, add more water, 1 Tbsp at a time until the dough comes together. The dough should be slightly sticky and shaggy in appearance.
- Loosely cover the dough in the bowl and allow it to ferment for 12-16 hours at room temperature. This develops the gluten, making kneading unnecessary.
- When it’s time to make the pizza, begin preheating the oven to 450 degrees. Oil a cast iron skillet with another tablespoon of olive oil. Use the excess oil from the skillet (there will be a lot) to oil your hands and the dough in the bowl. Pull the dough out of the bowl and place it in the oiled skillet. Press it down into the skillet until it covers the entire bottom of the skillet (it will be very loose and soft).
- Top the pizza with sauce, cheese, and your desired toppings. Cover the pizza edge to edge with the sauce, cheese, and toppings. The dough will be very thick, so there is no need for a dry edge or crust around the outside.
- Bake the pizza in the fully preheated oven for 18-22 minutes, or until the top is golden brown and the cheese is bubbly.
See how we calculate recipe costs here.
Equipment
- Cast Iron Skillet
- Mixing Bowls
Notes
Nutrition
Scroll down for the step by step photos!
This post contains some affiliate links, which means that we make a small commission off items you purchase at no additional cost to you.
How to Make Pan Pizza – Step by Step Photos
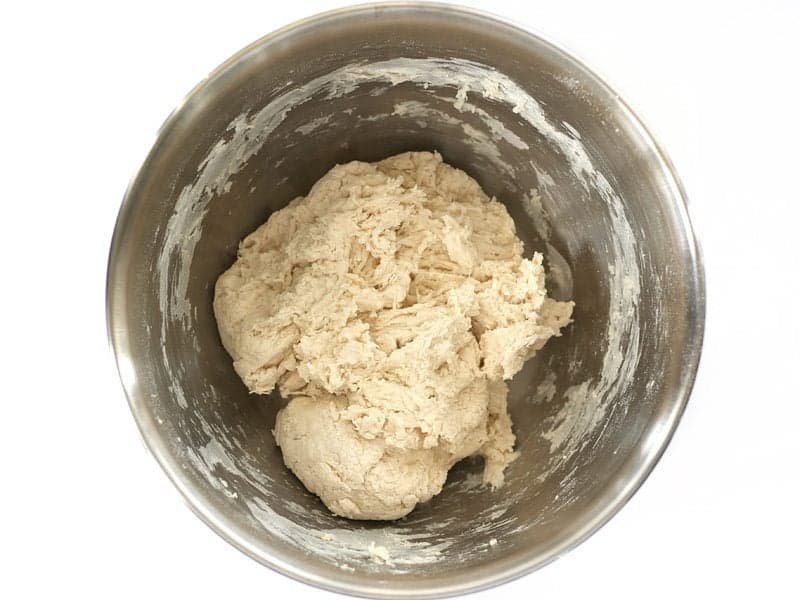
Begin the dough the day before so that it has time to “ferment” for at least 12 hours. In a bowl, stir together 2 cups all purpose flour, 1/8 tsp instant or bread machine yeast, and 1 tsp salt. Once those are well combined, add 1 Tbsp olive oil and 3/4 cups water. Stir until the dough forms one cohesive ball. See how there is no dry flour left in the bowl and the dough is all in one piece? If needed, add more water 1Tbsp at a time until it forms this sticky ball of dough.
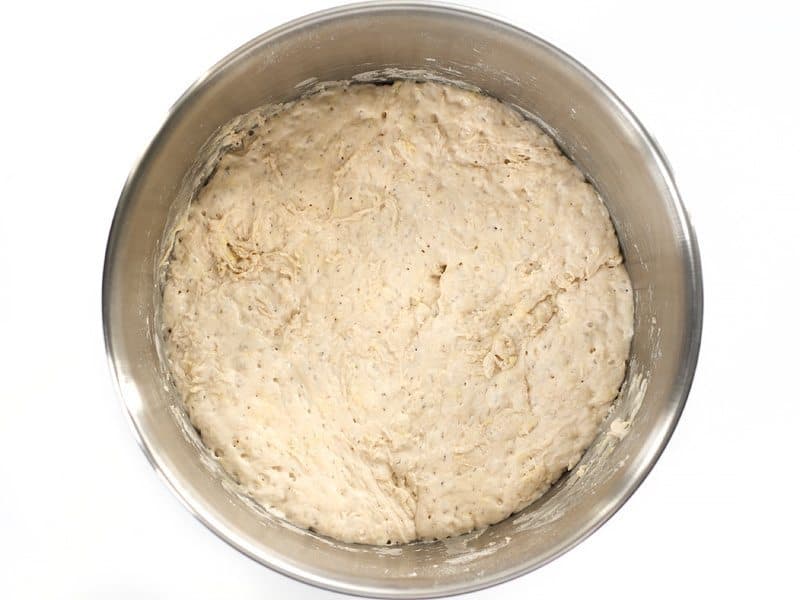
Loosely cover the dough and let it ferment at room temperature for at least 12 hours. During that time, it puffs up and becomes light and airy. It’s still very sticky, though…
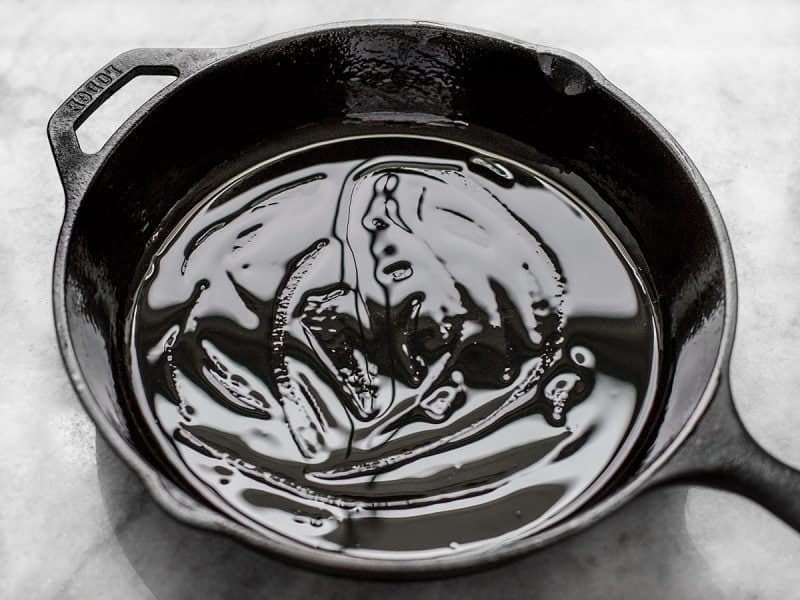
Begin to preheat your oven to 450 degrees. It needs to be FULLY heated before you put the pizza in there. Add 1 Tbsp olive oil to a 10 or 12 inch cast iron skillet and spread it around. There will be a LOT of oil, but that’s what gives pan pizza that awesome crispy crust.
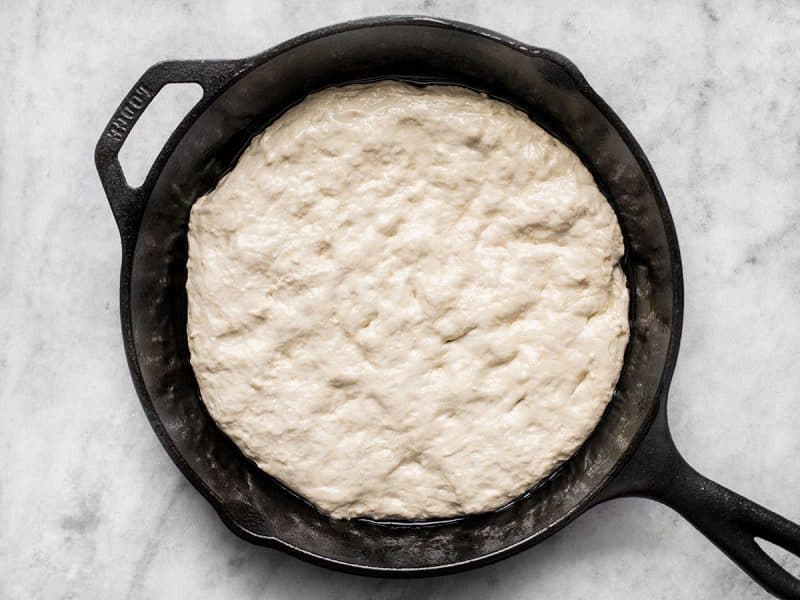
Use some of that excess oil to coat your hands and that sticky ball of dough, then transfer it from the bowl to the skillet. Press it out until it covers the bottom of the pan. The dough will be VERY loose and should be easily manipulated.
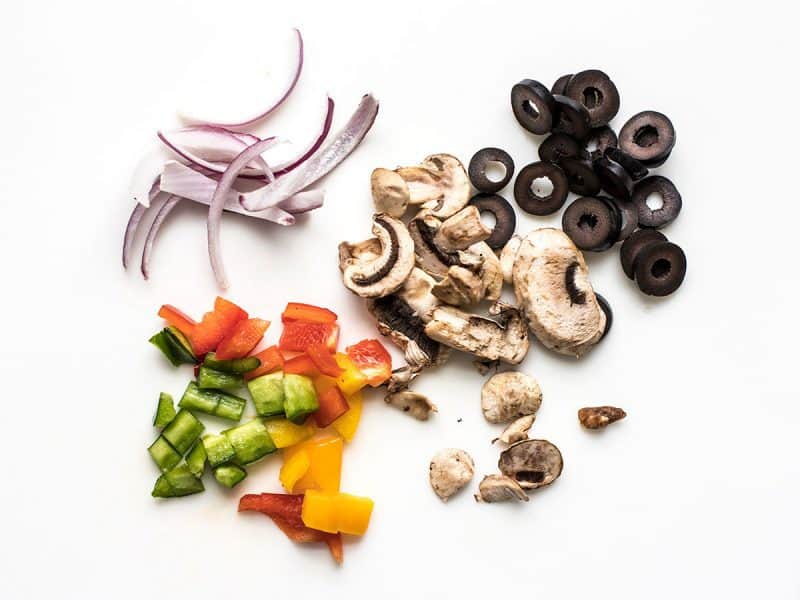
Instead of buying a bunch of things to add to the top of this pizza, I stopped by the salad bar and got a small scoop of black olives, bell peppers, mushrooms, and red onion. The small handful of toppings was only 84 cents! Much better than buying a whole package or item of each then trying to figure out how to use up the leftovers.
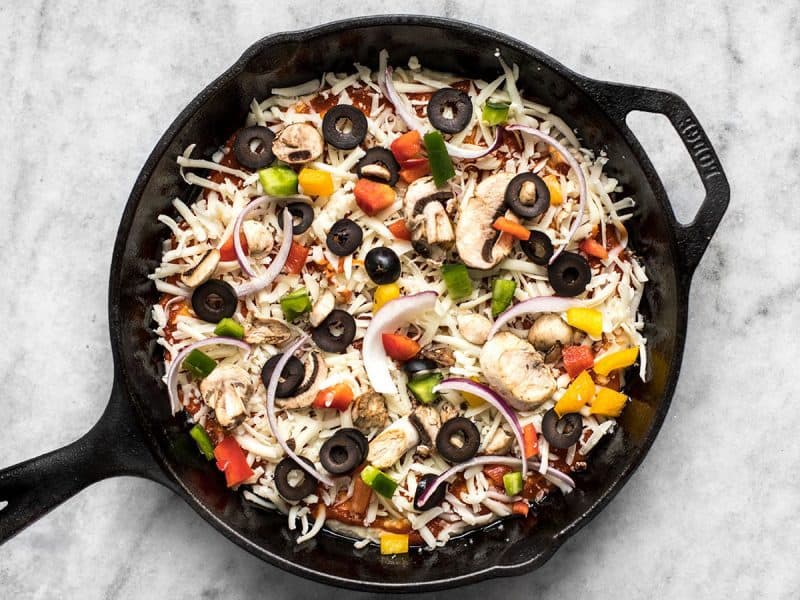
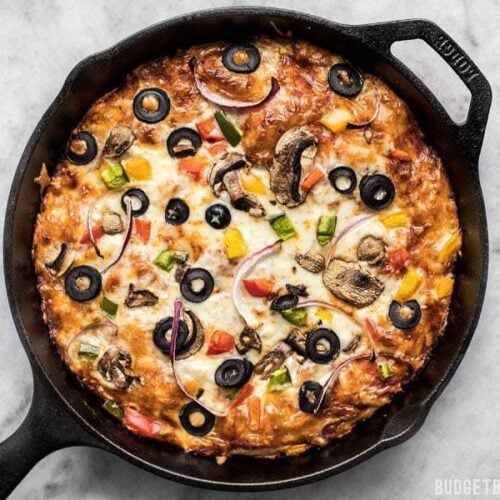
Top the pizza with sauce, cheese, and your veggies (I used leftover sauce and cheese from my fridge). Go ahead and spread the sauce, cheese, and toppings ALL the way out to the edge. The dough will be thick once baked, so you need all those toppings to go to the edge to balance all the bread and keep things moist. By this time the oven should have finished preheating, so go ahead and pop the pizza in the oven. Bake it for about 18-22 minutes (depends on your pizza, toppings, skillet, and oven), or until the edges are browned and the cheese is bubbly all over.
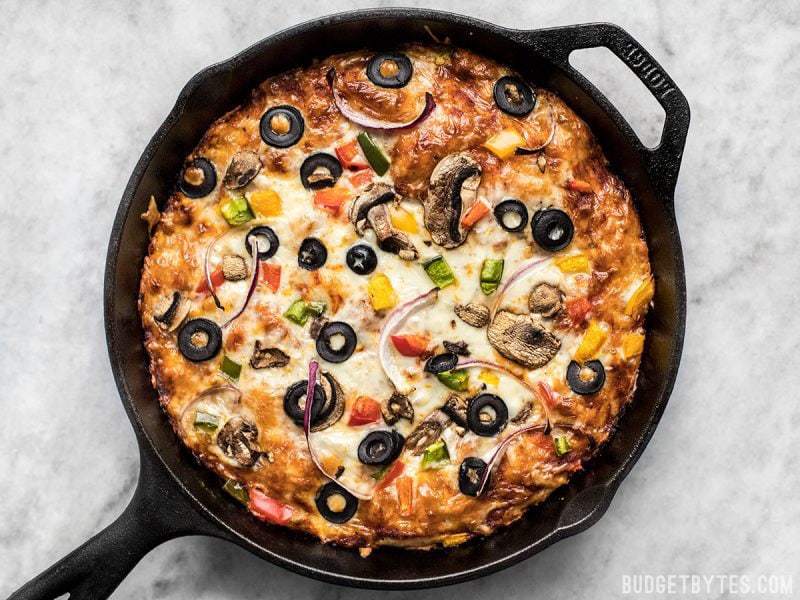
Like this! Yummm… smells like a real pizzeria in here. (take my word for it)
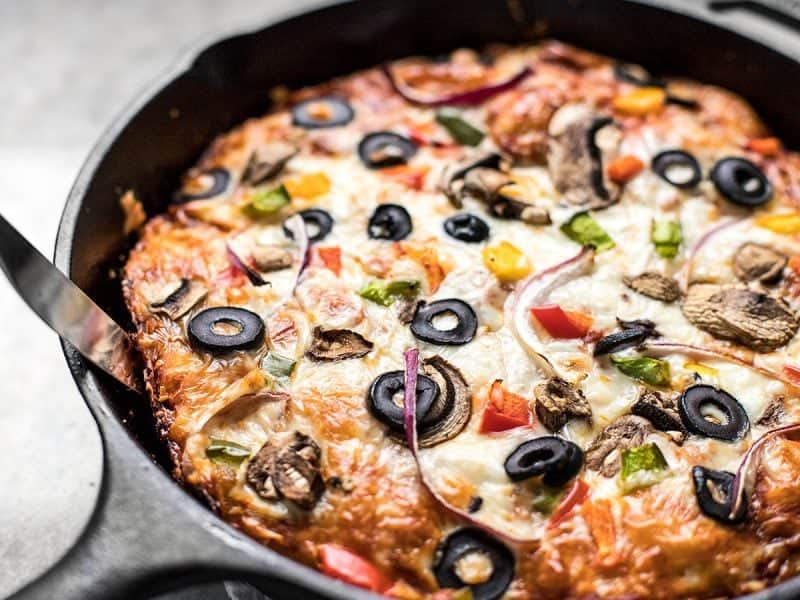
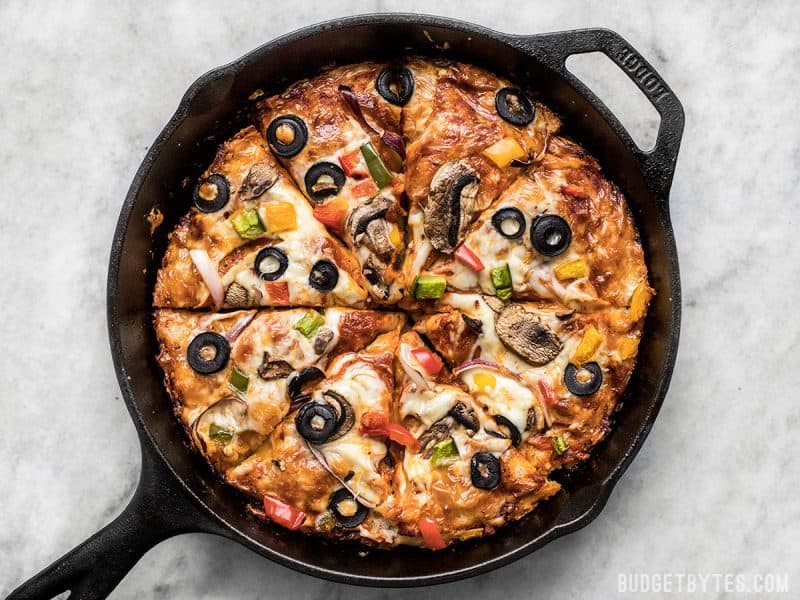
You’ll want to run a knife around the edges to loosen any cheese that has stuck to the side. Because we used so much oil in the pan, nothing should really be too difficult to loosen. Once loose, I suggest sliding the pizza out onto a cutting board to slice, rather than leaving it in the pan like I did for the photos. It’s rather hard to cut while in the pan and you may damage the finish on your cast iron!

Crispy on the outside, soft and fluffy inside, all around moist and delicious.





Hi Beth! I love this recipe. Can the dough sit for longer than 12 hours? Like 24 hours? Thank you! I love your site!
Yes, you can let it sit out for a couple of hours to get the yeast started, then keep it in the fridge for the remaining 24 hours. It will continue to ferment, just at a slower pace. :)
Hi Beth! I love this recipe and really want to make it. Is it possible to have the dough sit for longer than 12 hours? Even possibly 24 hours? I’m thinking I could make the dough the night before instead of in the morning before work.
Thanks for all you do! I love your site.
Yep, if you need to leave it for more than 12 hours, you can just pop it in the fridge after the first few hours. This slows down the fermentation process. It can actually sit in the fridge for a week or so.
This recipe is excellent! I’ve used your traditional dough recipe successfully for a while now but this one is so much easier. I love that I no longer have to knead or proof the yeast. This crust comes out soft in the middle and crisp on the outside. It also makes the perfect amount to cover my pizza stone.
I’ve found that the dough doesn’t dry out if I put a wet cheese cloth covering the bowl and then plastic wrap over that.
Thanks for the fantastic recipes!
Could you use an enameled cast iron skillet to do this? I have a dutch oven type cast iron pot that is enameled.
Yes, that would probably work just as well.
This recipe is DANGEROUS! So simple, so delicious! Beth, you are the best!
I’m not sure what “loosely cover” should mean – I covered the dough with a kitchen towel, and after 8 hours a very hard outer shell has formed. It doesn’t look promising. I live in a very dry climate.
For other bread recipes I’ve rubbed dough with olive oil before leaving it to sit for a long time, and/or used a damp towel. Or maybe I just didn’t use enough water with the dough?
Ah, the dry climate probably made the biggest difference. A damp towel probably would work well. I just covered the bowl with plastic, but left it loose so that some air could flow in and out.
This is exactly what happened to me and I also used a towel on top. Next time I will use cling wrap or a wet towel. It didn’t rise at all and is dry and sad. I don’t live in a dry climate (Portland, OR!).
This looks good! I want to try it, but I don’t have a cast iron skillet. The only two kinds I’ve got are non stick and stainless steel… Now that I think about it, I do have a griling cast iron, but I’m not sure this would work or if I would like to have a wavy pizza! Do you think it would work in the stainless steal pan? Or even in the grilling cast iron?
You could definitely do it on the grilling cast iron if you don’t mind the wavy bottom. :) The issue you run into with stainless steel is that it’s just not as thick or heavy as the cast iron, so the heat won’t be quite as even. You run the risk of the outer edge browning/burning too fast. BUT, I haven’t tried it and it probably depends on the particular pan in question (and make sure it doesn’t have a plastic handle!).
I was wondering if I could make the dough ahead of time, storing it in the fridge… then bring it out the night before to rise/ferment? For that matter, could I freeze the dough, then thaw it and do the same thing?
Yep, you can actually leave it in the fridge to ferment for a couple of days, too. It will continue to ferment in the fridge, just at a slower pace.
I was wondering what temperature “room temperature” is for you. My house is pretty chilly in the winter with the thermostat set at 62. If this dough can be refrigerated, then it sounds like I could make this, but I might need to allow it to rise a bit longer. How can you tell it is ready to be used?
Yep, you can definitely do it in the refrigerator, as well, but it will take about twice as long. Room temp around here is somewhere between 70-75, depending on the season. You’ll know it’s ready to use when it’s big and bubbly, like in the second picture of the step by step photos.
hi! Would this work in another dish than cast iron? Thanks!
It might work okay in a heavy ceramic dish. The special thing about cast iron is how it conducts the heat. Ceramic does a pretty good job, too, but not quite as well as cast iron.
You can also use a round cake pan!
Thank you so much for this recipe and your wonderful website! This one turned out perfectly and was a huge hit with the family. We have recently enjoyed your sesame chicken and yakisoba, and your swamp stew is a staple at our house! I love that I can cook such yummy food, even when money is tight. Thanks again for all you do!
I want to make this but I keep having trouble with the dough! It keeps making stiffer bits on top within 3-4 hours of being left on the counter. I’ve made the original focaccia recipe and that worked fine, but the three times I’ve tried this (with the oil in the mix) it gets stiff floury bits on the top like a shield. Is that from not enough water? Too much water? I can’t figure out how to fix it!
Hmmm, I’ve never had that happen. Have you tried covering it loosely with plastic? That should help hold in the moisture and keep the skin from forming on top. Not enough water may be an issue, too, but it’s hard to say without seeing what’s actually going on.
I’ll give that a shot. I’m thinking it has to do with living in a hot place with less moisture in the air (ie, AZ). I think it’s basically the dough drying out on top. I’ve hit closer to 1+c of water to get it to form into a sticky ball. Ahh, the fun of cooking in a stupidly hot place.
That worked!! Thank you so much! Made the pizza last night and it was delicious. :)
I would like to try this but I don’t have a cast iron skillet. You think this would work on a dutch oven??
I think it would work in any really thick, heavy cooking vessel, but cast iron is definitely the best. :)
I’ve made this recipe five times so far and each time it turned out great. The first time I was worried because I don’t have a cast iron skillet. I used my 12″ calphalon everyday pan. This one is a keeper. Thanks so much!
Is “active dry” or “quick rising” yeast the same thing?
Hmm, I haven’t heard of quick rising, but you will definitely need “instant” or “bread machine” yeast for this recipe. Active dry yeast requires proofing in warm water before it is added to a recipe, whereas instant or bread machine yeast does not.
I can’t find this anywhere and I’ve checked Giant Eagle, ALDI, and another store. :( I also found “RapidRise” yeast.
You can buy it on amazon. They have several brands.
You are a genius.