For the entire month of September, I’ll be participating in the SNAP Challenge and attempting to eat on $4.50 per day. Read more here.
For week 4 of the SNAP Challenge, I purchased a rotisserie chicken from which I planned to make a few different meals. Rotisserie chickens are probably one of the most awesome “convenience” items because they are useful for such a wide range of dishes. Once the meat is pulled from the bone it can be use to make just about anything from sandwiches to casseroles, salads, or soups. What’s left over after you pull off all the meat can be used, too! The remaining bone, cartilage, fat, and bits of skin are filled with flavor and nutrients that can be made into the most wonderfully magical chicken broth.
I’ve made homemade chicken broth before using the stove top and it’s unbelievably easy. If you go one step further and use a slow cooker, it’s nearly effortless. All you need is a chicken carcass, a couple vegetables, some herbs, and water. Pop it all into a slow cooker, turn it on, and come back later to find all the work is done for you. Awesome, right?
This time I happened to have some celery, carrots, onions, and parsley on hand because I was going to make chicken noodle soup with them later, but you can make this broth practically cost free by saving your vegetable scraps throughout the month and using them to the flavor the broth instead of the whole vegetables. What do I mean by vegetable scraps? Well, onion and carrot peels, celery leaves, stems from parsley and other herbs, or anything that you’d usually cut off from vegetables and throw away. Cleaning is key, though. You don’t want a sandy broth, so make sure to wash your scraps well (or just wash the whole vegetable well before cutting off the scraps) and don’t save anything that looks rotten or moldy.
The broth is customizable, but onion, carrots, and celery are the magic trio. Garlic is good, too, but you want to go light so that it doesn’t over power the broth. Be careful with other vegetables, as they may change the color or cause odors in the broth (beets, obviously, will turn the broth red and any cruciferous vegetables, like broccoli or cauliflower, will give it a sulfurous smell). For herbs, I like to keep it simple with parsley, bay leaf, and black pepper. You can experiment and customize this to your liking, too (a little thyme or rosemary might be nice).
So, here it is… The incredibly simple step by step process of making chicken broth in a slow cooker:
How To: Slow Cooker Chicken Broth
This post contains some affiliate links, which means that we make a small commission off items you purchase at no additional cost to you.
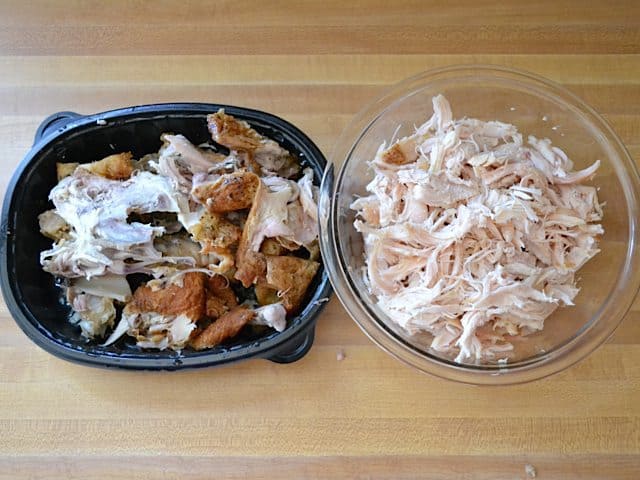
Step One: Get yourself a chicken carcass. I used the leftover bits of my grocery store rotisserie chicken.
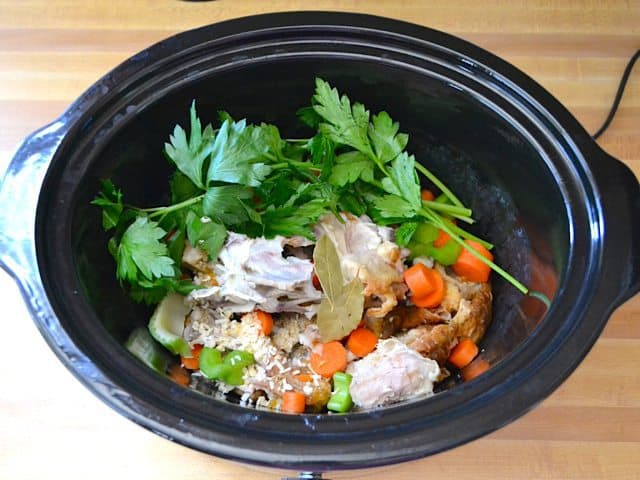
Step Two: Add the chicken carcass, some vegetables, and herbs to a large slow cooker (I think mine is a 5 or 7 quart slow cooker). I used one stalk of celery, two carrots, a handful of parsley, two bay leaves, some freshly cracked pepper, and a sprinkle of dried onion flakes (because I only had one onion left and was saving that for the actual chicken soup).
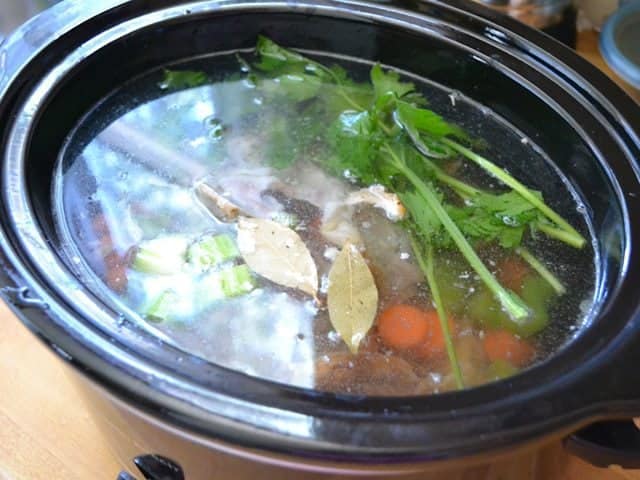
Step Three: Add water. I filled up my slow cooker to the top, which was about 10 cups. There’s no real rule for how much water here, so don’t fret if you can only fit six cups or add up to 12. But, I’d try to add as much water as possible. There’s a lot of flavor in them bones, so don’t let it go to waste.
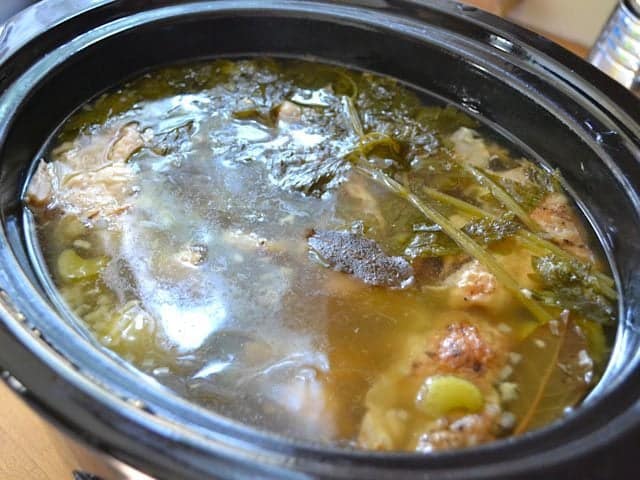
Step Four: Cover the slow cooker, turn it on to high, and let it go for at least six hours. I was short on time, so I had to finish it at 6, but if you let it go longer, the flavor will get deeper. The beauty of the long, slow cooking process is that all of that cartilage breaks down and adds body to the broth. NOM.
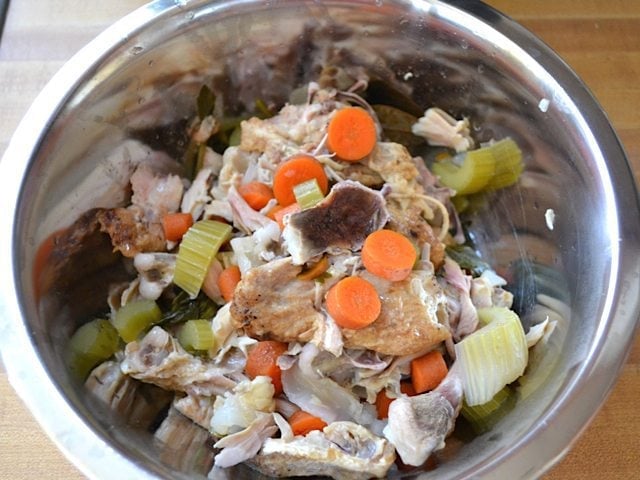
Step Five: Use a slotted spoon to remove the large pieces. Check to see if there is still any meat clinging to the bones, and if there is, you can pick it off and save it. If cooked long enough, the vegetables will have nearly disintegrated into the broth, but because I had to cook mine for a fairly short amount of time they were still whole. I picked those vegetables out and saved them for my chicken soup!
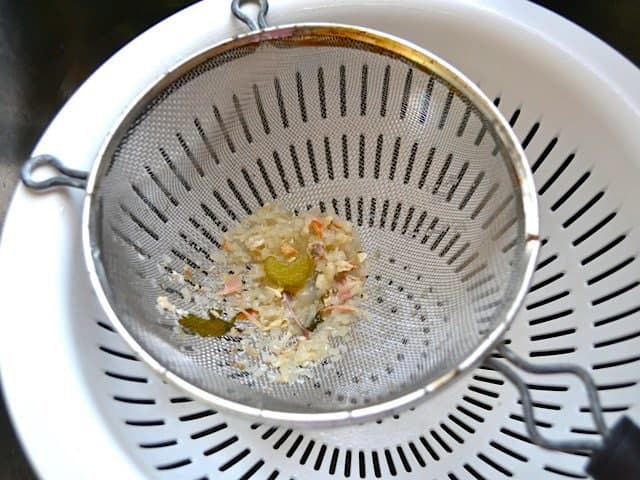
Lastly, you’ll want to strain out the sediment. You can do this with a wire mesh strainer (over a bowl or pot to catch the liquid) or with a colander lined with cheese cloth (again, over a bowl or pot).
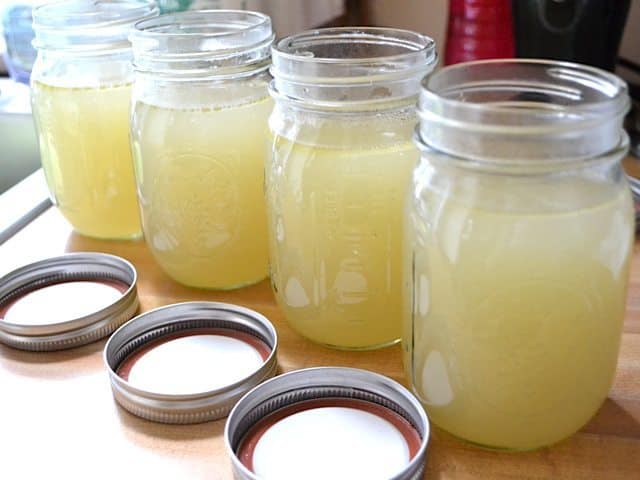
Salt the broth if desired, or you can leave it unsalted and just salt whatever dish you’re using the broth in later. Store the broth in the refrigerator for up to a week or in the freezer for several weeks. If freezing, cool the broth completely in the refrigerator first, then transfer to the freezer. I like to freeze my broth in heavy duty zip top freezer bags laying flat, so they are stackable and don’t take up much space in the freezer. (This is actually a photo from my stove top chicken broth. I was too busy packing up for the move to take photos of the slow cooker broth, but it looked exactly the same!)
I know a lot of you make your own broth at home, so how about sharing your favorite add-ins and tips? Leave a comment below! :D


Awesome recipe for slow cooker chicken broth. I’m actually making it for my dog in which I soak his kibble answer from the refrigerator. He has no teeth so this is a simple way to get the nutrients from the kibble into his tummy. Thank you
Great savings if a person knows how to cut up a whole fryer. It’a a skill worth learning because they are cheaper than parts. I live alone but one chicken provides me with plenty of parts (legs, breasts, wing portions and thighs) for several meals. The wing tips, back, neck, heart and gizzard go into a freezer bag labeled “bony parts”. When it’s full, I throw it all into my slow cooker and make broth. I keep a separate, labeled bag with my veggie scraps for stock. Nothing gets thrown away except for the liver and the cluck! (hello from BR)
Hi there,
How long should I cook a whole chicken I water in my slow cooker if it is on low?
Many thanks?
Hello, I’m sorry I haven’t tried that method so I’m unable to offer advice.
I tend to do 12 hours on low. I find it only gets a darker brown stock
When making Slow Cooked Chicken Broth, can half a Chicken Carcass be used or would that make the Broth too bland?
Yes, that should work great. All the bones and connective tissue will give it plenty of flavor. :)
If you reduce the amount of liquid the flavour should be there
I freeze rotisserie chicken carcasses, skin and drippings and then when I have a few I put them into a zippered mesh laundry bag along with onion, bay leaf, celery tops, whole peppercorns and then into a slow cooker overnight. The laundry bag makes it easy to remove everything when the cooking is done. I then strain thru cheesecloth, cool and refrigerate. Next day I skim off the fat that has risen to the top and add any additional seasoning. A little turmeric gives it a nice color
Hi Beth. My budget requires that I am frugal. I wash and freeze the outer layers of yellow onion which I use in my bone broth instead of buying another onion. I often use celery, carrots, roma tomatoes, and herbs as aromatics. I notice when those food items are just getting ready to transition–but haven’t transitioned–to being not quite right–wash them rough chop them and put them in my freezer.
I love it! Thanks for the tips! :)
Hi Beth. I am making a chicken in the slow cooker now–in the way you posted. Now I am planning ahead, planning to make chicken stock from the carcass. I will be using a real onion, so how much onion do you suggest I use?
Thanks Beth for your blog.
I’ve made broth using one small onion before and it works well. :)
I didn’t even peel or slice the carrot as small as shown in the pictures. Larger chunks of celery and parsnips and a head of garlic sliced in half are also a tasty addition. I’m a huge fan of thyme too.
i put the carcass and veggies on a broiler pan and put them in the oven @ 350 deg roast them until they are bronzed this carmalizes them and adds a real lot more flavor to the broth
karen, ;you put the cooked broth in the fridge overnight then scrap any fat that settled on top off. the fat always settles at the top
Thank you for an amazing blog and recipe.
I’ve always been a bit scared of the amount of fat that is in the broth.
Does anyone know how many calories (roughly) is in it?
It definitely depends on the chicken used. One thing you can do is chill the broth in the refrigerator over night and the fat will float to the surface and solidify, allowing you to just scoop it right off. :)
If using the carcass only and no skin you won’t have much fat. After the broth is chilled the fat will rise to the top and you can skim it off very easily.
Refrigerate the broth and the fat solidifies then skim if off, simple as that but, remember there’s flavor in that fat so you might want to skim only part of it off. Bon Appetito,…..Shalom !
I was wondering if turkey should be done in 2 batches since its bigger?
That’s up to you. If your cooker is big enough, you can do one batch.
I would not recommend saving onion scraps. I would not recommend saving any portion of unused onion for any length of time at all. Even in a sealed container, onions have a way of absorbing all the bacteria around it in the fridge, on the counter, everywhere.
Except, that isn’t true.
http://www.snopes.com/food/tainted/cutonions.asp
Also:
“The fact is that onions are not especially prone to bacterial contamination. In fact, quite the opposite. Onions feature a variety of sulphur compounds that have antibacterial activity.”
http://blogs.mcgill.ca/oss/2012/12/29/is-it-true-that-onions-can-absorb-bacteria/
I just did a slowcooker broth and I did it over several days. At the end of one day I would take out about half the broth and add more water. I ended up with about about 16 cups of broth to freeze. That will do a few soups and it was nice to get that muh since I don’t do whole chickens often.
Like to freeze broth in muffin tins, each muffin round holds about a 1/2 cup of broth. Once frozen pop out the cubes and toss into a freezer bag. It’s an easy way to not only keep broth but to be able to use smaller quantities for gravy, sauces etc…just thought I would share….keep up the great work, I have made both the back bean soup and slow cooker marinara this week and it’s only Wednesday….my freezer will be full and my wallet too….:)
Great tip, thanks!!
That is the best idea I’ve heard in a while ! Thank you for the idea.
Great idea! Thanks so much for sharing it with us.
I boil a chicken once a week but I do it on the stovetop. I pick the meat off and separate it into 2 baggies then save the broth for whatever. Sometimes I use it to make polenta. Yum. I also cook for my chihuahuas. They eat chicken, carrots, garlic, and whole wheat pasta. I save the broth from their food too.
Please be careful about feeding your dogs garlic or onions, it can be very bad for them!
https://www.aspca.org/pet-care/virtual-pet-behaviorist/dog-behavior/foods-are-hazardous-dogs
I have various chicken pieces that I’ve been saving, ranging from various organs to skins, that I’ve been wanting to use for broth, but I’m not sure if it’ll be enough to produce a slow cooker’s worth of broth.
Is there any problem with filling it halfway, test tasting it after a period of time, and then adding more water if it’s strong enough?
It shouldn’t be a problem to add more water at the end if needed. :)
I let mine go on low for 11 hours while I was at work and the veg, while not disintegrated, didn’t taste all that great. But I felt too guilty to throw out the veg because it seemed such a waste!
My solution: puree the leftover veg in a blender with some of the broth and make it into a quick pasta sauce for lunch tomorrow.
The resulting puree wasn’t quite flavourful enough on its own so I cracked black pepper into it and melted some butter in. I imagine it would go great with a little bit of canned diced tomatoes or a dollop of tomato paste/puree, but it certainly needs to be jazzed up for taste. At least I managed to save it from the bin!
Great idea!
I keep a big bag in the freezer and collect chicken bones from various recipes in it. When a 1gal size bag is full, it’s just the right amount to go in my large slow cooker.
Sometimes I don’t add extra veggies to the stock, and it is not a big difference in flavor if it is going into something flavorful like tomato soup or chicken chili. So if you don’t have any onion, celery or carrots on hand, or don’t want to spend extra, skip it!
Two quick questions, before you freeze this, do you let it cool and skim the fat from the top as I have read in other recipes?
Also, when you use this to make your soup, do you dilute it with water to thin it out or use it as is?
I made turkey broth last year with a turkey carcass and used that to make soup and the next day the leftovers were like jello!
Thanks – love your site!! :)
I like to leave the fat in because I like the flavor. :) The jello effect is from the gelatin found in the bones. The gelatin gives the broth a lot of body and flavor. It is solid when chilled, but if you heat the soup up again it will become liquid. I don’t water it down at all when I use it because it’s a non-concentrated broth, so I can just us it “as is” :)
What’s crazy is that I was just checking up on your blog and wasn’t looking for a chicken stock recipe, but that’s exactly what I was going to make when I got home! How fortuitous!
Homemade broth is really one of the best tricks for getting the most out of your food. I usually do a vegetable broth since we’re a half-vegetarian household: just save all your veg scraps in a bin in the freezer until you have around 4 cups, boil for 20 min with plenty of water (one of the many veg broth benefits is that you don’t have to cook it for hours on end to break down bone marrow etc), strain, cool, and freeze. I freeze mine in 2-cup containers and use them for soup or risotto or adding to sauces. Ice cube trays are not for me, but I have no qualms about half-melting a puck of broth (usually in a hot pan), using the liquid, rinsing the remaining frozen bit, and throwing it back in the freezer for later.
I like adding a tablespoon of apple cider vinegar to the broth to help the bones break down and add some nice flavor to the stock.
If you have cheesecloth, you can put the chicken bones in that and then you have chicken soup :)
What size mason ball jars are you using to store your chicken stock? Do they freeze well in those jars? How long do they last in the fridge and in the freezer?
Looking to purchase them for storage of bulk rice and stock etc.
Love your website, I’ve learned many new money saving ideas that have cut my grocery bill by several hundreds. Keep up the amazing work!
Those are 12 oz. jars and I really just used them for the photos. :) I like to freeze the broth in quart sized freezer bags laying flat so that they are stackable and low profile in the freezer.
I make mine in the crock pot as well. I cook it on low overnight. I don’t usually add veggies, but the flavor still comes out great. I do, however, add a little apple cider vinegar as it is supposed to pull more nutrients from the bones.
we make veggie broth the same way–just delicious and a rich, free addition to sauces and other recipes, as well as soup. all those carrot ends, onion skins, tough-looking beans, celery tops, can go in a bag in the freezer till we have a good bunch. then just add water, any handy fresh herbs, and slow-cooker overnight.
my mom, a child of the depression, threw in any left-overs and plate scrapings to her soup-base, including chunks of cornbread, mashed potatoes, etc. making a thicker soup base.
I always make my stock in the pressure cooker. It’s so quick- done within the hour. I have a bag in the freezer that I pop bones etc into and when I have enough I make stock. I use all the usual veg and plus some herbs and whole pepper corns. A Spanish friend saiď you can cooked soaked chickpeas in there too- tasty chickpeas and stock all at the same time. I’ll have to give it a try.
I can’t wait to buy a pressure cooker!
I like to buy bone-in breasts and thighs on sale, debone them, and save the bones and skin until I have a potful.
I also add about a tablespoon of apple cider vinegar – the taste disappears in the final broth, but it really helps get all of the gelatin out of the bones.
One thing about using the skin – it adds flavor and a lot of fat. If you chill the broth, the fat congeals on the surface and is really easy to remove.
Here’s a really nice saving tip: Keep 2 zipper lock bags in the freezer. One is for washed vegetable scraps (e.g. vegetable peels, onion skins, that half bunch of herbs you have in excess because the recipe only calls for one pinch, carrot tops, salad greens that are just about to go bad but not yet too bad, etc.), then the other is for chicken carcasses and bones. When the bags are full (or even half-full), it’s stock making time. Just use the bag contents in the same method described here. This is a great way to take advantage of the nutrients in the parts of the vegetables that we don’t normally eat. The onion skins also provide a good natural golden tint to the finished stock. I add a few whole cloves, pepper corns, and bay leaf for enhanced flavor, but those are optional.
I find that no matter what vegetables are in the veggie bag, I still get the same chicken flavor anyway because the chicken-ness trumps all other flavors.
I usually do a 24-hour simmer on low. It produces really great stock that’s incomparable to store-bought ones.
I was wondering about freezing “scraps” happy to read your tip & will try it soon. Thanks
I let my broth cool, and then place it in a wide mouthed bowl over night in the fridge. The fat will solidify and can be scraped off before decanting into storage containers.
We love to make homemade chicken broth! It’s so much better than buying it at the store and it’s so easy to make!
I do my broth the same way as you, but I always roast the bones first. Just put in 350 degree oven and roast until golden brown. I also put a splash of apple cider vinegar in the pot to draw out the calcium. Roasting the bones really ups the flavor and makes the broth golden brown. I have also just started turning finished broth into homemade boullion – easy and takes up so much less space to store. http://www.simplebites.net/homemade-bouillon-cubes/
Awesome, thanks for the link!
You should be cooling your broth on the counter before putting into the fridge or freezer.
Most new freezers and fridges can handle warm items being put in them just fine.
It’s a recommendation being made now to chill the broth or warm food as fast as possible to avoid bacterial growth.
I pressure.can mine into pint and quart jars. Saves me a ton Of room In The freezer
I make chicken broth any time I have leftover bones of any sort. If I only have a few (say from roasting a few thighs or whole chicken breasts) I pop the bones in a freezer bag and keep adding until I have around a chicken’s worth, then make up a batch. I freeze the broth in 2 and 4 cup containers so I have the right amounts to make soup or add to recipes. It’s so much better than canned or concentrate, and essentially free!
That’s my favorite way to make chicken broth! I let it go overnight, and then strain out the disintegrated caracass the next day. I don’t usually add much by way of vegetable, but if I do it’s usually onion skins, which make the broth more of the lovely yellow color we usually associate with chicken broth. My crockpot holds 8 cups of water once I add the chicken, which is enough for 2 recipes of soup for my family–one the day I make the broth, and another later, since I freeze the remainder.
I like to add a couple of parmesan rinds to my broth as it cooks, or adding a few large chunks of ginger makes for great soup for sick days
I love both of those ideas! Thanks for sharing!
I also save my parmesan rinds to put in my soup stock! It really adds an amazing flavor.
Adding a little bit of lemon juice or vinegar makes the chicken bones release more calcium into your broth.
I always add some apple cider vinegar when making my chicken stock as I’ve read that it helps to draw the calcium out of the bones for a healthier stock. Can’t make stock too often as I only have a small freezer, the one above my fridge.
I always intend to make chicken broth with the bones when I make a whole chicken but I just never do it. Throwing it all in the slowcooker though sounds like it’s acheivable. Maybe I’ll do it this time. I have some good bones in the fridge right now.
Sarah
thesloppyperfectionist.blogspot.com
Quick question, my grocery store doesn’t allow the purchase of hot food, so I wouldn’t be able to buy a rotisserie chicken. I’m also doing the SNAP challenge, and the DHS website I looked at says no hot food. Does your grocery store accept the food stamps for foods like that?
I made your Blueberry Banana Oatmeal Bake as part of our challenge today, and it was a huge hit! Enough serves for 6 with plain Greek Yogurt, it was heavenly!
That was something I overlooked when shopping for this week’s SNAP challenge. But after posting the last recipe using the rotisserie chicken, a lot of readers chimed in to say that in many places you can buy rotisserie chicken with food stamps as long as it’s chilled. Many stores sell the previous day’s rotisserie chickens chilled and at a discounted price. If you can’t find that in your area, you can try roasting your own whole chicken, which is actually pretty easy (you just need to have some free time). Here is a link to how to roast your own chicken: How to Roast the Perfect Chicken.
Bone-in chicken is cheaper, and better-tasting, than boneless/skinless. I cut the meat off the bones if I’m doing a stir fry or whatever and freeze the bones/skin until I have a full freezer bag. Rotisserie carcasses too. If you’re using those, they’re usually salty, so I don’t add any salt. I’ve read about roasting the bones first for added flavor, but I haven’t tried that yet.
I’ve roasted bones for both chicken and beef broth using the recipes from 80s chef “frugal gourmet”. You use chicken neck bones and the beef bones that the meat counters keep for dogs, I think their thigh bones, almost bare.
Roast for 30-45 minutes on a baking sheet and they make the most beautiful broth.
Agreed – roasting the bones and also the onion and carrot (in large chunks) for about 40 min at 400F gives the broth gorgeous colour and some caramelized flavour. Yum.
I can usually get two batches of broth out of one batch of bones in my slow cooker. The second time, I add more vegetables (I generally dispose of most of the old vegetables, but don’t really worry about getting every last bit out) and cook it for about twice as long as I did the first time (the slow cooker is usually going overnight in that case), but the second batch of broth usually is as flavorful (and sets up as well into that wonderful thick jelly that I like to see in my homemade broth) as the first.
Fun facts about homemade chicken broth:
In the slow cooker, cooking it on “high” can cause the broth to go cloudy. I prefer to do mine on “low,” because the finished broth looks nicer. ;)
I also freeze my broth in ice cube trays! By my measure, 1 ice cube = 1/8th of a cup (your trays may vary). I store them all in a big gallon ziplock bag and can just pop 2-4 into a pan to flavor up a stir fry or cook some veggies. It’s less wasteful than using up and having to throw out a bunch of baggies, too.