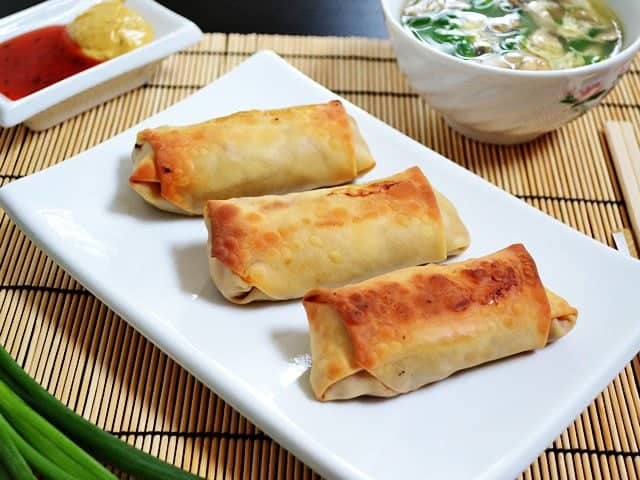
Okay, I might just have to make egg rolls all the time. They were so much easier than expected! And, because I decided to bake mine, they’re pretty freakin’ healthy. And, wow, super inexepensive! Just over 50 cents for two rolls? Yes please. Win, win, win!
Baking egg rolls definitely creates a different texture than frying, but I still liked them A LOT. It’s more of a “crunch” than a “crisp” when you bite in… But, if you wanted to fry these, they would be every bit as easy and probably even more delicious. If you don’t have a deep fryer, a couple inches of vegetable oil in a heavy bottomed skillet would probably do the trick. …I just have an irrational fear of frying things. I guess I’ve been badly burned one too many times and I know that one day it’s going to splatter on my face and that’ll be the end of me.
I also experimented with freezing the egg rolls uncooked. After freezing I put them straight into a hot oven without thawing. The texture was a little less than great but they were still delicious all the same. I will be freezing some the next time I make them. More about that in the photos at the bottom of the post.
There are a lot of step by step photos with this post, but don’t be mislead. It’s an easy process… I just wanted to catch every little step because most of this is hard to describe in words!
What to Serve with Egg Rolls
Take your takeout fake-out meal to the next level by serving these egg rolls with Easy Lo Mein, Vegetable Fried Rice, or Egg Drop Soup!
[np_shared_counts]
Vegetable Egg Rolls
Ingredients
- 1 Tbsp vegetable oil ($0.08)
- 1/2 tsp minced garlic ($0.04)
- 1 inch fresh ginger ($0.12)
- 4 oz. mushrooms ($0.99)
- 2 medium carrots ($0.25)
- 3 medium green onions ($0.23)
- 1 small head green cabbage ($1.70)
- 1/4 cup soy sauce ($0.24)
- 1/2 Tbsp cornstarch ($0.03)
- 1 tsp sesame oil ($0.12)
- 1 pkg 20 ea egg roll wrappers ($2.00)
- as needed non-stick spray ($0.10)
Instructions
- First prepare the vegetables. Peel the ginger and grate with a small holed cheese grater. Peel and grate the carrots on a large holed cheese grater. Mince the garlic (if using fresh rather than pre-minced). Clean and slice the green onions and mushrooms. Peel the outer leaves from the cabbage, cut into quarters, remove the core, and then slice thinly into shreds.
- In a very large skillet or wok, heat the vegetable oil over medium heat and saute the green onion, garlic, and ginger until slightly softened (1-2 minutes). Add the mushrooms and continue to saute until softened (about 5 minutes). Add the carrot, saute for one minute more, then add the cabbage. Continue to cook and stir until the cabbage has reduced in volume by half (increase the heat to medium-high if necessary).
- Dissolve the cornstarch in the soy sauce. Add that to the skillet and stir to coat the vegetables. The heat will cause the mixture to thicken and create a soy sauce glaze. Drizzle the sesame oil over top and stir in. Turn the heat off. Give the mixture a taste and adjust the soy sauce and sesame oil to your liking. Transfer the mixture to a bowl to cool.
- Begin to fill and roll the egg rolls. Place one wrapper at a time on a clean surface and place about 1/4 cup of the cabbage mixture just off center, close to one of the corners on the square. Roll the corner up and over the filling, fold each side in, and then roll the rest of the way up. Keep a small bowl of water near by and use it as “glue” to hold the corners of the egg roll wrapper in place. (See step-by-step photos below)
- Preheat the oven to 425 degrees. Prepare a baking sheet by covering with foil. Place the egg rolls on the baking sheet and coat with non-stick spray. Roll them over and coat the other side (you can brush with vegetable oil if you’re opposed to non-stick spray). Bake in the fully preheated oven for about 20 minutes or until golden brown and crispy. Turn the egg rolls over half way through cooking and rotate your baking sheet if you have hot spots in your oven.
See how we calculate recipe costs here.
Nutrition

This post contains some affiliate links, which means that we make a small commission off items you purchase at no additional cost to you.
Step By Step Photos
Start by prepping all of the vegetables so they’re ready to go. I used cabbage, carrots, mushrooms, green onion, ginger, and minced garlic (in the jar).
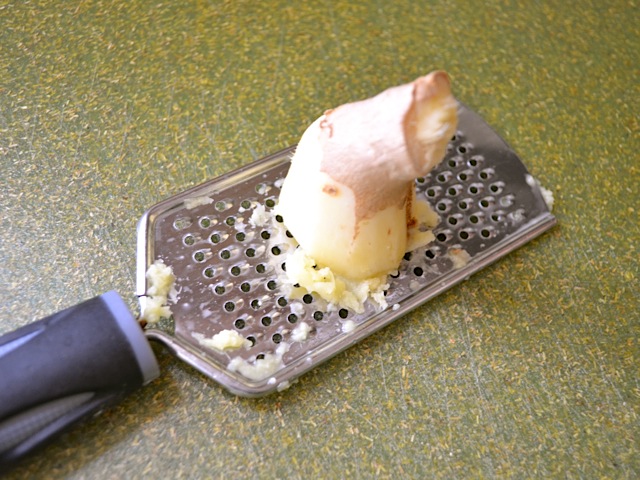
Peel and grate the ginger. I use a small holed cheese grater rather than mincing with a knife, and I grate it right over the skillet to catch any juices, which there are a lot of.
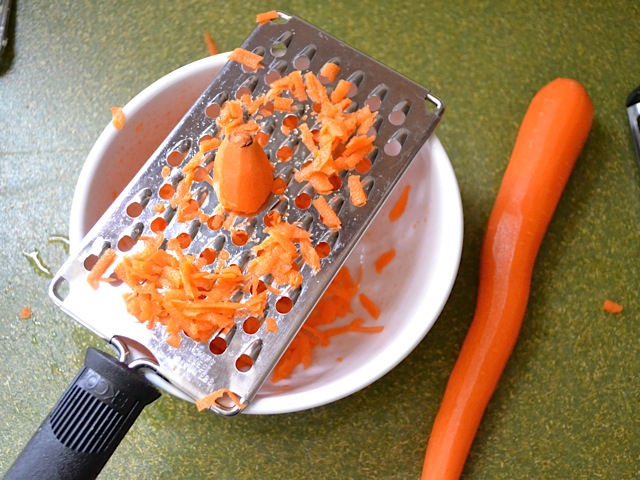
Peel and grate the carrot. I use a large holed cheese grater for this. I tried to use a mandolin ONCE and will never bother again!
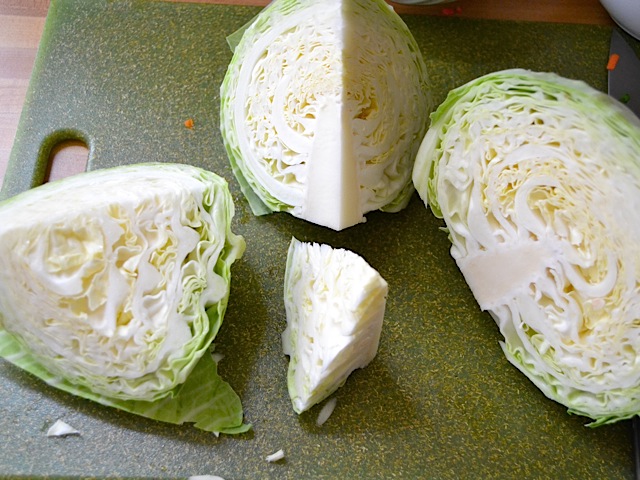
To shred the cabbage, first remove the wilted leaves. Next, cut the head into quarters and then cut the core off of each quarter. Then cut each quarter lengthwise one more time, and then cut crosswise into very thin strips.
Once all of the veggies are prepared, you’re ready to cook. Sorry, no pictures on how to cut the mushrooms or green onion because I think you can probably do that part on your own… and if you can’t, just give it a shot. You can’t really mess those up!
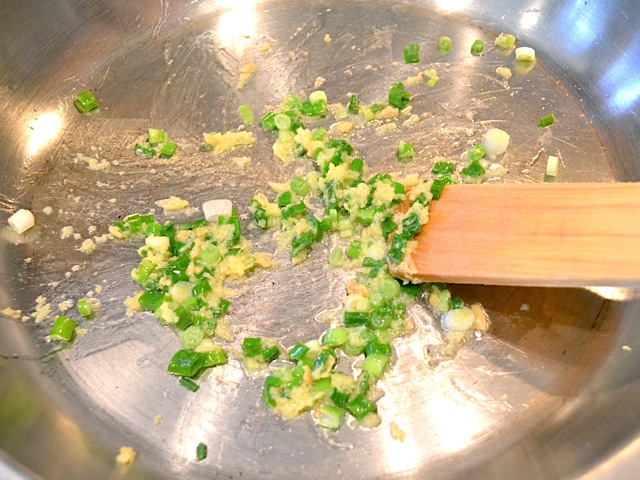
Start with the vegetable oil, garlic, green onion, and ginger in a very large skillet or wok. Heat over a medium flame.
Saute this mixture just until softened (1-2 minutes).
Then add the mushrooms and continue to cook until they’ve released all of their moisture (about 5 minutes). You don’t want soggy egg rolls.
Add the carrot, cook for about a minute more.
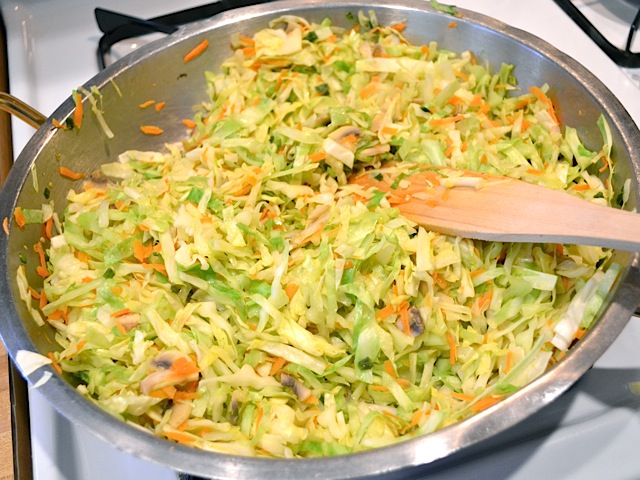
Add the shredded cabbage and continue to stir and cook, allowing the cabbage to wilt. It might help to increase the heat to medium-high at this point.
Continue cooking until the cabbage is reduced in volume by about half (10 minutes or so).
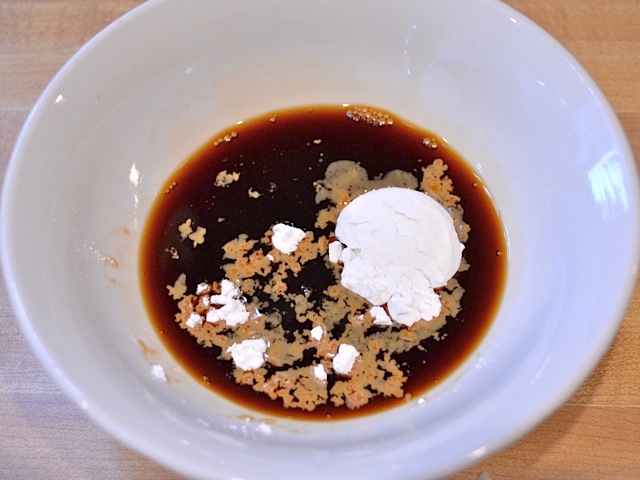
At this point, dissolve the corn starch in the soy sauce. Add this mixture to the skillet and stir to coat the cabbage.
The heat from the skillet will thicken the corn starch/soy mixture and create a soy sauce glaze. Turn the heat off once it has thickened (this usually happens immediately).
Stir in the sesame oil and give the mixture a taste. Adjust seasoning as you see fit. …a little sriracha wouldn’t hurt, if you ask me. But, that’s just me.
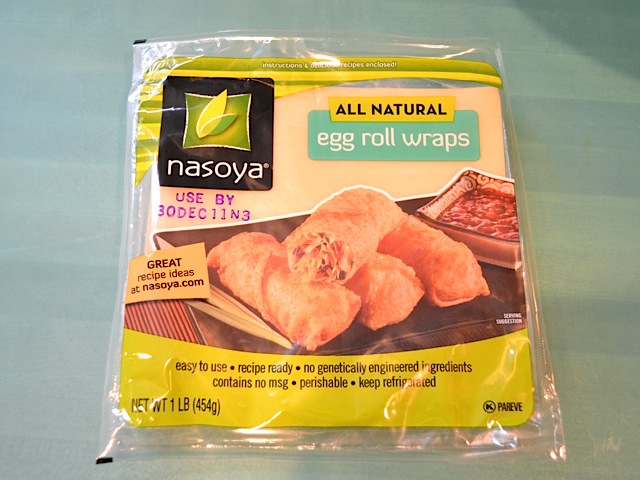
These are the egg roll wrappers that I used. They can usually be found in the refrigerated section of the produce department, near the tofu and other meat substitutes. This package had 20 wrappers in it which was perfect for the amount of filling I had.
Start to fill and roll the egg rolls. Get a small bowl of water because that will be your “glue.” Lay one wrapper out at a time and place some of the filling just off center, toward one of the corners. I used an 1/8th cup scoop but filled it to overflowing… so it was probably more like 1/4 cup per roll. But you’ll have to play with it.
Fold the bottom corner up and over the filling and make it snug.
Make sure the filling isn’t squeezing out the sides and then fold each side in. This is where the water comes in. Put a small dab of water under each corner to glue them into place.
And then roll it the rest of the way up. Place another little dab of water under the top corner of the square.
Preheat the oven to 425 while you’re rolling so that it’s ready to go when you’re done. Place the egg rolls on a baking sheet and coat with non-stick spray. Roll them over and spray the other side. If you don’t like non-stick spray, you can brush them with vegetable oil.
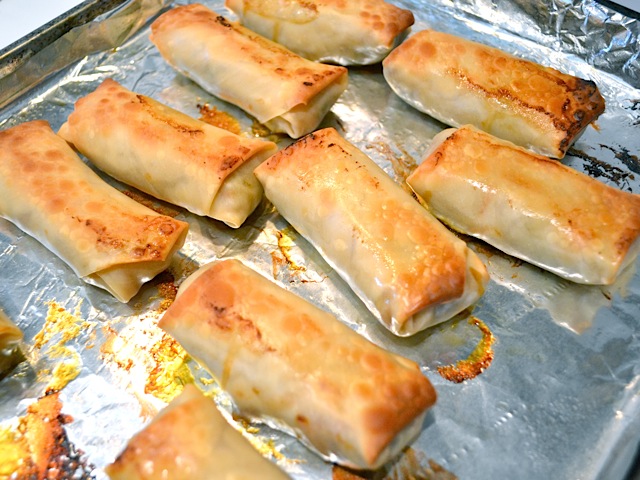
Bake in the preheated for about 20 minutes or until they are golden brown and crispy. Turn the egg rolls over at least once during the baking time to prevent the bottoms from getting soggy. Mine still seeped a little liquid but they were pretty crispy overall. Keep an eye on the egg rolls because every other “baked egg roll” recipe I’ve seen suggested 10 minutes but mine took somewhere between 20-25 minutes. Every oven is different!
I’ve been gobbling up my egg rolls with Chinese hot mustard and a little sweet and sour sauce… you can also try teriyaki sauce, duck sauce, sriracha, sweet chili sauce, or just plain!
The Freezer Experiment
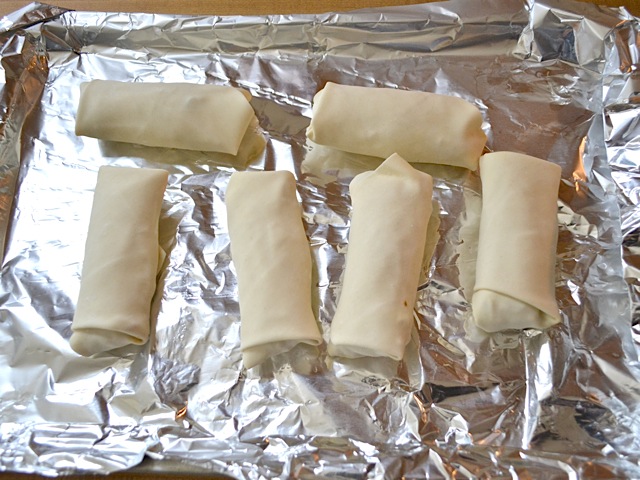
So, when I made my egg rolls, I placed a few on a baking sheet and popped them in the freezer. Once they freeze through (a couple of hours) you can then transfer them to an air-tight container like a freezer bag and they won’t stick to eachother.
So, the next day, I preheated the oven, took the egg rolls out of the freezer, and coated them with non-stick spray. I decided to elevate them off of the baking sheet with a cooling rack to try to keep the bottoms from getting soggy… but I forgot to roll them over during the baking process, so my efforts went wasted.
I baked the egg rolls at 400 degrees rather than 425 so that they would have time to heat up on the inside before the outside browned. As it turns out, freezing them reduces the elasticity in the wrapper so they kind of cracked open in some spots… but damned if they weren’t still delicious! I’ll still be freezing some next time!













Would freezing them after baking and cooling work out? Then I could take them to work for lunch!
I will try this and let you know!
I have a feeling that freezing after cooking will make them mushy upon reheating, but let me know!
Wowza! Never had baked egg rolls before and these were the bomb. I added a generous amount of sriracha so they were pretty spicy, but the sweet and sour sauce I had them with provided a good balance. Nice.
Made these last night….. first time trying to make egg rolls. I can’t believe how easy it was and love that they are baked!!!! We added salad shrimp to half and a little cooked ground pork to the other half. Yum! My facebook friends were impressed. Thanks for another winner!
We just made them. They are in the oven baking….I can hardly wait to eat them. So hungry!
I just made these this morning (but added your basic shredded beef in to it). Holy crapcakes these are delicious. I mixed rice vinegar, soya sauce, garlic and sesame oil as a dipping sauce, and I sincerely hope I don’t eat all of them at once…
Thanks again, Beth – your recipes never disappoint!!!
One thing i always do after i cook the filling is i put it a strainer in the sink to drain, the veggies exude a lot of water while cooking and also sauces ( soy, whatever…) can make it to saucy and they wont crisp as well, also i have froze cooked spring/egg rolls many times and they freeze great, you just want to re-heat them in the oven not the micro or they will be soggy.
I’ve been drooling over this recipe for months and I finally just made them (eating them right now!) and they’re fabulous! Except that I can add wrapping beautiful veggie rolls on my list of things I’m not good at. The ginger that I bought was really green, so I didn’t use it, but I can appreciate what it would have contributed. Fortunately it was only a teeny tiny piece. I am freezing the leftovers and will be very happy to have them later. Thank you for your beautiful blog! You’re helping a lot of people eat happily!
I made these last night and they were so good! I ended up using some leftover chicken for the filling. I also ended up with a lot of leftover filling and I put in close to 1/3 of a cup per roll. I think next time I will use slightly less cabbage.
I cheated a little and instead of using whole veggies I bought a bag of coleslaw mix. It saves time of cutting everything but still gives you all the flavor. I also added some boca crumbles as well to make a “mock” egg roll. YUMMMM
These were just ok. I definitely suggest more than the 1tsp of sesame oil.
My oven’s a piece of crap, I’m pretty sure it is the reason these weren’t better. The wrappers came out still pretty soft, only parts were crispy. Next time I think I’ll try frying them since my oven seems incapable of baking these.
I had a similar issue and I think that there may have been too much moisture in my filling. Next time I will try to cook out more moisture, or just add less liquid?
Made them again. Still fantastic!!
For me, the key to crispy rolls is two steps:
(1) after the mixture has cooled, tilting the bowl to see if there is any extra moisture in there (there was, I just drained it off into the sink)
(2) baking them on a rack and not just on a sheet (or broiler pan… had too many and couldn’t fit them on one).
I also did a quick spray of olive oil on the tops before I put them in the oven.
If yours didn’t get the crisp you desired, try that.
Mmm, these are good. The recipe was perfect to use up the whole wrapper package. I cooked four to taste, and I’m going to freeze the rest as snacks or quick meals. Baking them makes the outside crunchy (not crispy) but not greasy like fried eggrolls.
Katie – ive done that and they came out great! I put the whole baking sheet in the fridge!
Do you think these would still bake nicely if I were to build them earlier in the day, refrigerate them, then bake them in the evening?
Made these tonight and they were great! Thanks so much. I just realized I made your banana bread baked oatmeal this morning sans walnuts. I guess it has just been a “Budget Bytes” day. <3
I made these tonight and they were fabulous. When I first saw the recipe I thought, “oh great–baked instead of fried–much healthier” (being a New Year and all …) but then I remember how much I love the crispy-fried texture of egg rolls and I, um, fried them instead.
I used this other recipe/link for fry instructions (sorry to link drop and please feel free to edit out as needed–just wanted to share what I did) http://frontierkitchen.blogspot.com/2010/02/make-it-cheap-monday-egg-rolls.html
Anyhow, the family ate half the egg rolls. The rest I cooled, put in an 8×8 foil pan, covered with saran/tin foil and popped into the freezer. I did this once with the aforementioned egg rolls in the link and they turned out super. These ones will too–I can feel it :)
Thanks for the great recipe!