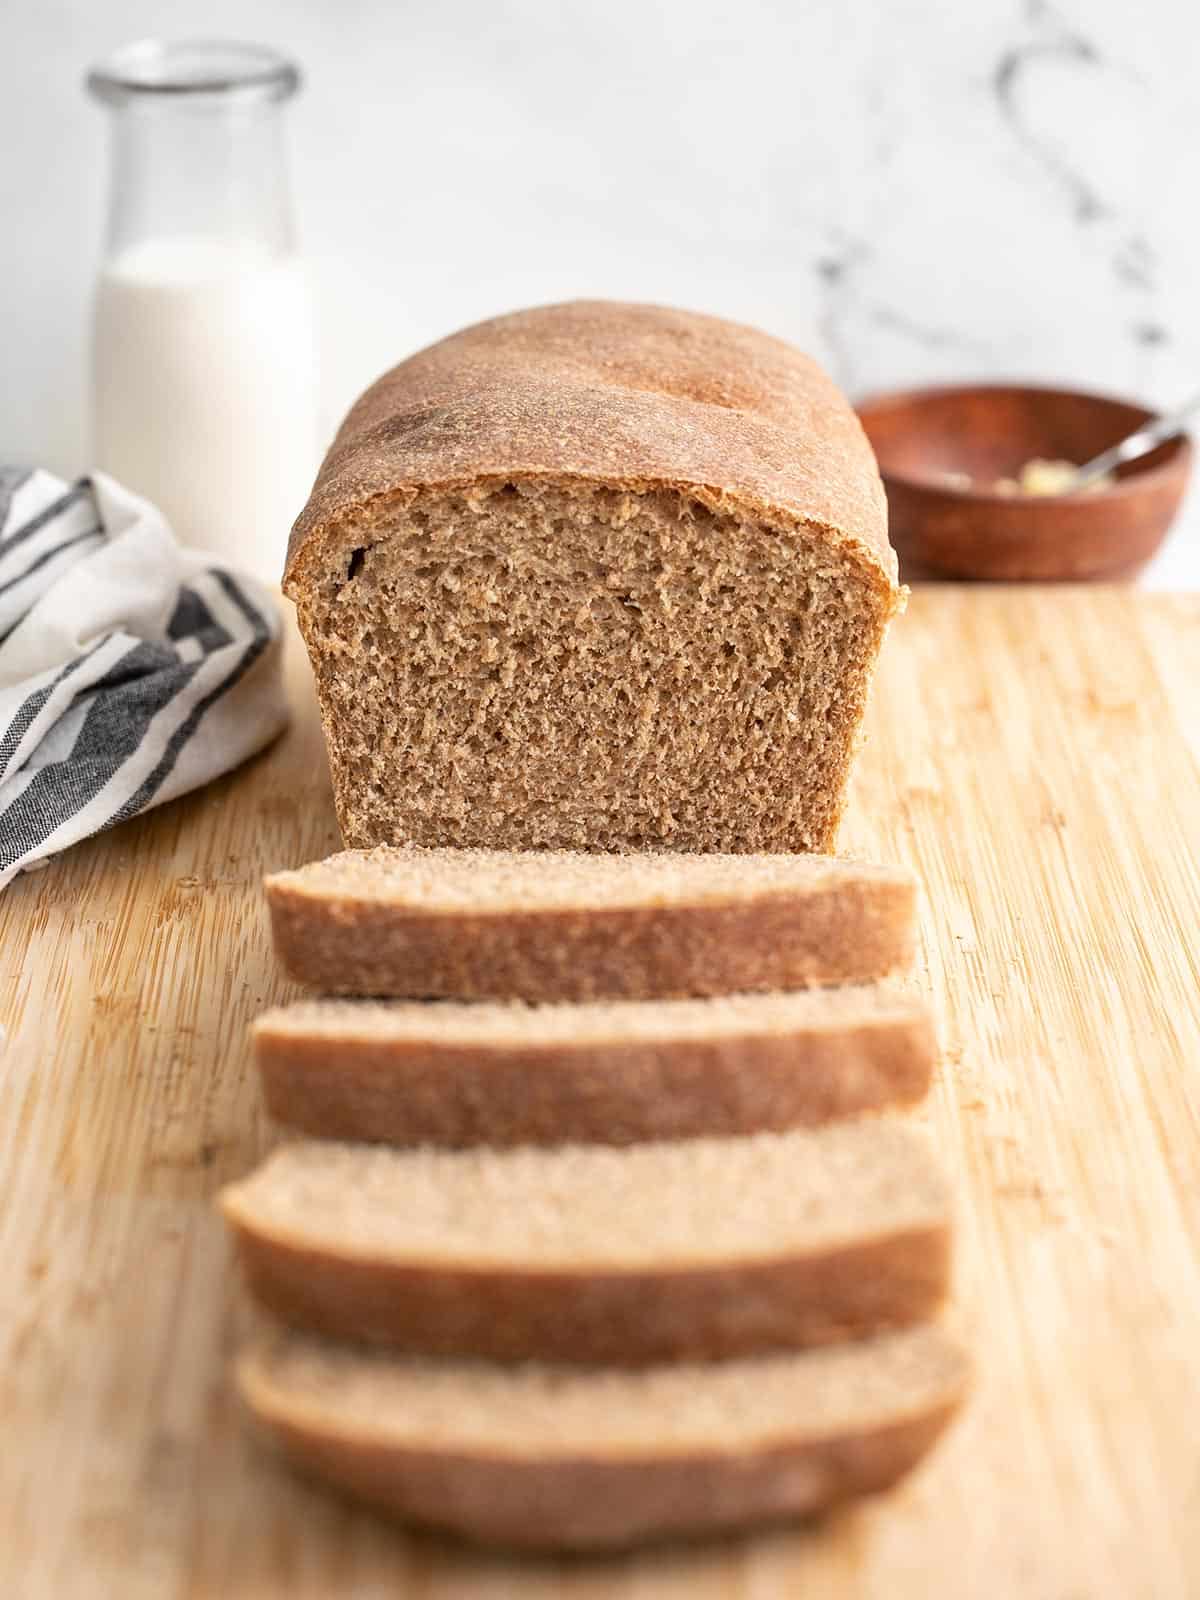
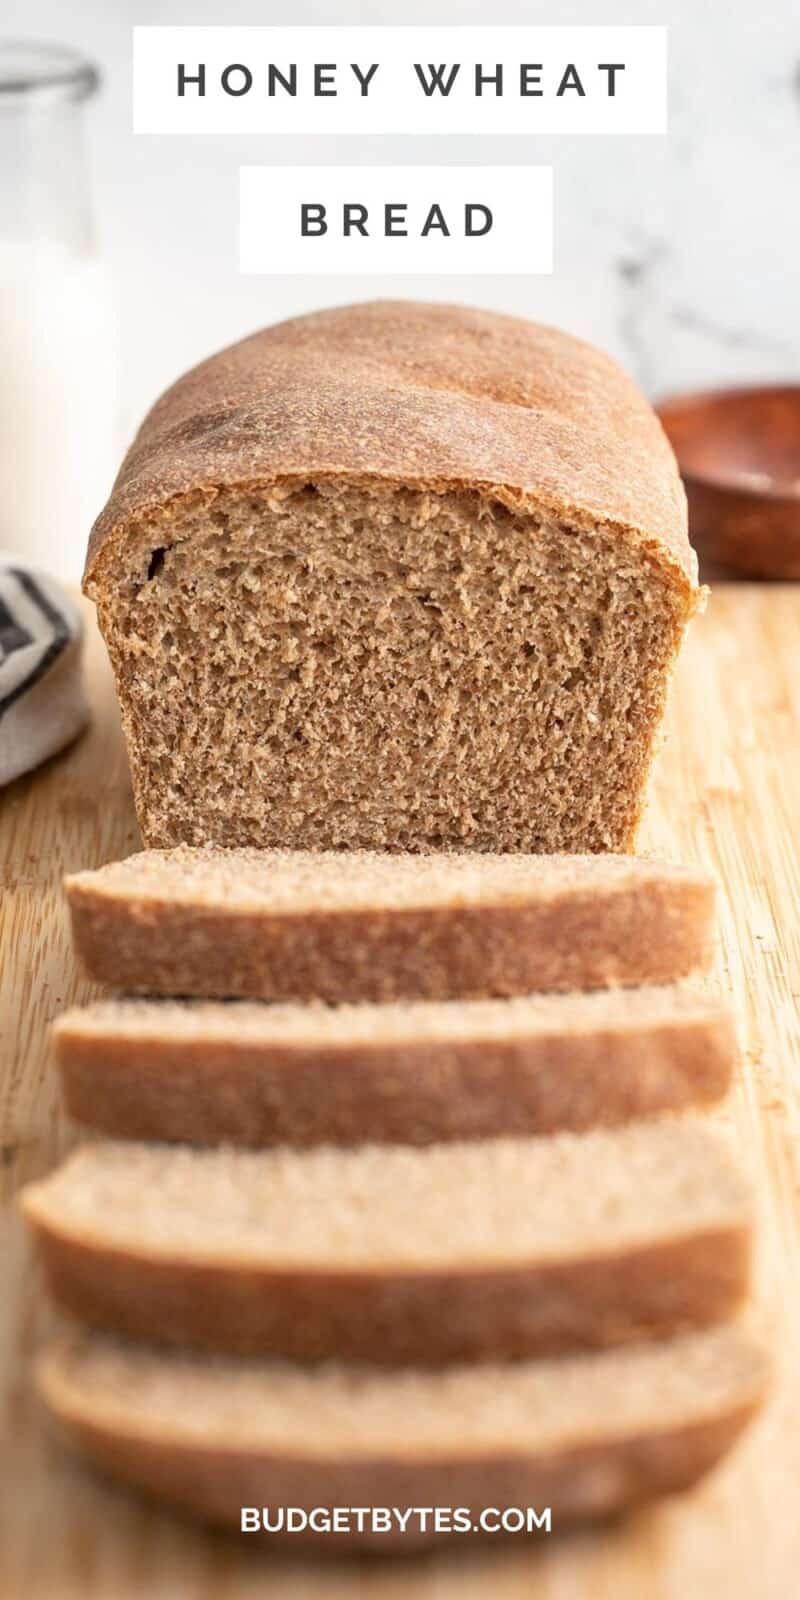
Grocery prices just keep rising and we’re all feeling it, so I decided to revisit some of my old bread recipes. Because if there ever was a time to learn how to make homemade bread, it’s now! It only takes a couple of dollars to make this super delish homemade honey wheat bread that is soft, fluffy, flavorful, and perfect for toast or sandwiches. And while it does take some time to make a loaf of bread, most of that is hands-off time that you can use to tend to other business. ;)
This post contains some affiliate links, which means that we make a small commission off items you purchase at no additional cost to you.
What’s in Honey Wheat Bread?
This recipe starts with the basic yeast bread ingredients: flour, salt, and yeast. Then I added a little honey to give the bread just a hint of sweetness and a little olive oil which helps keep the bread (and the crust in particular) nice and soft. I’ve used a combination of whole wheat and all-purpose flour for this bread to keep the texture light and fluffy.
Can I use All Whole Wheat Flour?
While you can make bread with 100% whole wheat flour instead of a mix of white and wheat, that tends to produce heavier, dense bread. Whole wheat flour absorbs more moisture than all-purpose flour, so you may need to adjust the ratios in this bread slightly. I find that for the best texture, a 50/50 mix of whole wheat flour and all-purpose flour produces the best results.
How to Store Homemade Bread
It’s very important to let homemade bread cool completely to room temperature before storing to prevent trapping steam and creating condensation. Homemade bread doesn’t contain preservatives like store-bought bread, so you’ll need to either consume the bread quickly or freeze it for longer storage. (Or make bread pudding with the leftovers!)
If storing your bread at room temperature, wrap the bread in cloth or paper to allow just enough airflow to prevent moisture build-up. Homemade bread will last about 2-3 days stored at room temperature.
If storing in the refrigerator, keep the bread in an air-tight container. This is my preferred method because I don’t usually eat bread that quickly. Bread stored in the refrigerator will stay good for about 5-6 days.
If you need to store your bread for longer, freeze it. I suggest slicing the bread prior to freezing so you can thaw or use 1-2 slices at a time as needed without thawing the entire loaf. I often toast my slices straight from the freezer for convenience! Make sure to freeze the bread in an air-tight, heavy-duty, freezer-safe container (like a freezer bag).
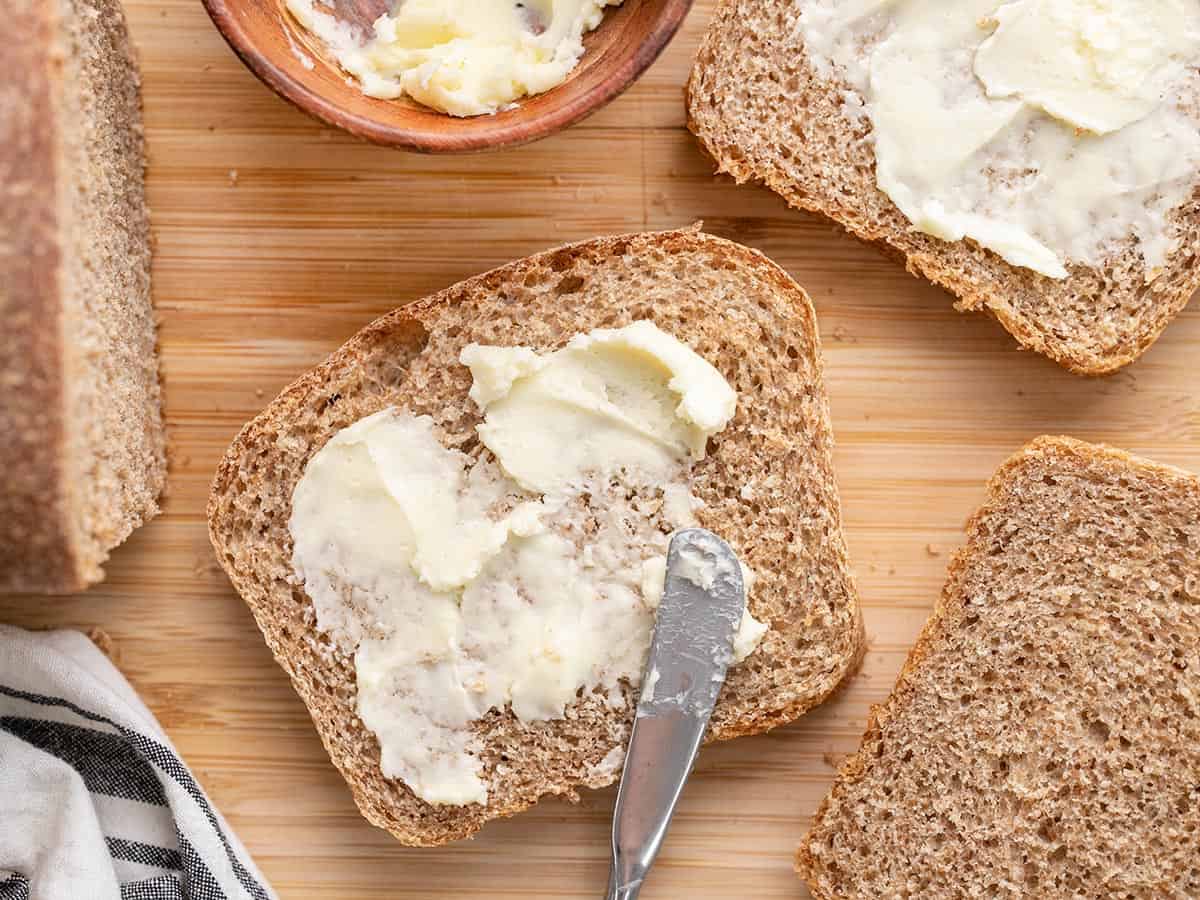
New to making homemade bread? Try our super easy No-Knead Bread!
Honey Wheat Bread
Ingredients
- 1.25 cup warm water ($0)
- 2 tsp active dry yeast or instant yeast ($0.34)
- 2 Tbsp honey ($0.50)
- 3 Tbsp olive oil ($0.36)
- 1.5 cups whole wheat flour* ($0.57)
- 1.5 cups all-purpose flour* ($0.38)
- 1/2 Tbsp salt ($0.05)
Instructions
- Stir the yeast and 1 Tbsp of the honey into the warm water until dissolved, then set it aside for about five minutes to allow the yeast to activate. A thick layer of foam should develop on the surface of the water.
- While waiting for the yeast to bloom, stir together 1 cup of the whole wheat flour with the salt.
- Once the yeast is foamy, add the rest of the honey (1 Tbsp) and the olive oil and stir to combine. Pour the yeast water into the bowl with the flour and salt, then stir until combined. Add ½ cup more of whole wheat flour and stir until combined again.
- Now start adding all-purpose flour, ½ cup at a time, until you can no longer stir the dough with a spoon. At that point, turn the dough out onto a floured surface and begin to knead all-purpose flour into the dough, a little at a time.
- Knead the dough for about five minutes, slowly adding flour as you knead, or until the dough no longer sticks to your hands, but is still fairly pliable. I used 1.5 cups all-purpose flour total, but the total flour amount will vary with the type of flour used and relative humidity in the room.
- Place the kneaded dough back into the mixing bowl and cover with a cloth. Let the dough rise at room temperature for about an hour, or until it has doubled in size.
- Lightly coat a bread pan with oil. Punch the dough down to deflate, then take the dough out of the bowl. Shape the dough into a log about the same length of your bread pan.
- Place the shaped dough in the bread pan and let it rise for anohter hour, or until it has risen about 2-inches above the edges of the bread pan.
- Preheat the oven to 375ºF. Once fully preheated, add the risen bread and bake for 30 minutes, or until the bread is deeply golden brown and it sounds hollow when tapped.
- Remove the bread from the oven and let it cool just a few minutes (to make it easier to handle), then carefully remove the bread from the pan to fully cool.
- Once cool, slice and serve your delicious homemade bread!
See how we calculate recipe costs here.
Equipment
- Glass Loaf Pan
Notes
Nutrition
How to Make Honey Wheat Bread – Step By Step Photos
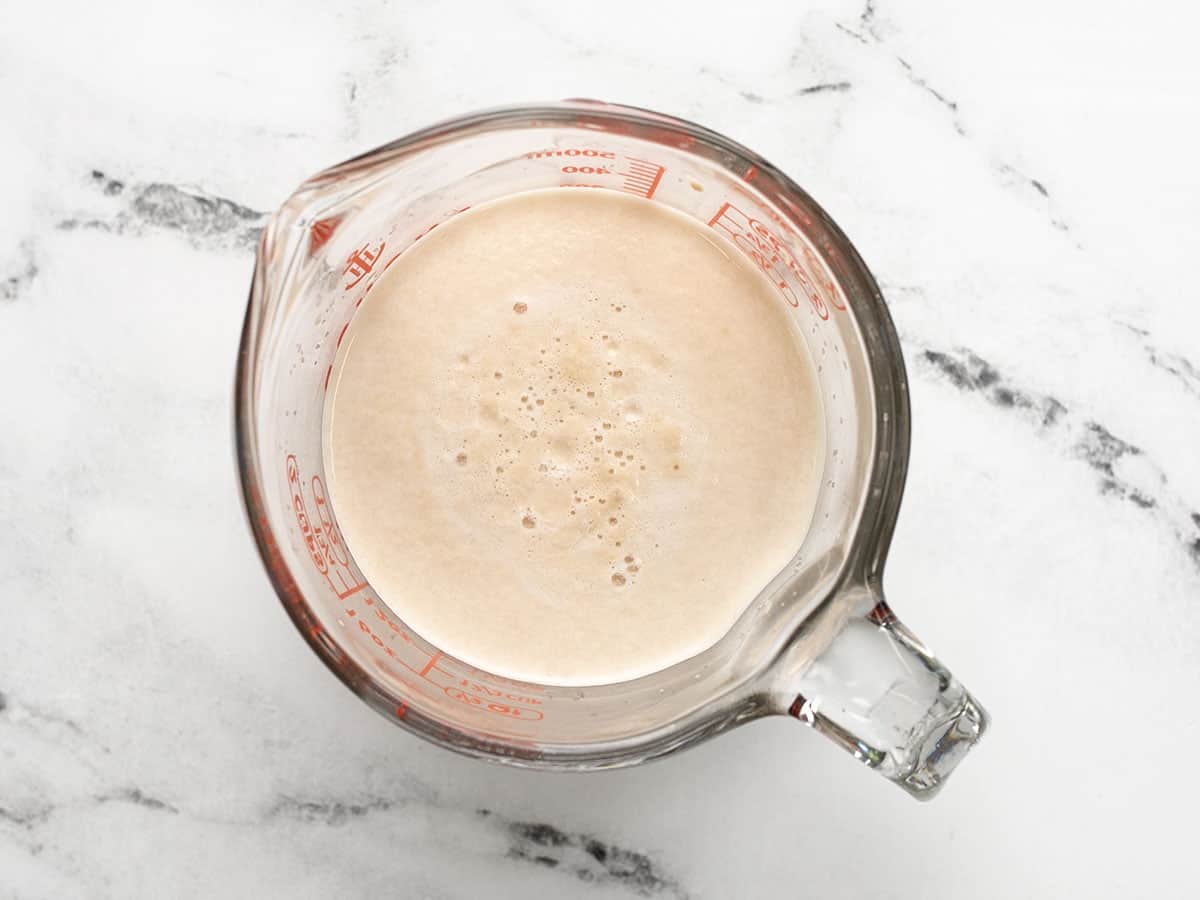
Start by dissolving 1 Tbsp honey and 2 tsp instant yeast or active dry yeast in 1.25 cups of warm water. Set the mixture aside to allow the yeast to bloom. It should develop a thick layer of foam on the surface.
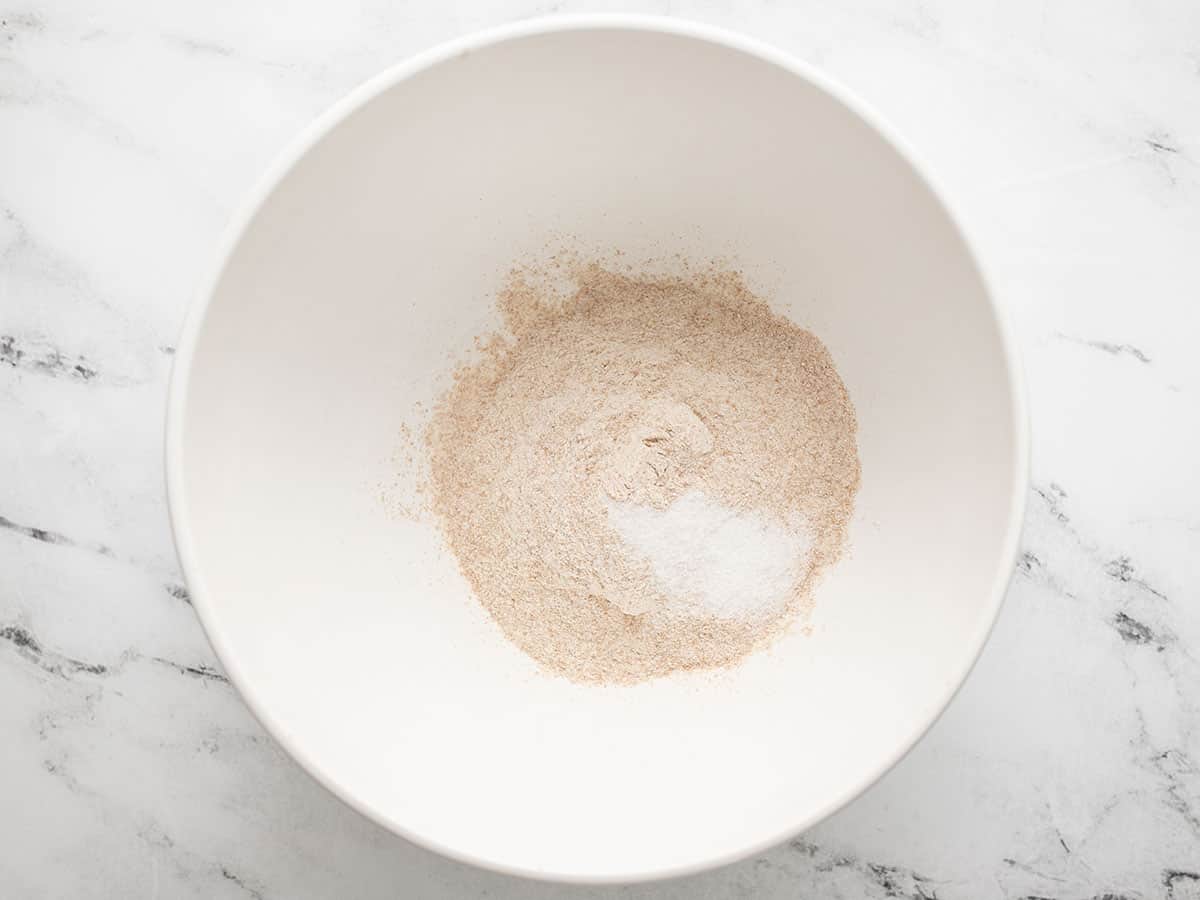
While waiting for the yeast to bloom, add 1 cup whole wheat flour to a bowl with ½ Tbsp salt and stir to combine.
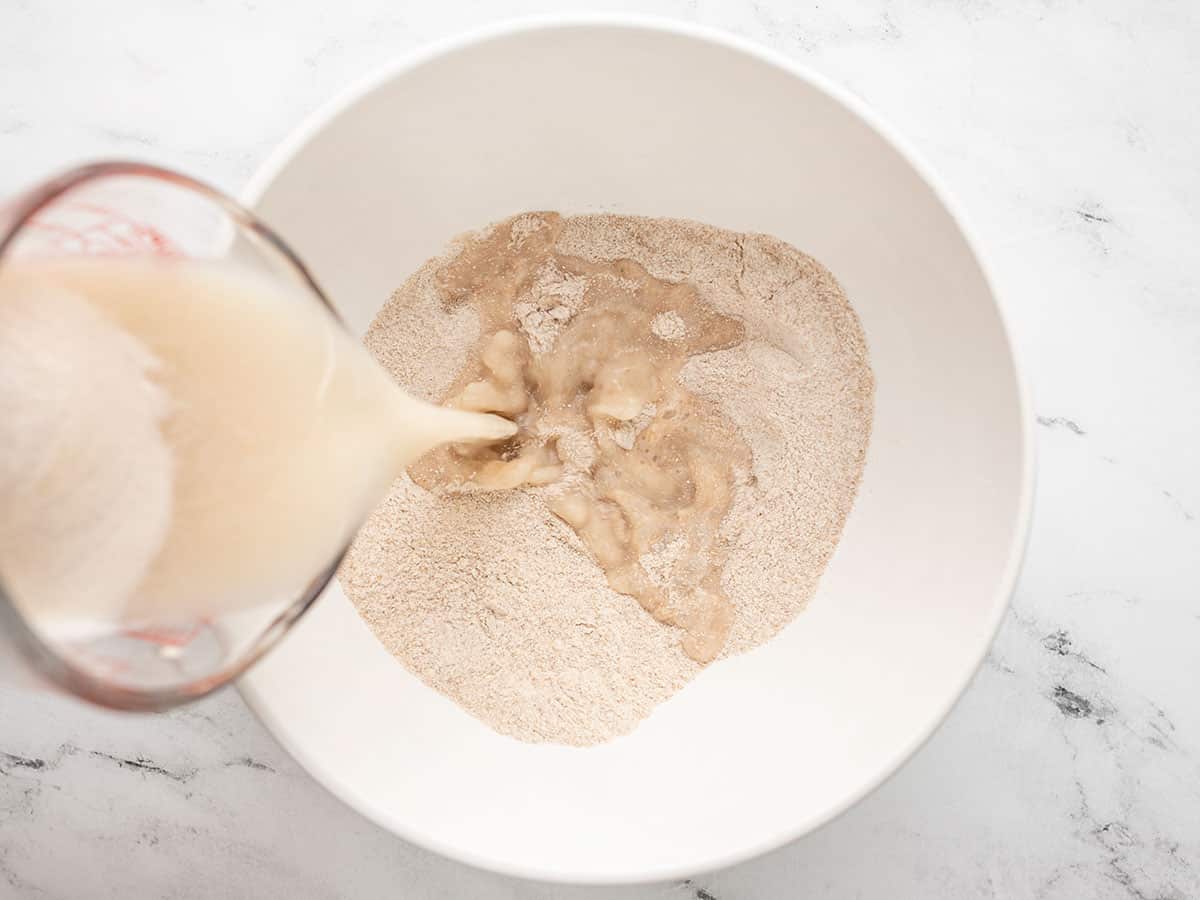
Once the yeast has bloomed, stir another 1 Tbsp honey and 3 Tbsp olive oil into the yeast water, then pour that mixture into the bowl with the flour and salt. Stir to combine.
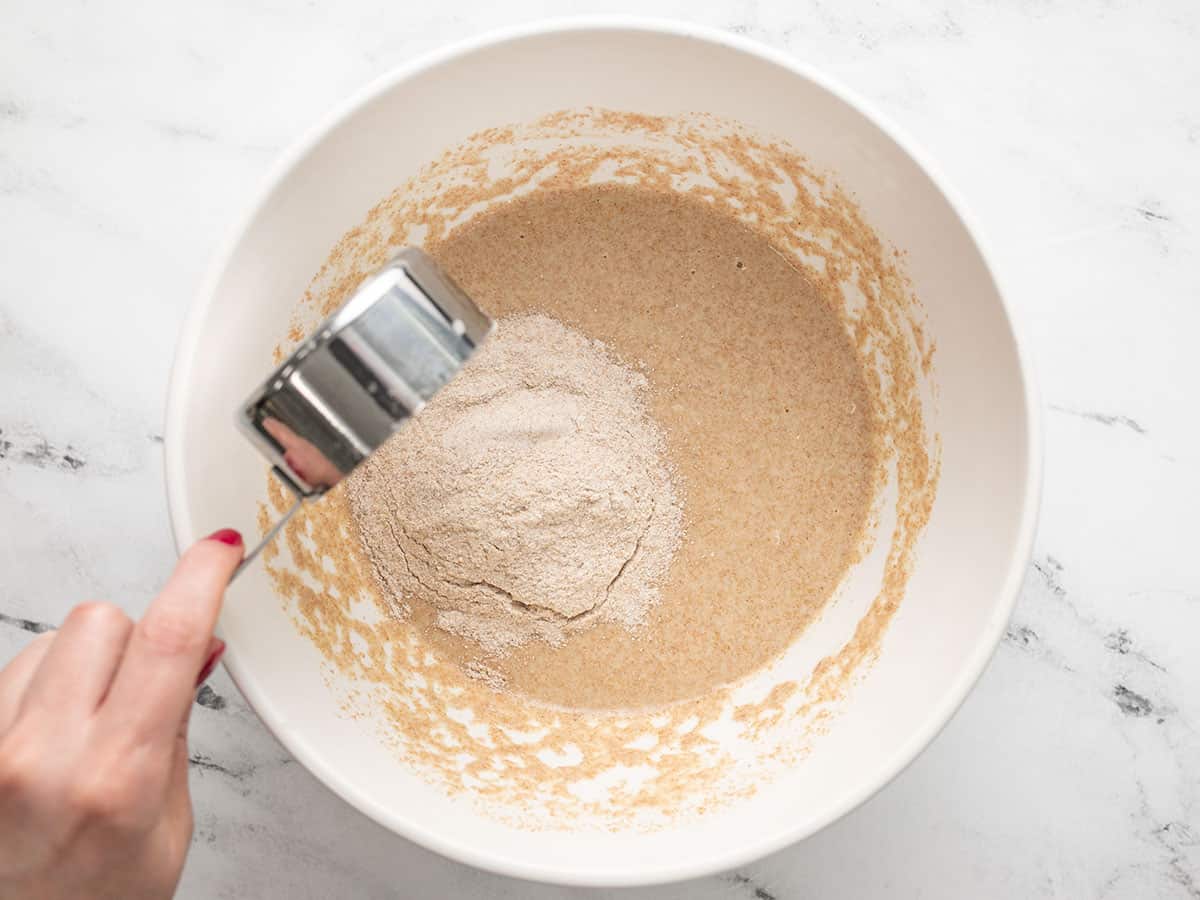
Stir another ½ cup of whole wheat flour into the dough.
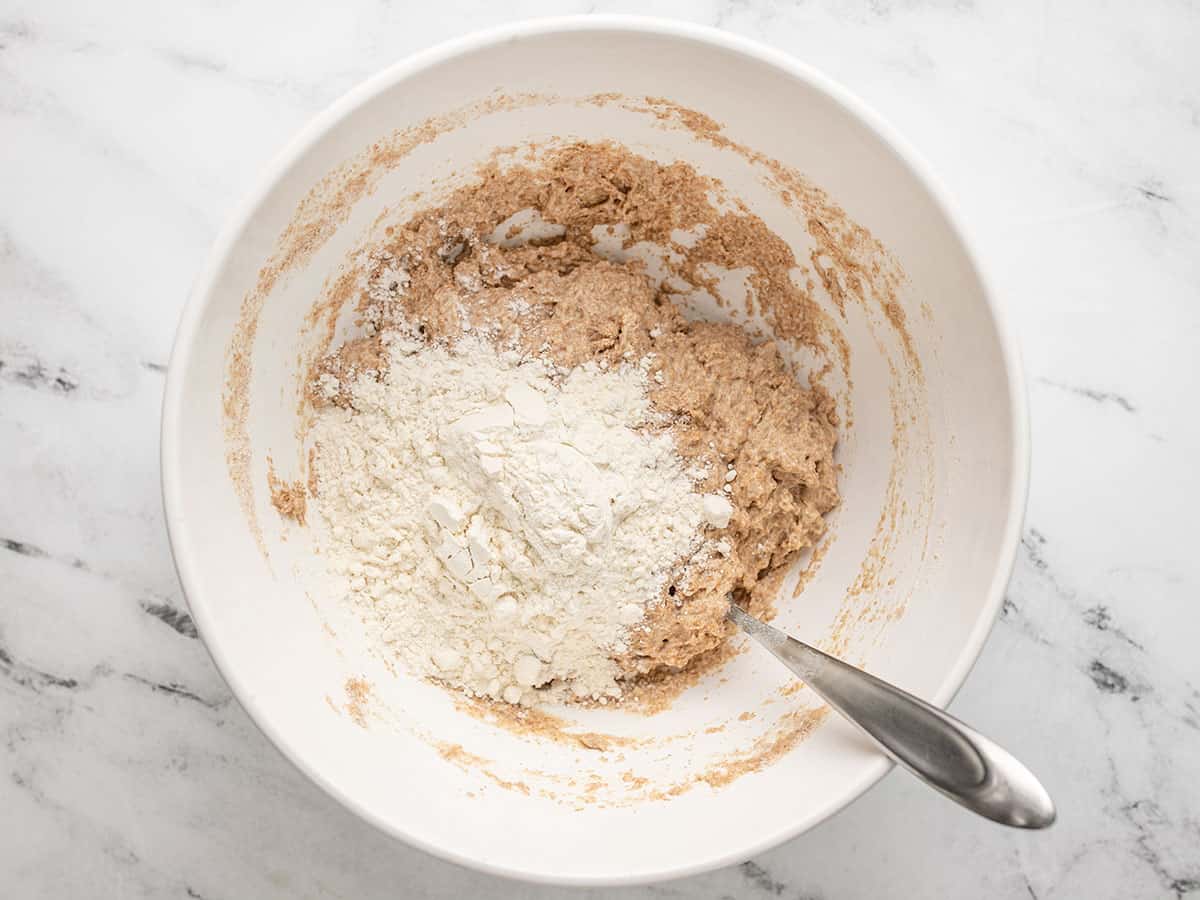
Now start adding in all-purpose flour, ½ cup at a time until you can no longer stir the dough with a spoon.
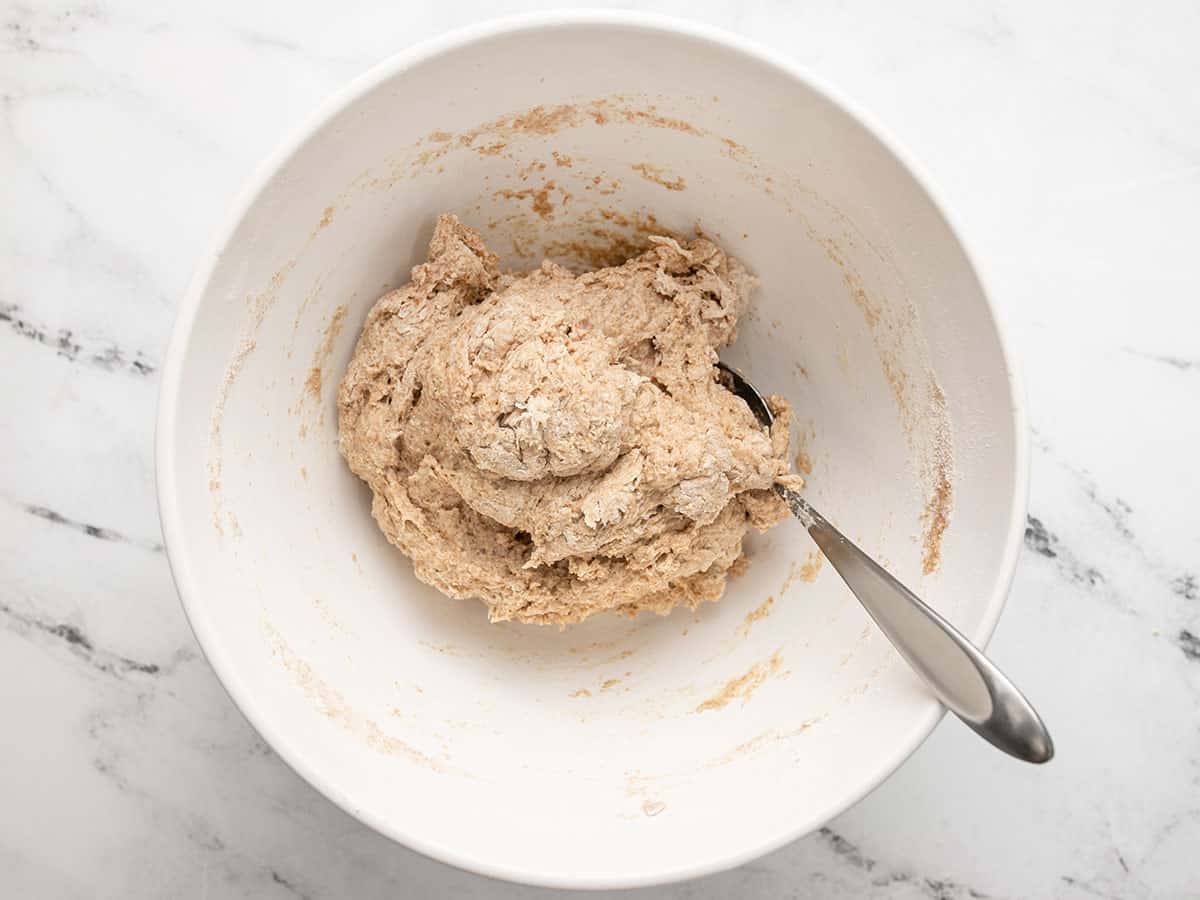
When a shaggy ball of dough forms that can no longer be stirred with a spoon, it’s time to turn the dough out onto a floured surface to knead.
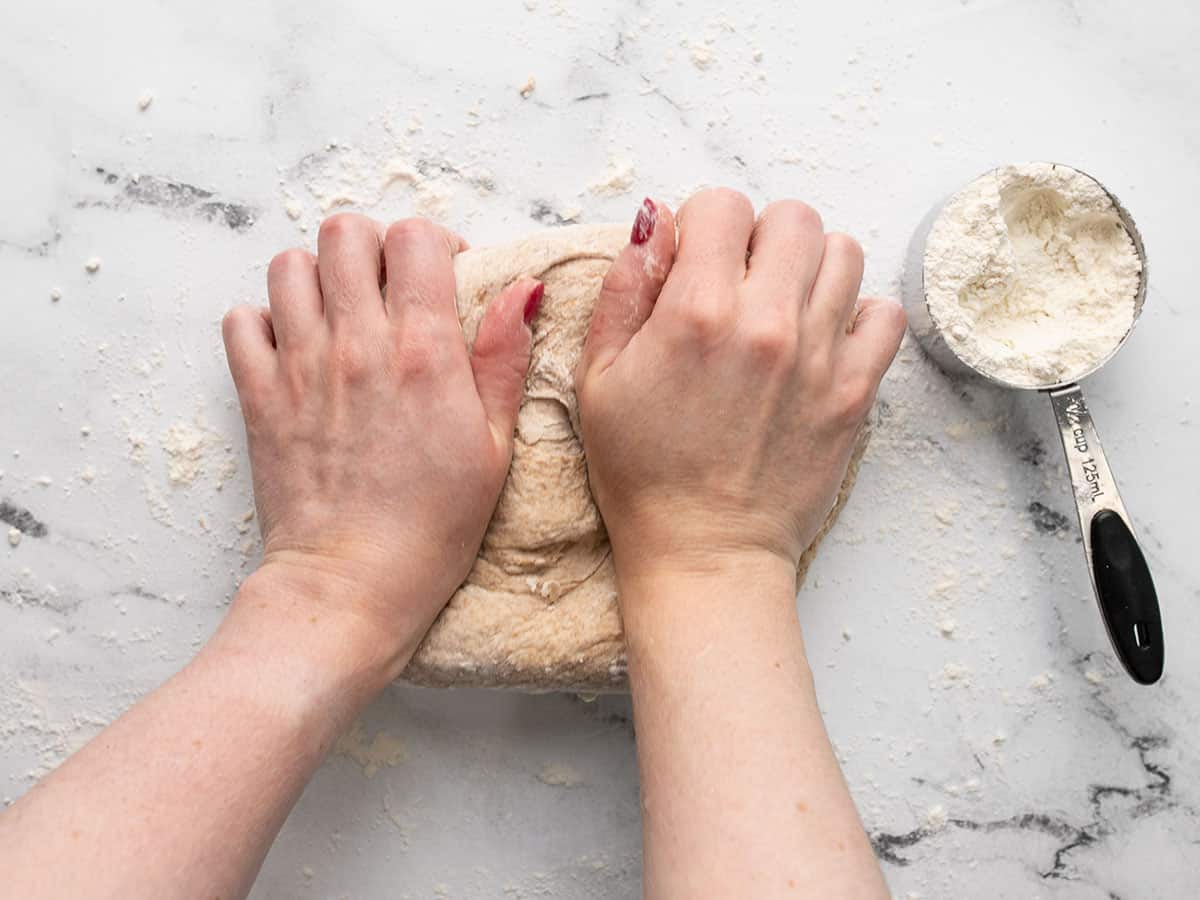
Begin kneading in more all-purpose flour a little at a time. Knead for about five minutes, or until the dough no longer sticks to your hands, but is still pliable. I used about 1.5 cups all-purpose flour in total, but the total flour amount can vary depending on the type of flour used and the relative humidity in the room.
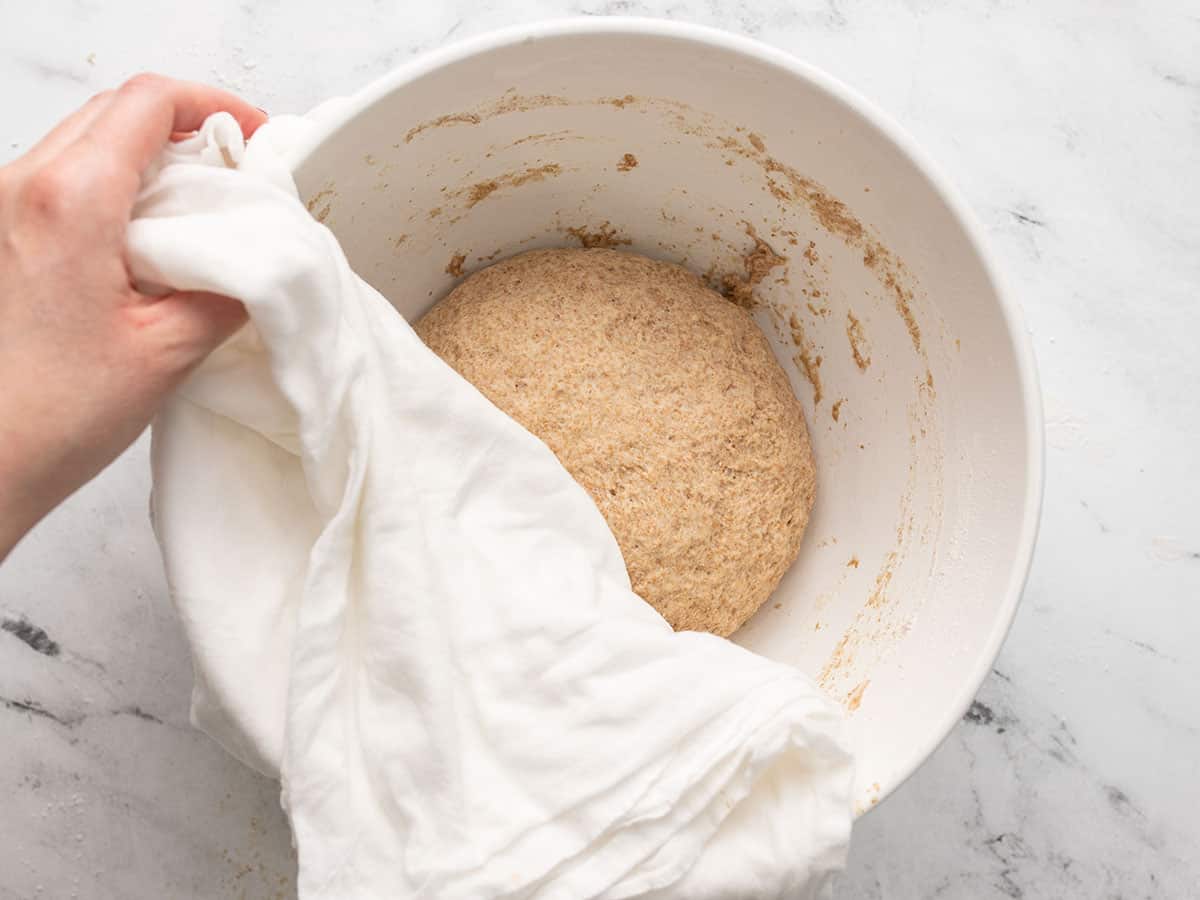
Place the kneaded dough back into the mixing bowl and cover it with a towel. Let the dough rise at room temperature for one hour, or until doubled in size.
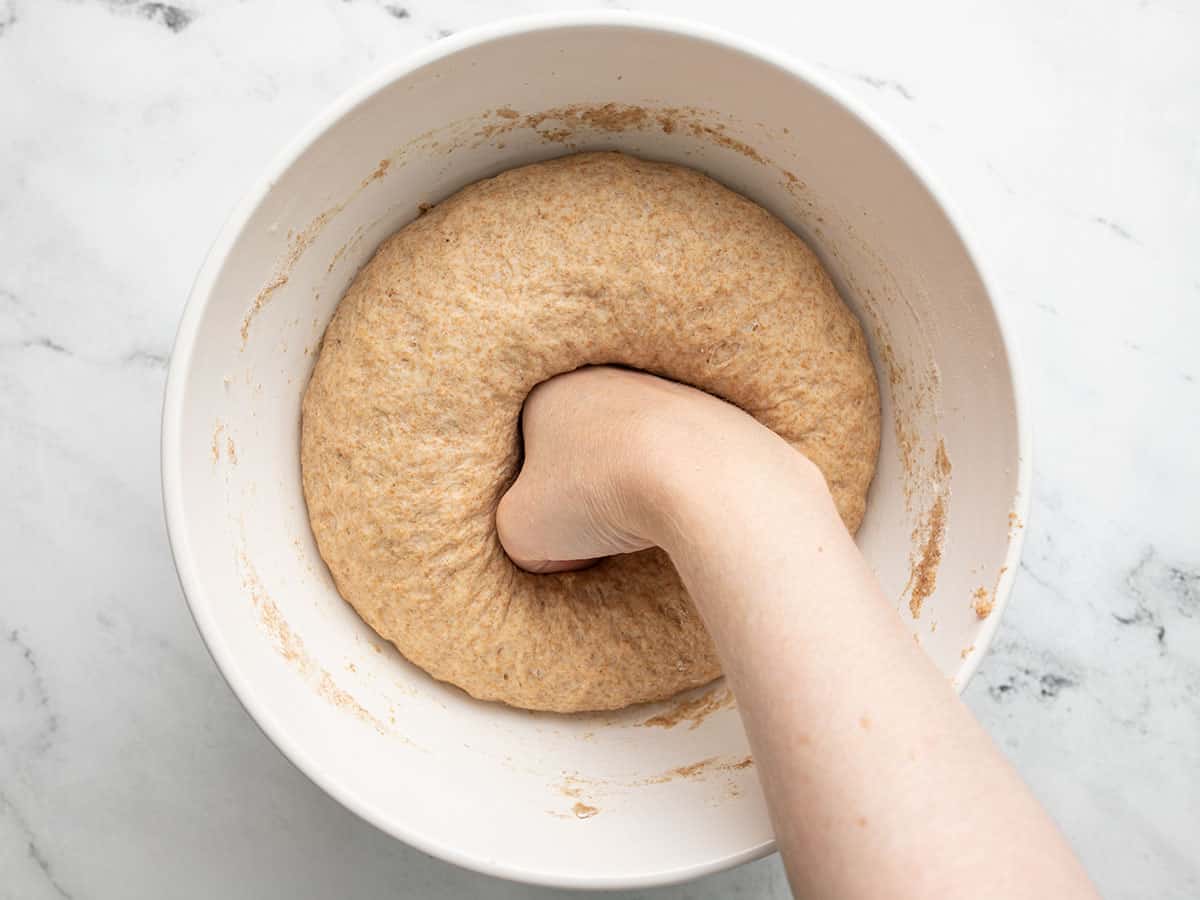
Once doubled in size, punch the dough down to deflate. Remove the dough from the bowl and shape it into a log the same length as your bread pan.
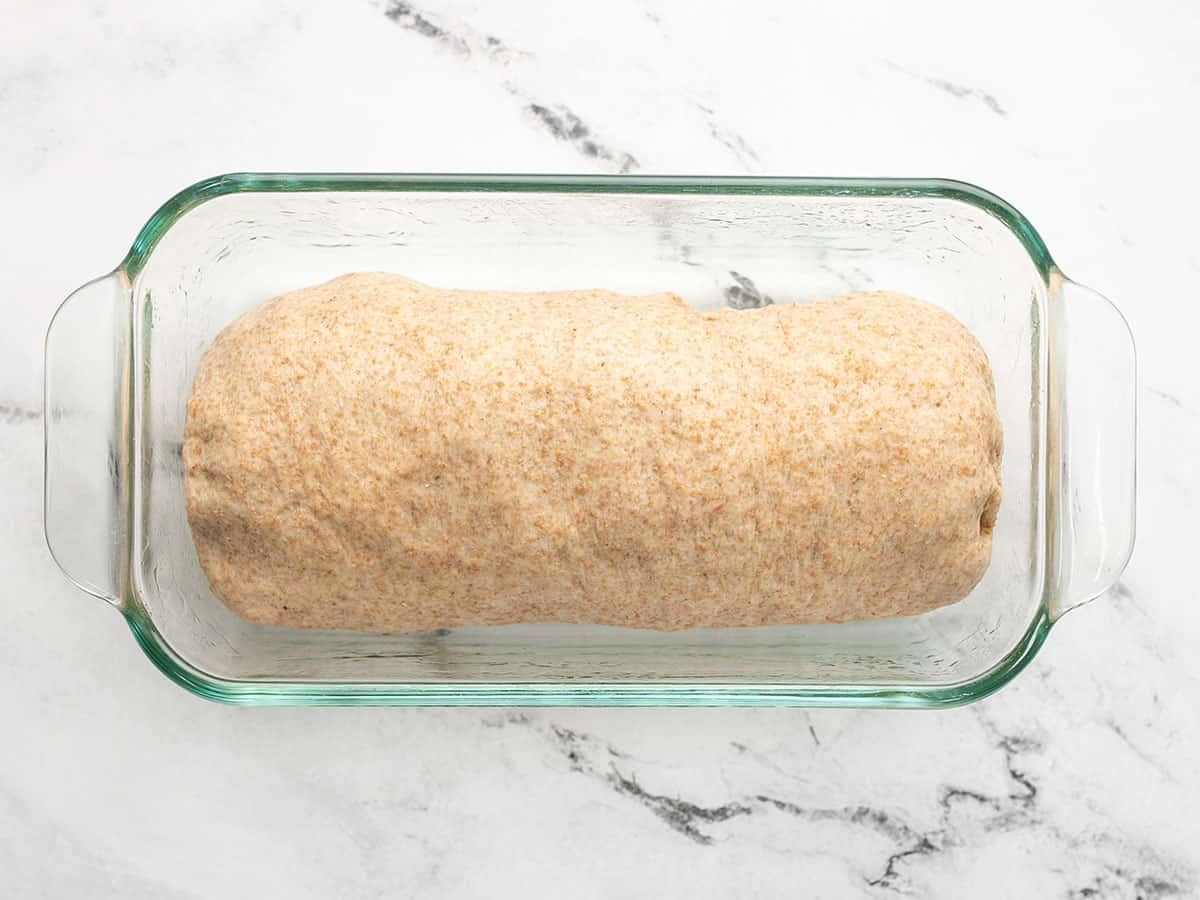
Lightly coat a bread pan with olive oil then place the shaped dough inside. Let the bread rise for another hour, or until it has risen about two inches above the top of the bread pan.
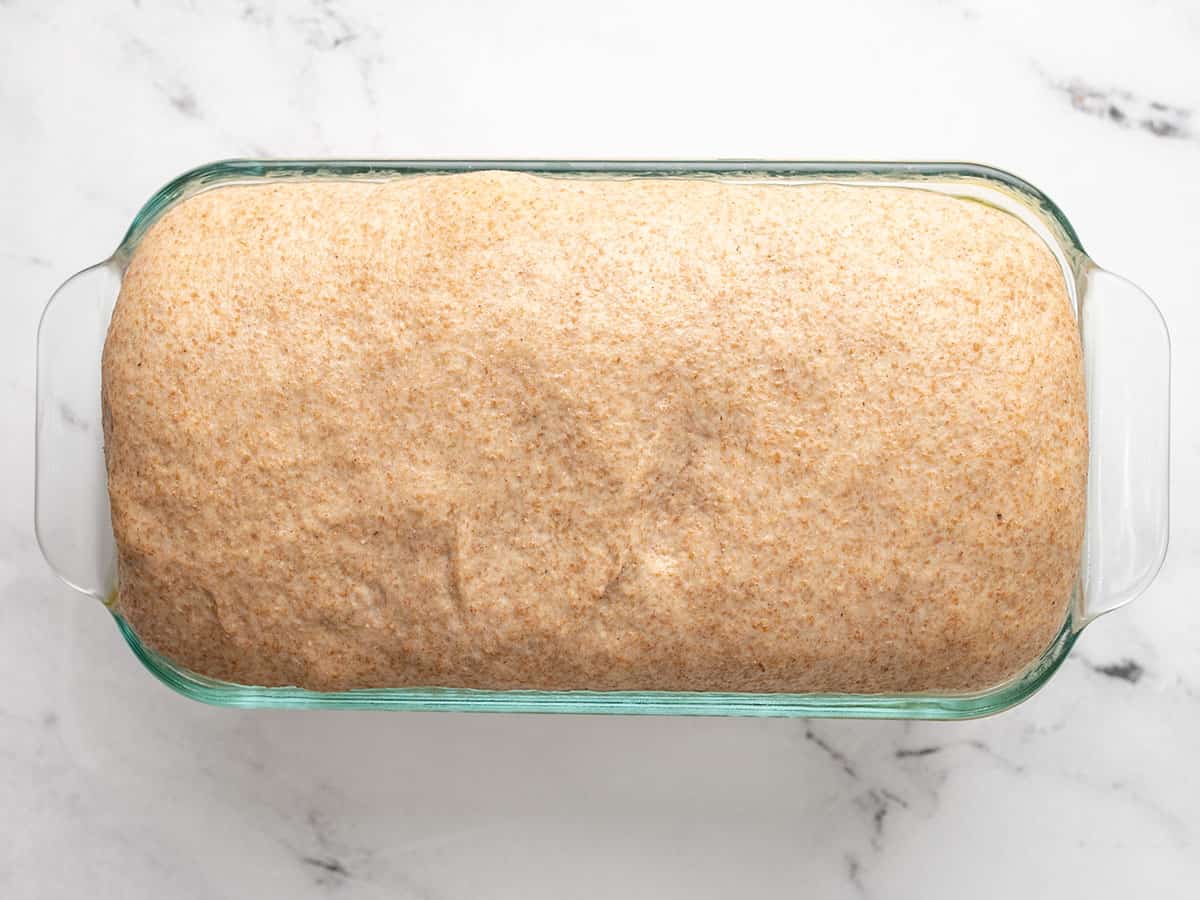
Preheat the oven to 375ºF. Once the bread has risen, transfer the bread to the oven and bake for 30 minutes, or until the crust is deeply brown and sounds hollow when tapped.
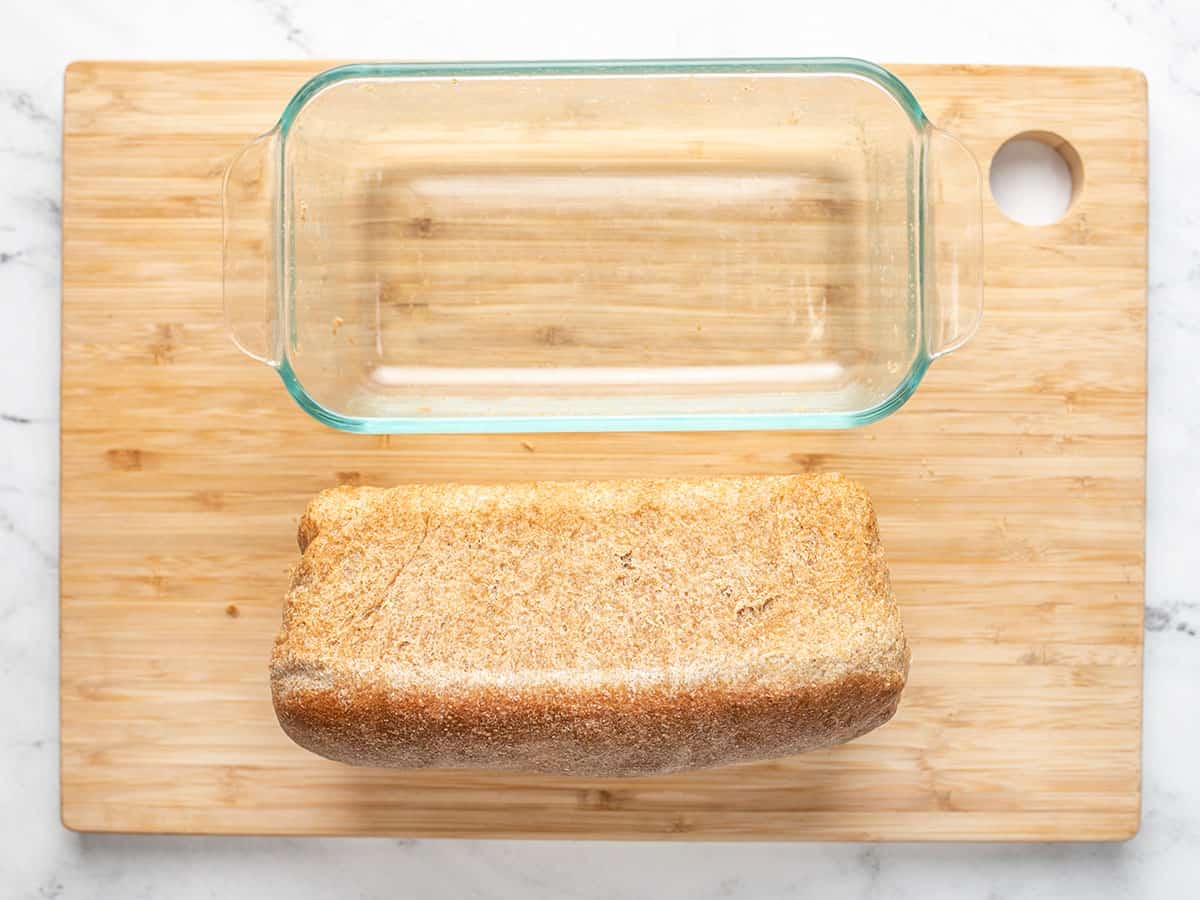
After 30 minutes, remove the bread from the oven. Let it cool for just a few minutes to make it easier to handle, then carefully remove it from the bread pan to finish cooling.
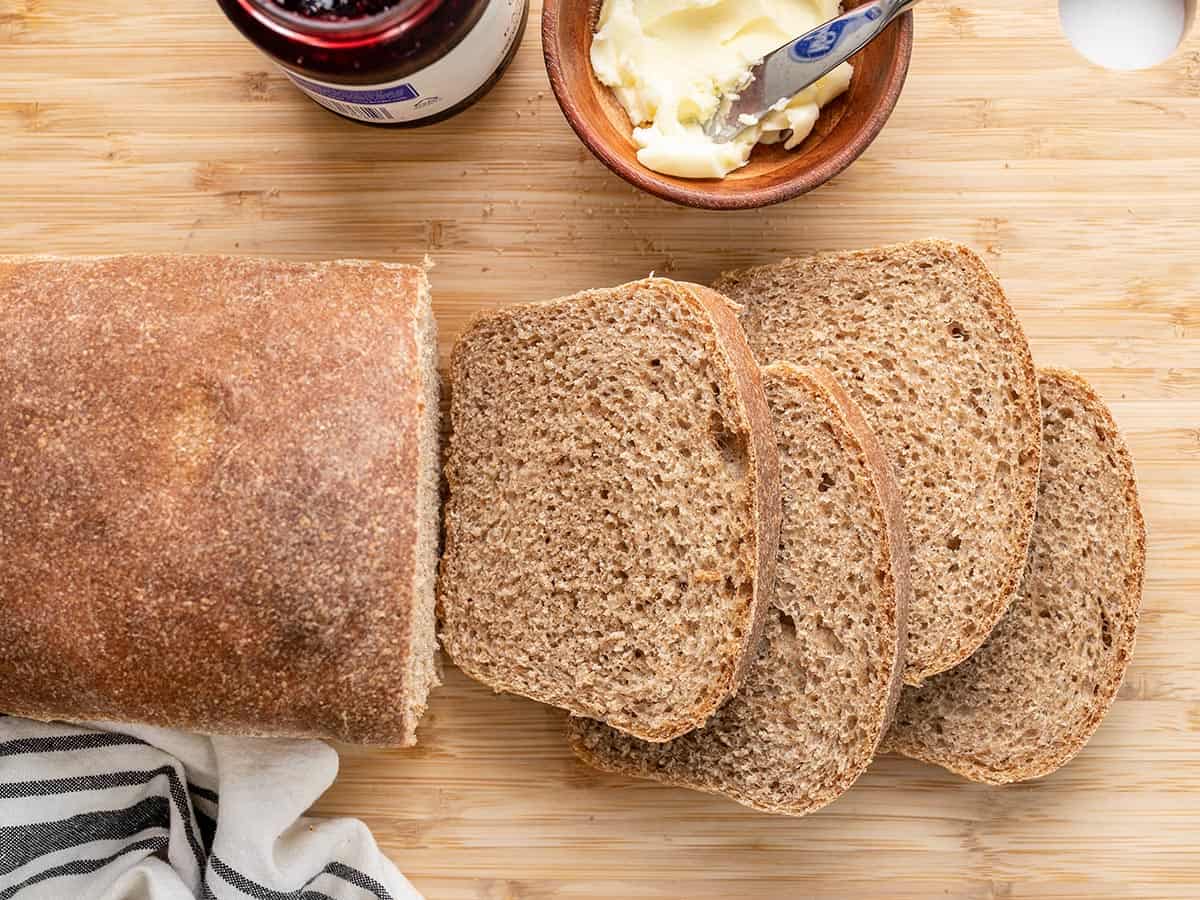
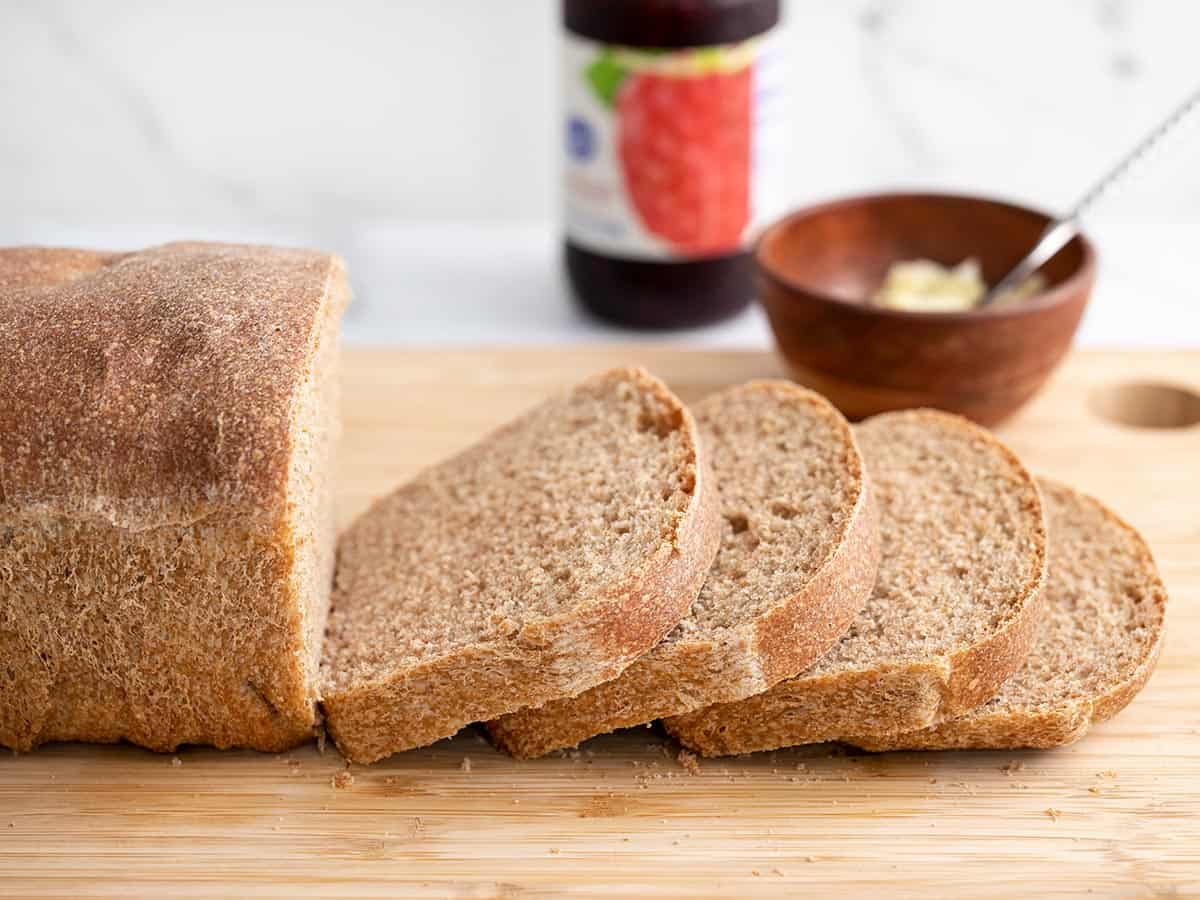
Once cooled, slice and serve the bread, or store it for later!





I also use to eat honey with bread instead of jam. Thanks for this recipe.
Solid recipe. I doubled it but otherwise followed it as written, and the loaves came out really nicely. I’m not a total yeast novice, but this is a recipe that most should be able to follow with results as pictured.
If I wanted to throw in some seeds/grains for texture would that affect the bake time? Or necessitate any other changes?
It’s easy to give this recipe 5 stars.
The directions are well-written and easy to follow, and the results are fantastic: A delicious soft bread that smells great and is excellent for toast or sandwiches. It will be part of my go-to rotation of reliable bread recipes that I’ll be happy to serve to guests.
I even made a slight error – I used 2 tablespoons of yeast instead of 2 teaspoons, because I was too lazy to grab my reading glasses when looking at the list of ingredients – but the dough rose nicely and the texture of the bread was wonderful.
.
This was my first visit to your web site, and now I’m looking forward to checking out your other recipes. Thanks so much for making a tremendous first impression!
Why bloom if using instant yeast. Does it matter which yeast is used?
Since we gave the option to use either, we included that step just in case you’re not using instant! But you’re welcome to skip if you’re comfortable!
I’ve used this bread recipe for years, and since then I’ve gone on to grow my baking skills and discover new bread recipes – but this is the one that I use every week. It is simple and efficient, that delivers excellent bread. I do substitute one tablespoon of all purpose white flour with 1 tablespoon of wheat gluten. But that’s a personal preference, you can absolutely make this recipe without any adjustments. This is a great recipe. I’ll probably continue to use it for the rest of my life.
Do you have any gluten free bread recipes? Also I just bought some sourdough starter, any sour dough bread recipes?I really liked the one bread recipe of yours that showed the breakdown of what each ingredient costs. Do you do that for all of your recipes? If not that would be great! I have always assumed and was recently told that making your own was a great deal cheaper than store bought. From your honey wheat recipe it looks like there really isn’t much of a savings, but then again, as I’m typing this I really can’t remember what I paid last time for a loaf of store bought honey wheat bread. Just got back into the bread making thing again after not doily it for sooo many years. I just bought a mixer with dough hook wisk and meringue paddle, hope it arrives soon! I remember years ago that I bought a bread maker machine. You just throw all the ingredients inside push the right buttons and it mixes them all, lets the yeast rise, punches it down and bakes it also! My first loaf was just fine except I didn’t realize that on the bottom of the machine was a dough hook and when I dumped the bread on my counter I didn’t realize that the dough had baked the bread completely covering the dough hook. So when I went to cut it my knife raked across it making me nearly freak out! I’m glad I discovered my mistake before I served it to my family!
Unfortunately, we don’t have any gluten-free bread recipes, but you should check out Mama Knows Gluten Free. We do a cost breakdown of almost all of our recipes, yes, and this bread is still roughly half of what store-bought would cost in our area, so I count that as a win! :)
Wow this bread was easy to make and it is sooooooo good!
Would bread flour work instead of all purpose?
Yes, that should work fine.
I’ve made this a handful of times (on a bit of a homemade bread kick), and my kids won’t eat anything else for sandwiches. I modified the recipe slightly by halving the yeast (cuts down on the yeast flavor a little and rise times are pretty much the same), and substituted 3 Tbsp of unsalted butter for the oil. Everything else is the same, and I score the top of the loaf before baking because the kids don’t think it’s bread unless it has that shape.
Perfect recipe! I use the dough cycle of my bread machine and bake it in the oven. This recipe also works beautifully when I add nuts, cinnamon, and raisins for a sweet breakfast bread or flaxseed, sunflower seeds, and pumpkin seeds for a sandwich bread. The only recipe I use now.
It was amazingly delicious thank you for sharing! ❤️
I’ve made this bread about 5 times now and it is SO delicious and incredibly easy! A loaf doesn’t even last an entire 24 hours in my house.. I usually make sourdough but sourdough sandwich bread just isn’t a pillowy soft as yeast risen and this is now my go to for delicious sandwich bread 😋
I don’t remember ever making homemade bread but I haven’t been able to find a store bought bread that I like, so I decided to give it a try. This is so easy and delicious!! This is going to be my go to bread recipe.
What size bread pan do you use for this recipe? My apologies if I missed it.
Hi, Shola! We used a standard 9×5 (1.5-quart capacity) loaf pan. However, anything in that ballpark will work. If using a metal pan instead of glass, keep in mind that the outside of the loaf will cook slightly faster and you may see more browning than in our photos (but it will be equally yummy!). I have added the loaf pans we use to this recipe card (under Equipment) with a link to an Amazon page with more product info & ways to purchase. ~Marion :)
Delicious! This will be my new go-to bread recipe. I was a little skeptical since the dough was really wet and sticky – I had to add a full cup more flour than the recipe called for to get the right texture – but it turned out perfectly in the end!
There is something so satisfying in making your own bread! I usually make no knead bread but this recipe has taken me back. When my kids were little I made almost all of our bread but as they got older and I got busier I quit doing that. I will be making this bread this weekend, enjoying the process, the way the baking bread makes the house smell, and how delicious fresh bread tastes! Thanks for the recipe and the memories
Happy Thanksgiving!
Can this be made in my breadmaker??
I’m sure it can. However, we did not test it in a bread maker and can’t offer guidance. If you do make it, we’d love to hear about your process and results! XOXO -Monti
Can I use a stand mixer with a dough hook and achieve the same results?
Absolutely! XOXO -Monti
Absolutely delicious. Reminds me of the fresh baked bread at Longhorn Steakhouse. 🤤
Curious and excited to try this. How would you adjust the temp for a metal pan? Thanks!
Though metal heats up quicker than glass, it cooks slower. You’ll need to keep an eye on it, but a general rule of thumb is to add 20 minutes to the bake time. XOXO -Monti
Thanks! Same temp?
Yes. XOXO -Monti
I’m thinking of trying this. What size bread pan did you use? Thank you for all the wonderful recipes!
Just a standard loaf pan, 8-1/2 x 4-1/2 x 2-1/2 inches. :)
Perfect loaf but had absolutely no flavor. Not sure if it matters that I made it in bread machine.
I also found the taste a bit bland, good texture tho. Next time I might add more honey.
If using instant yeast, would you just combine everything in the first step with the water?
Instant yeast can actually be proofed the same way as regular dry yeast, so you wouldn’t have to change the method. It can be added dry, like in no-knead breads, but it doesn’t have to be. :)
Do you us guide for uniform slices?
Nope, that was just freeform slicing. :)
Great bread! However, 425 is too high of a temp to bake this bread. I’m glad I read the comments. I baked mine at 375 degrees for 25 minutes and it was done. I used a thermometer to check the internal temp, which was 185 degrees.
This is my go-to recipe for cinnamon rolls and other buns. I use all chakka atta flour (a finely ground whole wheat flour, the only kind my Costco stocks) with a little vital wheat gluten instead of the white/whole wheat combo. Otherwise, I let the dough rise, divided it in 2 portions, and then flatten/stretch each portion out into a rectangle for filling.
Two fillings that have worked great so far:
– soft butter (smeared) then sprinkled with sugar and cinnamon
– olive oil (brushed) then smeared with a tart jam and sprinkled with ground almonds
I roll the filling into a sausage, pinch shut, cut into cinnamon roll shapes, rise about 30-40 minutes in lined cake tins, then bake at 350 for about 15-20 minutes. As the dough is not very sweet, these work well with a little icing.
It came out well. I think that I like a little more sweetness, and so may add a little brown sugar. That will increase browning, so I’ll have to keep an eye on it in the oven. I baked this loaf at 375 in a convection oven for 35 min.
This is my go-to bread recipe! For some reason though it always turns out overdone when I follow the oven directions, so I bake it at 400°F for 27-28 minutes and it’s perfect!
We double the recipe and keep it in the freezer. We don’t buy bread at the store anymore! Thanks for a great recipe.
Hi! I’ve been unable to get whole wheat flour due to the pandemic. Are there any adaptations of this that use regular bread flour or all purpose flour? Thanks!
You should be able to make this will all AP flour, but you might need slightly more water as AP flour doesn’t absorb quite as much as WW flour. :)
I’ve been messing with this in quarantine as a sort of personal science experiment to learn more about bread. It’s such an easy and forgiving recipe that it’s good every time. The first time I had a hard time getting the dough to come together by hand. I got there but had to add a lot of water. I’ve been using my stand mixer with the dough hook ever since which is easier. For this week’s loaf I used a whole packet of yeast (only an extra 1/4 teaspoon) and didn’t score the top (I’ve had the same problem with deflation another commenter reported). I also forgot the salt but that was an accident. :) It rose beautifully and is almost fluffy.
This did not turn out well for me. I proofed my yeast and it seemed fine but it did not rise smoothly for the second rise so I have an uneven lumpy loaf. Not sure what went wrong but probably won’t try this recipe again.
Does this call for quick yeast?
It’s active dry yeast.
I’m a bread making novice & decided to try my hand at it with hopes of cutting down on grocery runs during this quarantine. I was able to follow the recipe successfully with absolutely no prior knowledge! The bread is delicious and definitely has less sugar than our regular store bought which is absolutely a win in my book!
This bread is so yummy! Although the recommended baking temp always overcooks it for me. Next time I will try 30 mins at 400.
This is the second time I’ve made this bread, and while it tastes delicious, scoring the dough with a knife has made it deflate both times. Am I cutting too deep, or is there some other trick? What would happen if I didn’t score the dough?
This one will probably be okay if you don’t score it. Deflating can be the result of a few things. One might be the type of knife you’re using, or putting too much downward pressure as you score, or perhaps the gluten hasn’t been developed enough in the dough so it’s not very strong (kneading longer can help, just don’t add too much flour so the dough gets stiff).
Great recipe!
Followed recipe except instead of all purpose flour I used bread flour. Perfect texture and sooooo delicious. My husband couldnt wait until the loaf was cooked to cut a slice. Cut no problem and didnt deflate the bread as the crust is pretty sturdy. Loved this recipe. Keeping in my tried and true stash! Will start trying some of your other recipe and passing this recipe to my friends and family!
has anyone tried this recipe with only all purpose flour?
I love this website so much because the recipes never fail. So if I can alter one of her recipes then that would be awesome
You should be able to make this will all AP flour, but you might need slightly more water as AP flour doesn’t absorb quite as much as WW flour. :)
Has anyone tried using sprouted wheat flour? We’re interested in using this type of flour but not sure how well it will perform. I think in terms of processing it performs more like white flour. I would just use the King Arthur recipe (where we bought it) but it looks way more complicated than this! :)
I made this today and unfortunately, it didn’t come out as I expected….I don’t think my yeast had enough to eat because after a while, it just stopped rising although I had it in a warm room. I really only had enough for one loaf. Also, it maybe my american pallet but I think it needed a little more to sweeten it up for me…I would say this is more of wheat bread than honey wheat. I never try a recipe just once so I may try it again with a few adjustments.
This was a flop for me. Had to work to hard to get more then 1 cup of amp flour in it. Might have made one loaf better. Tried 2 loafs n they aren’t 2 inches high.
It’s only meant to make one loaf
My family loves this bread! It’s simple and delicious, and it really does make great sandwiches! Even my pick husband prefers this! The only modification I made was cooking it at 375 for about 25 min in a countertop oven (they tend to cook a bit quicker). Yum!
I added one cup of bread flour and one cup of AP flour to the whole wheat, and it came out great! I also baked it at 425 for about 20 minutes until it got really brown on top, then covered with foil and turned it down to 350 for another 15. Probably didn’t need that long — I’ll do it for 15 at 425 and 15 at 350 next time. Great bread though!
I will make this bread again. It tasted very good. I used canola oil, instead of olive oil. I used 1 cup of all-purpose flour, and 1 tsp. of salt. Next time I would add a little more AP flour, because the loaf was a bit sticky to remove from the bread pan, even though I oiled it. 400F
made my loaf quite dark. Next time, I would turn it down to 375F and bake a bit longer. I didn’t slice the top, but may try it next time. I had one air bubble right on top. This is a winner recipe. I have tried multiple whole wheat bread recipes, and this is the best one.
LOVE this bread Beth! I’ve made it the last four weekends in a row and we’ve basically stopped buying sandwich bread from the store, which is great. I’m curious — could this same dough be used for a cinnamon roll recipe, or would it not work? I just think the taste/texture would be great for it.
I bet it would work! I don’t see any reason why not. :)
Thank you so much for this recipe! I make this bread almost everyday for my family. Its absolutely delicious!
I’m wondering, is there a standard size for bread loaf pans? The one in the photo looks fairly large, larger than the loaf pan i use for banana bread.
I think standard is 9″x5″, but I’m not sure if that’s a top measurement or a bottom measurement, since they usually flare out a bit from bottom to top.
its easy to follow. thank you for sharing this.
Eu amo esta receita! Nosso lanche ficou muito mais saboroso. Meu marido, não consegue esperar o pão esfriar. Muito obrigada!
Can you make this recipe in a bread maker?
Unfortunately I don’t have any experience with bread makers, so I’m not sure. :(
When you say 2 tsp of yeast, would that equal one package of Fleichmann’s Active Dry Yeast?
Yep! I think technically a packet is about 2.25 tsp, but I doubt that extra 1/4 tsp will make much of a difference.
We’ve made it in the bread maker twice, it turns out great!
YES! This bread turned out PERFECT. I changed only one thing – the cooking temperature – at the recommendation of my mother, master bread maker. I cooked at 375 for the same time, 30 minutes. Bread came out perfecttttt, golden brown, internal temperature read 200 degrees. People who are having problems with the bread burning might want to reduce the temp. I suppose the only other change I made was letting the second rise go a bit longer than 45 minutes, maybe an hour and 10 minutes, only because I really wanted the bread to be over the edge of the pan for sure. I waited almost 12 hours to cut into it too! Baked it at night and let cool all night under a tea towel – no caving in! It’s the most delicious sandwich bread ever. I just ate the best turkey and pimento cheese sandwich of my life, all thanks to this delicious, easy bread! THANKS BETH!
Beth can you use bread flour rather than all purpose for this?
Yes, that will work very well. :)
Thank you, I did! My rave reviews above! :)
Another similar question – could I use ALL bread flour? I want to make again but want just a white sandwich bread this time. Would I have to change anything else to the recipe if I only used bread flour and no whole wheat? Thanks!
Yes, you can use all bread flour. The total flour amount may vary, but it usually varies a bit from time to time anyway depending on the humidity etc. Just feel out the dough as you’re adding flour and make sure not to add too much and make the dough stiff. :)
Turned out excellent and perfect again! I can’t believe it’s this easy and cheap to make homemade bread!
Hey Beth! This might be a silly question but when making homemade bread, how do you get it to cut so evenly and nice? I’m always scared that I will damage my carefully made loaves, and my bread knife doesn’t make me feel much safer.
Making sure the bread is 100% cooled to room temp is the number one key! :) It’s too delicate when warm.
I’m making this bread for the second time today. It’s coming out incredibly dense, and doesn’t want to rise over the sides of the pan. I have it in the oven now, and it looks really flat and sad. I don’t know what I’m doing wrong. :(
I would try kneading it a bit longer. Sometimes if the gluten isn’t developed enough, it won’t be strong enough to rise up. Just be careful not to add the flour too quickly while kneading, or else it will get stiff and dry before it has been kneaded sufficiently.
I’m making this bread for the second time, not having good luck with the cooking in my oven. It seems to very quickly get very dark/burned looking on the crust, way before it’s finished cooking. I’ve tried turning the oven down this go, still not great, and I’m struggling with figuring out how much time extra I need to bake with a lower temp to get it cooked in the middle.
I’d lowered the oven temp to about 210 C (410 F) initially this time, and then down to about 205 C towards the end, but still way too browned.
And because two replies are not enough, it was fully cooked through this time (yay! wasn’t last time) and man does it taste fantastic, despite a very thick and dark crust.
Another thing you can do is wait until about half way through the cooking time (when the crust is already set), then cover it with foil. I’m pretty sure this will stop the browning on top, but let the inside continue to bake. You just want to make sure to wait until the bread has expanded as much as it will and the top is no longer soft. I hope that works out for you!
Made it today – tried the foil over the top after 15 minutes. Just draped it over the top of the pan. Way less overcooked on the top. Still a bit too browned, but way better. I also don’t think I kneaded as much as I had previous times, it was still sticky when I put it in the oven. I haven’t tasted, but it looks okay and cooked.
Thank you so much for this recipe – I’m finding it fun to make bread, even though I don’t particularly know what I’m doing!
I know it’s three years after the fact, but I just have to say that this is my new go-to recipe for sandwich bread. I’ve been making it once a week for the past couple of months and it’s great! I am no longer buying bread at the store. I increased the salt to 1 Tbsp. but it’s otherwise perfect!
I have tried to make bread so many times without success. Somehow I can make delicious cake, biscuits, pizza dough, and other baked goods…but a loaf of bread has eluded me. This is the first recipe that came out perfectly…and it was also the easiest. My husband couldn’t stop eating it. Thank you for breaking it down and making it easy! I felt relaxed and enjoyed the process, rather than feeling like I was doing something wrong the whole time.
Hi,
I have made this bread three times now (three days in a row). The first time was too dense, the second was better but the dough deflated when I cut it, and this time it was more elastic and rose better but still deflated when I attempted to put the slit in it. So, I let it rise for about 15-20 minutes longer so it was over the edge of the pan again and it is about to go into the oven. Do you have any suggestions on how to cut the slit in the top without deflating? I tried just dragging the blade across with little downward pressure and it didn’t work right.
Thanks,
Joie
Hi Jole – it might just be the knife you’re using. I’ve used both a serrated bread knife and a smooth chef’s knife, but if you’re having trouble you may want to stick to a very, very sharp chef’s knife. Also, the slit isn’t absolutely necessary, so you can skip that step if it helps your bread keep its shape. :)
Thanks! I think I am going to try skipping the slit the next time I make it.
Okay, so I did not cut the slit in it this time but as soon as the heat hit it when I went to put it in the oven, it deflated! I am out of ideas and may just have to try something else. There has to be something that I am doing wrong.
I wish I could watch your process to find out what it is! :(
Joie and Beth: I have not yet made this bread but with my past bread making experience (the little I have) do this when you’ve reached step 4:
After the bread has risen in step 4, before shaping it in the pan, punch the air out. Then try shaping it in the bread pan. This may or may not make the bread more dense but should prevent it from deflating. It should also allow you to make the slit for a more appealing design. :) Hope that works for you!
What size are your loaf pans? I have 2 different sized loaf pans and I’d like to use the right one. :)
They are a standard 8.5 x 4.5 inches (measured on the inside bottom). Hope that helps!
Thanks, Beth! My pans are just a half inch bigger, which shouldn’t be a big deal. :)
Thanks, Beth! My pans are just a half inch bigger, which shouldn’t be a big deal. :)
Beth, I was wondering… roughly how many slices to you get out of this loaf? My boyfriend and I are trying to really watch our weight and I wanted to try to calculate how much per slice. Just thought I’d ask before a make this fabulous looking bread :D
About 12 slices, if I remember correctly :)
Hi Beth! I love your blog and I can’t wait to try this recipe since we do eat a lot of honey wheat sandwich bread in my house. What size bread pan did you use?
I just baked these on a baking sheet covered with parchment paper (no bread pan). If you wanted to use a loaf pan, the dough would be enough to fill a standard size loaf pan.
Raven, I used a 9″ X 5″ metal loaf pan. It was Baker’s Secret brand. I greased the pan lightly with butter and it worked really, really well! Good luck.
Oh, the other thing. I use a single edged razor blade to slash the top of breads. It stays sharp and cuts cleanly and not too deeply. I keep it in a wine cork in my knife drawer. Cheers!
Great tip, thanks!
Beth, I just made this recipe two days ago and I must say it is sooooo good! I did use really good ingredients, tho. King Arthur All Purpose flour (non bromolated) employee owned, Bob’s Red Mill Whole Wheat flour (also employee owned), and some local honey. I think ingredients do make a difference. I will be making this again and again. Thank you for a great basic sandwich bread!
Awesome! Thanks, Beth!
Abby – Hmm, maybe try to knead it for a minute or two longer. That will help develop the gluten, which will help it hold it’s shape when rising. Since you’ll be kneading it longer, try to add flour slower when you knead so that the dough doesn’t get too dry and stiff (just sprinkle very lightly with flour as you knead). Bread is one of those things that you will always get better at the more you try, so keep it up :)
This was my first time making homemade bread, and I was pleased! However, it turned out pretty dense and crumbly. Any suggestions besides letting it rise longer? I used a Pampered Chef bread pan, but does aluminum work better? Can’t wait to try this out again!
I don’t know if you check this anymore but do you think i could use half sugar and half honey to cut down on the cost a little bit?
I made this last night. It will be our new sandwich bread since my bf took it for lunch today and approved. It is light like the bread you would buy from the store, but the taste and texture are so much better. I baked it in a glass bread pan at 375, and my oven must run hot because the top crust was a little overdone. Will try it at 365 when i bake more tomorrow. Thanks!
Oh, wow, that dough looks extra dry! Did you double check that you used the right amount of water? One and one quarter cups? Is that picture of the dough just after you kneaded it? The dough should still be soft and supple after you’ve kneaded in the rest of the flour. You do not need to add in a full three cups, just enough to make it a soft, elastic dough that no longer sticks to your hands. The amount of flour that you need to add will differ probably every time you make it depending on the moisture in the flour and the air. Try adding it very slowly (a very, very light sprinkle) as you knead so that you get at least a full three minutes of kneading in. If you add a ton of flour as you knead, it will get very dry and stiff before you get a chance to knead it enough.
Start with those tips and see how it goes, but most importantly, don’t give up! :)
Hey Beth,
Just tried this recipe (first time making bread), and it came out pretty dense.
http://imgur.com/a/Y7tMg
I know my kneading technique was bad after watching a few videos. I got a cup of AP flour in while still in the bowl, but had a hard time working the rest in on the counter top. Any thoughts?
Any olive oil will work – I used extra virgin :)
Hi I am trying to make this recipe. But, I only have extra virgin olive oil and safflower oil. Is any of them ok? Or should I really get olive oil, Please help?
My first loaf just came out of the oven! I couldn’t wait to slice off a piece and it was fabulous. :-D
I love this bread!! Okay so, I think I didn’t add enough flour because my dough was SUPER elastic after the first and second rise. It was spilling over my bread pan after the second rise. So I’ll try a tad more flour next time (only used maybe a cup and a half of AP flour). It did collapse a little when trying to cut the slice in the middle but again, it was too elastic. Once it baked though, it was heaven. The crust was perfect.
I have made this bread twice now and each time, it came out perfect, it is so delicious, words can’t even explain, thank you so much for a great recipe and easy to follow photos, thank you!!
thank you so much!! you’re the best!
Yep, the texture is the only thing that should change if you use all whole wheat. Go for it! I hope you enjoy it :)
i only have light whole wheat flour and my boyfriend won’t get any all purpose flour, he says until we use up the flour we have, there is no need to get more, he’s stubborn so i can’t really change his mind haha. so my question is, can i just use whole wheat flour for this recipe, i understand it’ll be more dense but he likes it that way. so can i go for it??
Yes, active dry yeast will work just fine :)
Would active dry yeast work for this recipe as well?
I’m making this bread for the third time today. I love it! I’ll never go back to being happy with store-bought bread.
Sarah, I use Fleischmann’s and have made this bread with both active dry and instant yeast. Make sure the water that you dissolve the yeast in is really really warm (almost hot). If you happen to have a thermometer, it should be between 100 and 110 degrees F. Keep trying! You’ll get the hang of it and then you’ll be able to do it with your eyes closed! :)
My bread didn’t rise..i have so much trouble making breads in general.. what kind of yeast do you use? brand name etc… my yeast never got frothy ..help!
It looks a bit dense :( We’ll see when I cut into it tomorrow. I will try again!
Sarah, you do have to be quite gentle or else it can collapse. It feels strange but you have to cut with no diwnward pressure at all, just drag the knife horizontally. I hope it still tastes okay!
I’m making this now… when I went to cut the top it deflated!! So I let it rise a hair longer before putting it into the oven. I wonder why it did that.
I just started making this loaf and half way through I realized I didn’t have enough AP flour for kneading so I just used some extra WW flour. I hope that it doesn’t come out too dense, but it looks okay. I am just waiting for the first rise now.
Freddie – instant yeast should work fine. IMHO, using all whole wheat makes bread too dense. Although, someone once sent me a link to a page on how to make your own dough conditioners, which should help. Unfortunately the link was broken otherwise I’d pass it on to you! But, I’m sure you could find something similar with a quick google search. Good luck and let me know how it turns out!
I have been making our bread for several months now and I am on the hunt for the perfect loaf of sandwich whole wheat. Do you think this recipie can be made with all ww or do you need to split it so it’s not to dense. I also use instant yeast that should be ok to right?
Great, thanks!
Kayla, I’ve never used a bread machine but I think I understand how you will need to modify the recipe. If you are using bread machine yeast, it does not require being dissolved or proofed in the warm water first. So, just add the ingredients like you would normally in a bread machine recipe. I think that will work! Good luck!
Hi, this is pretty late but I was wondering if you think this recipe would work in a bread machine? I have very little counter space to work with so I prefer to use my machine for the mixing and needing portions. The machine’s directions say to not mix the yeast with anything, but I’m wondering if I just followed your instructions while keeping the machine open if it would turn out ok?
Monkeytoes – Hmm, there are many things that could be causing this but here are two of my best guesses: First, your oven may run hotter than mine so try reducing the cooking temperature by about 25 degrees and cook it just until it’s a medium brown on top. Second, you may need to knead the dough a little longer. This will develop the gluten more and you will get a lighter bread (hopefully with a thinner crust). Keep trying, though. Bread making is a *lot* of trial and error. You really have to get a “feel” for it!
My bread came out with a hard top. You can knock it … Any suggestions?
The best yeast I have ever found is Saf. For the fluffiest baked goods every time. It never fails me! http://www.amazon.com/Saf-Yeast-Instant-Yeast-16-oz/dp/B0001CXUHW My mother got me hooked on the stuff.
Mile319- Yours didn’t look *too* bad. The quality of the whole wheat flour shouldn’t matter in how much your loaf rises. I make bread with the gold medal flour all of the time :) When you’re kneading in the flour, you don’t want to add so much that it becomes a stiff ball. Add just a sprinkle at a time as you knead it. The dough should stay fairly soft and pliable. This is just something that takes practice but you’ll get a feel for it eventually. So, keep trying! I suspect the problem is that you may simply need to let it rise longer. Rising time varies so much because it depends a lot on the heat and humidity in your kitchen and the state of your yeast. So, perhaps try letting it rise 30-45 minutes longer next time.
Good luck! I’m sure you’ll get the hang of it!
Beth
Thank you for giving the courage to try this recipe. I, of course, totally did something wrong because my loaf was pretty dense. I wonder about the type of flour I used (grocery store-bought Gold medal whole wheat flour) or if I didn’t knead it long enough…or if I used too much of the all-purpose flour. It’s tough being a novice! So many things could be wrong. :) Here’s a pic of my loaf: http://smellslikeburning.wordpress.com/2011/07/31/neither-a-cook-nor-a-baker/
Anyhow, thank you so much for your wonderful blog. It’s one of my favorites – I’ve made a few of your recipes and have loved them!
I have had such terrible luck with sandwich bread. I can make breadsticks, biscuits, naan…but not a loaf of regular whole wheat sandwich bread – until now. I tried this today and was SO pleased with the results. I used instant yeast and mixed it up in my kitchen-aid up through 1 cup of all purpose, then worked another 3/4 cup in by hand. So I actually came up short on the 2 cups but the dough had the right consistency and turned out great! It also only took 25 minutes in the oven before it was done baking. My only snag was trying to slash the top of the dough after the second rise. I used a (small-ish) serrated knife but it kept snagging the dough instead of cutting through it nicely. Any tips? It deflated the loaf slightly, though the texture didn’t suffer at all. I linked back to this on my food blog. :) http://newlywedfoodadventures.blogspot.com/2011/07/honey-whole-wheat-sandwich-bread.html
Looks wonderful!
I love your blog! I just made this yesterday. I’ve made banana nut and zucchini breads dozens of times, but never ventured in to ‘regular’ breads. This was SUPER easy – even though I was a little nervous about having to wait for rising, kneading, wait some more, etc. But I made this while I was doing other household chores and it wasn’t that painful at all. : ) I sliced off a piece after it cooled, and it tastes amazing! Can’t wait to try it for lunch with my tuna. : )
Tiffany, yep, it’s the same yeast!
Anonymous, try letting your bread rise longer. Because of temperature and humidity differences the suggested rise time may not be exactly right for everyone. Just keep letting it sit until it gets big and fluffy!
This is probably a dumb question, but is “yeast” the same as the “dry active yeast” I bought when I made your Naan recipe? The naan was phenomenal by the way! It was my first time using yeast and now I want to make more! :)
Hi Beth,
Try using Spelt or Rye flour as a variation to wholemeal.. Equally delicious but subtly different..
HappyDace..
This was my first time attempting to make a sandwich bread. I followed the recipe exactly, but found my bread to be much too dense. Any idea what would have caused this?
it would be great if you post the recipe of sub rolls like subway and quiznos? thanks.
This has now become our go-to sandwich bread recipe. We haven’t bought a loaf of bread in over a month! Our first few loaves kept coming out a little burnt on the top by the time the center was done, so now we dial back the oven temp to 350 and bake it a little bit longer – comes out perfect! Thanks for another fantastic recipe!
I LOVE this. So much. I’ve made it twice in the past week. I toast it, add some butter and honey and it’s a dream. It’s so soft and moist and sweet. Perfection. Never buying bread again.
I really loved reading your blog. It was very well written and simple to undertand. Unlike additional blogs I have read. I also found it very interesting. In fact after reading, I had to go show the spouse and she ejoyed it as well!
Banana Nut Bread
I tried this out today – first time EVER baking a yeast bread. Until spotting your recipe, I’ve been wary of dealing with yeast. Your recipe was super easy to follow – love the supporting pictures! Super crust and so soft on the inside. I’ll be baking this all winter! Thank you!
Ok this was my first time ever kneading, and making homemade bread. I wanted to do it myself instead of use my bread machine :) . It’s more fun that way! Anyways everything seemed pretty good I used 2 cups of white flour out of the 2-3 you recomended. And the bread came out yummy! But when I cut it, it almost cracks off at the end. Maybe I should add more water? Oh oh and when I made the slit down the middle it did the collaspe thing :/ what do you think I’m doing wrong? :/
Just made this…best sandwich bread recipe I have come across, as this is not complicated, has simple ingredients, and yields a fantastic result! The smell from the oven was swoonworthy. Mine was fully cooked by the 25 minute mark, although it could be my oven running hotter than most. My crumb had smaller holes as well, which is interesting (I used stoneground ww flour as well, and AP flour).
Anyway, thank you so much for posting this, I will link back to you on my sandwich bread post I did a while ago (which admittedly is not as nice as this but is a little more adapted for those needing time flexibility).
I made this…. just sliced it up now. Oh it was so yummy. I didn’t have enough all purpose flour, so I offset that a little with extra whole wheat flour. Baking is now my therapy. :)
I blogged about it at http://www.soulsurchin.blogspot.com
Thanks for the recipe!!
Hello!
Thanks for this recipe. I made it this afternoon and it turned out quite well. A (hopefully small) request: Would you consider posting the dimensions of the bread pan you use for this recipe? I find that I have a number of pan sizes and didn’t know which one to use to get the bread to rise above the edges as written.
Thanks again for the recipe! I look forward to trying it again using some corn flour in the mix next time.
Awesome pictures and recipe! I make a honey wheat bread very similar to this, but I also add a cup or so of oatmeal. It really give the texture that extra kick. I love making it into small rolls, and using it for pulled pork sandwiches. My kids like it with pb&j’s!
Caroline – This bag of ww flour that I bought was the first in YEARS. The store was out of regular brand ww flour so I ended up buying this small (2 lb.) bag of Hodgeson Mill Stone Ground Whole Wheat. It was pretty pricey (same price as the 5 lb. bag of all-purpose) but it really is good. It has more texture and flavor than I remember the generic whole wheat flour having. I’ll probably buy it again.
Ack!! Thanks Jennifer! Problem fixed… sorry if your bread doesn’t turn out good :(
The olive oil and salt step is missing from the written directions, and I missed it. Breads in the oven right now, I hope its still just as good. Thanks for the recipe, I will have to make again with the olive oil and salt.
I’m gonna make this tonight :)
Well done. I can see that you proofed your bread perfectly this time. When you cut the slit down the middle of the loaf, it did not collapse and you can see the bubbles and air that has been produced by the yeast.
And the end product is perfectly golden, with a very nice looking crumb.
I’m bookmarking this!! I need to buy some ww flour – do you have a brand you like?
Thank you for posting this recipe. You are awesome!