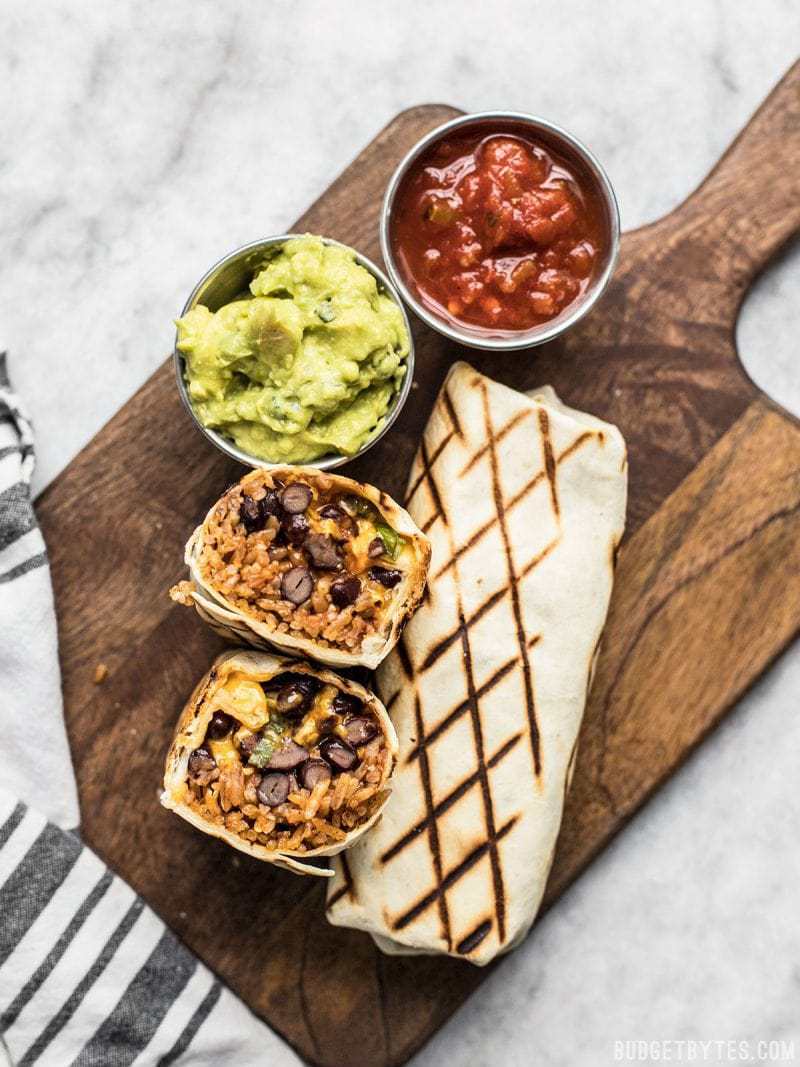
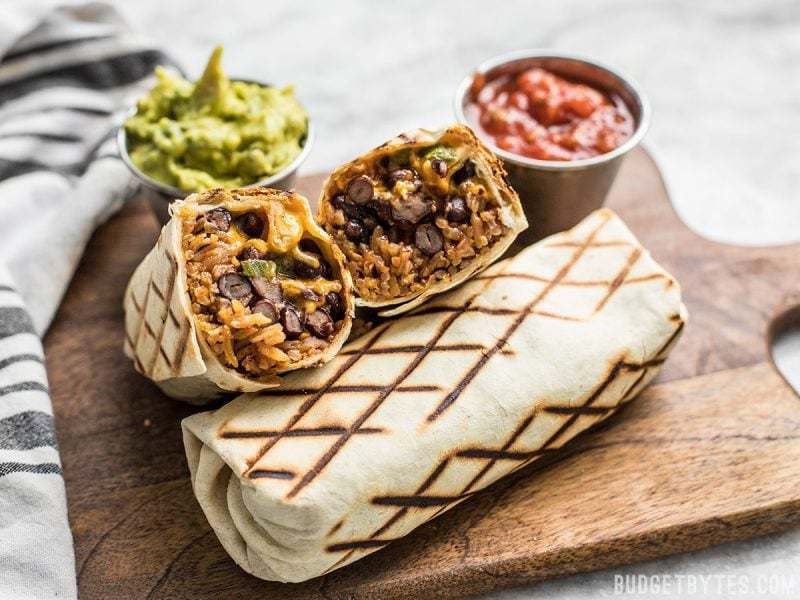
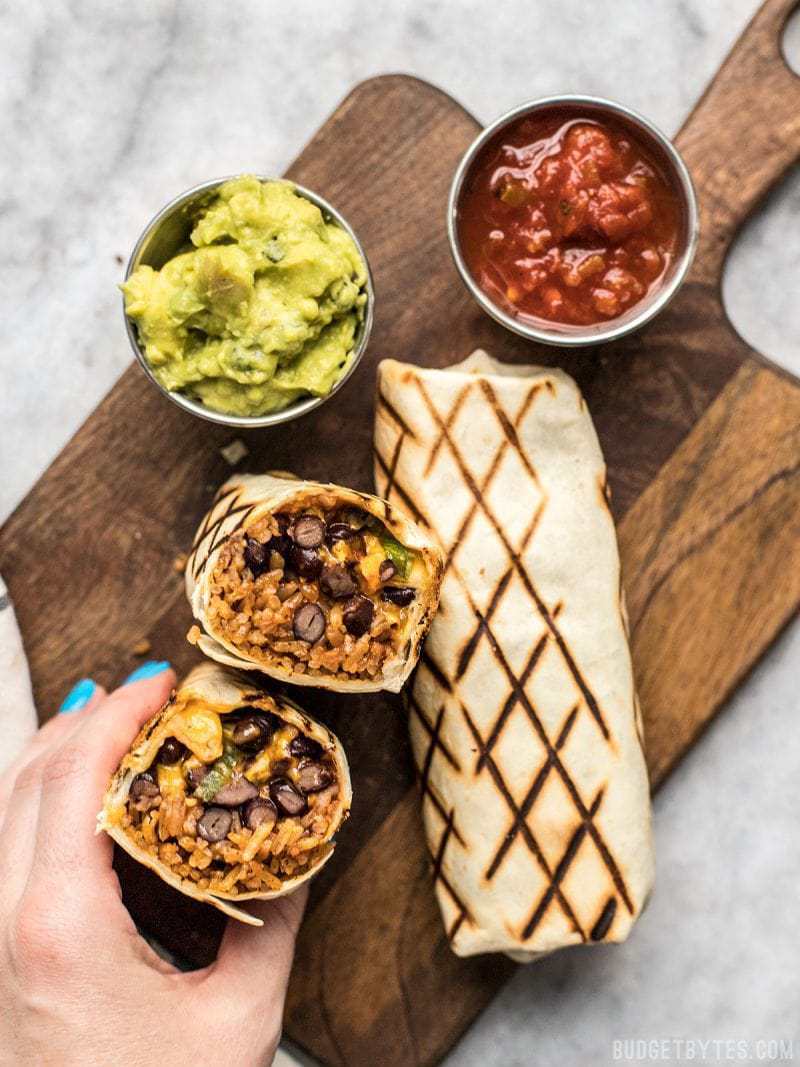
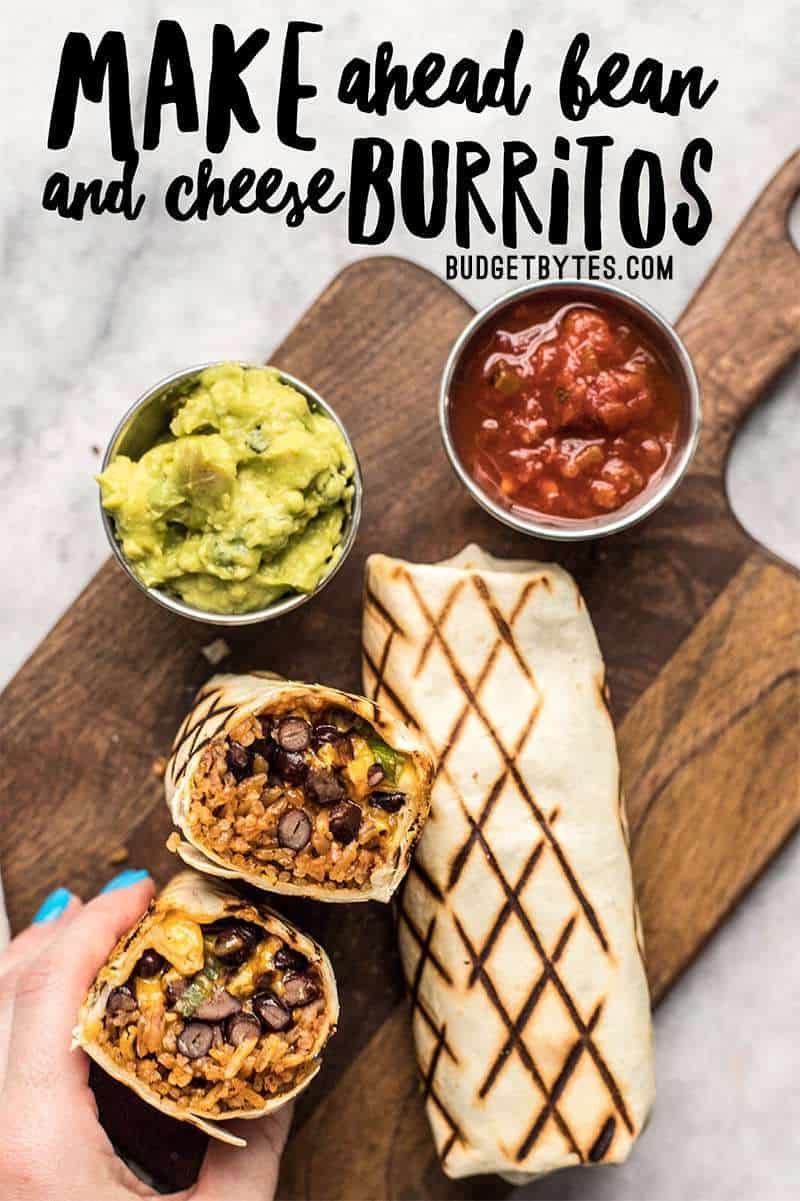
I can’t lie, guys. Sometimes I crave those cheap freezer burritos. They’re just so easy to buy and stash in your freezer for days when you don’t feel like cooking. But guess what? It really doesn’t take a lot of time or effort to make your own freezer burritos, with ingredients you choose, and they’ll still be super cheap. So this weekend I whipped up a batch of super simple Make Ahead Bean and Cheese Burritos to feed us for the week (and beyond). I stored half in my fridge for the next few days, and the rest went into the freezer for longer storage (but let’s be real, they’ll be gone in a couple of weeks).
This post contains some affiliate links, which means that we make a small commission off items you purchase at no additional cost to you.
Burrito Filling Options
I made my burritos super simple with just some seasoned rice, black beans, cheese, taco sauce, and a few green onions, but the options for what you could put in your make ahead burritos is endless. Here are some great options:
- Taco seasoned ground meat or meat substitute
- Scrambled eggs
- Roasted vegetables
- pulled pork and pineapples
- Jalapeños
- Carnitas
- Refried beans (instead of whole beans)
You can add just about anything to your burritos, as long as the ingredient isn’t very watery or has a high water content (like fresh lettuce or tomatoes). Ingredients with a lot of water won’t store well in the refrigerator or freezer and are best added to burritos that will be consumed the same day.
Bean and Cheese Burritos
Ingredients
Seasoned Rice
- 1 Tbsp cooking oil ($0.04)
- 1 clove garlic, minced ($0.08)
- 1 tsp chili powder ($0.10)
- 1/4 tsp ground cumin ($0.02)
- 1/4 tsp oregano ($0.02)
- 1 cup long grain white rice ($0.53)
- 1/2 tsp salt ($0.02)
- 1.5 cups water ($0)
Burritos
- 2 15oz. cans black beans ($1.18)
- 2 cups shredded cheddar ($1.50)
- 2 green onions ($0.17)
- 1/2 cup taco sauce ($0.88)
- 8 large flour tortillas ($2.39)
Instructions
- Begin making the seasoned rice first, so you can prepare the rest of the ingredients as the rice cooks. Add the cooking oil and minced garlic to a sauce pot and sauté over medium for about one minute, just to take the raw edge off the garlic.
- Add the chili powder, cumin, oregano, and rice to the pot. Continue to sauté, stirring continuously, for about two more minutes to toast the rice and spices.
- Carefully add the water and salt to the pot, place a lid on top, and turn the heat up to high. Allow the pot to come up to a boil, then turn the heat down to low. Allow the pot to simmer on low for 15 minutes. After 15 minutes, turn the heat off, and let the rice rest undisturbed for five more minutes. Finally, fluff the rice with a fork.
- While the rice is cooking, rinse and drain the black beans well. Slice the green onions.
- When the rice is finished cooking and you’re ready to assemble the burritos, stack four tortillas on a large plate and place a damp paper towel over top. Microwave for 30 seconds to steam the tortillas, to make them more pliable and easy to roll. Steam the next four tortillas only when you’re ready to begin working with them.
- To each tortilla add about 1/3 cup rice, 1/3 cup beans, 1 Tbsp taco sauce, 1/4 cup shredded cheddar, and a few slices of green onion. Roll the burritos up tightly, making sure to fold in the sides first to hold in the the filling.
- Store the burritos in an air-tight container in the refrigerator for 4-5 days, or wrap each burrito individually in parchment paper or plastic wrap, then place in a freezer bag, and store for up to three months.
- To Cook from Refrigerated: Place the burrito in a skillet or on a grill pan and cook over medium-low heat until the outside is brown and crispy and the cheese is melted on the inside.
- To Cook from Frozen in Microwave: Set the microwave to the defrost setting for approximately 9 minutes, or the defrost by weight setting, programmed to one pound.
- To Cook from Frozen in the Oven: Wrap the burrito in foil and bake in a preheated 350ºF oven for approximately 40 minutes.
See how we calculate recipe costs here.
Notes
Nutrition
How to Make Bean and Cheese Burritos – Step by Step Photos
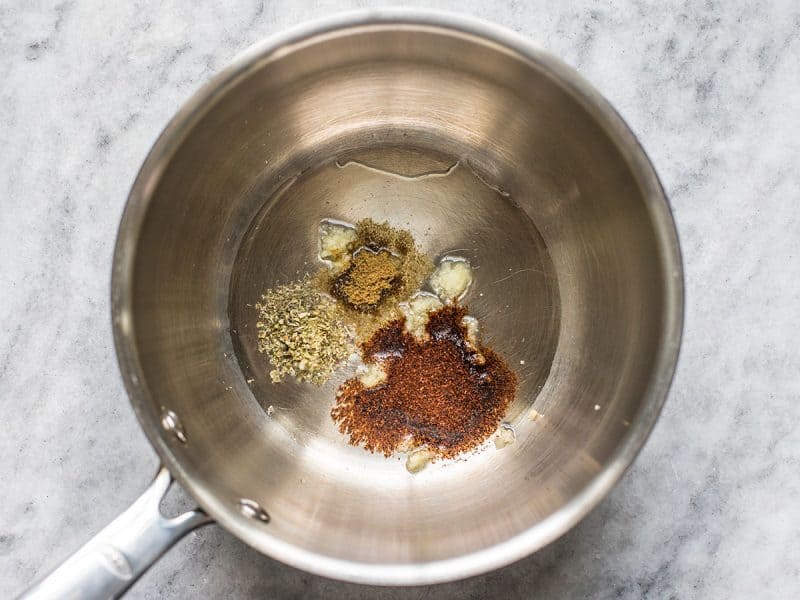
Begin the rice first so you can prepare the rest of the filling ingredients as the rice cooks. Add 1 Tbsp cooking oil and one minced clove of garlic to a sauce pot. Sauté the garlic over medium heat for only about a minute to take the raw edge off the garlic. Next, add 1 tsp chili powder, 1/4 tsp cumin, and 1/4 tsp oregano.
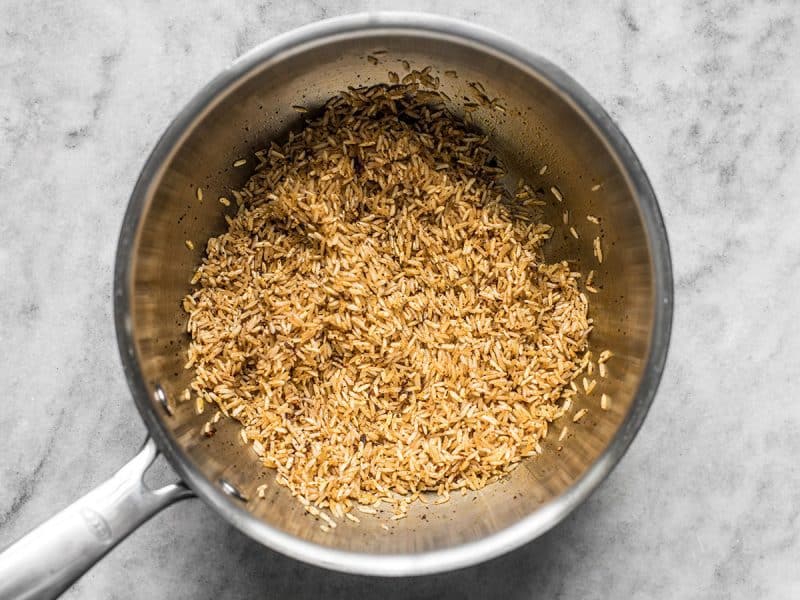
Also add 1 cup uncooked long grain white rice. Continue to sauté the rice and spices for about two minutes, which will toast the rice and spices and enhance their flavor.
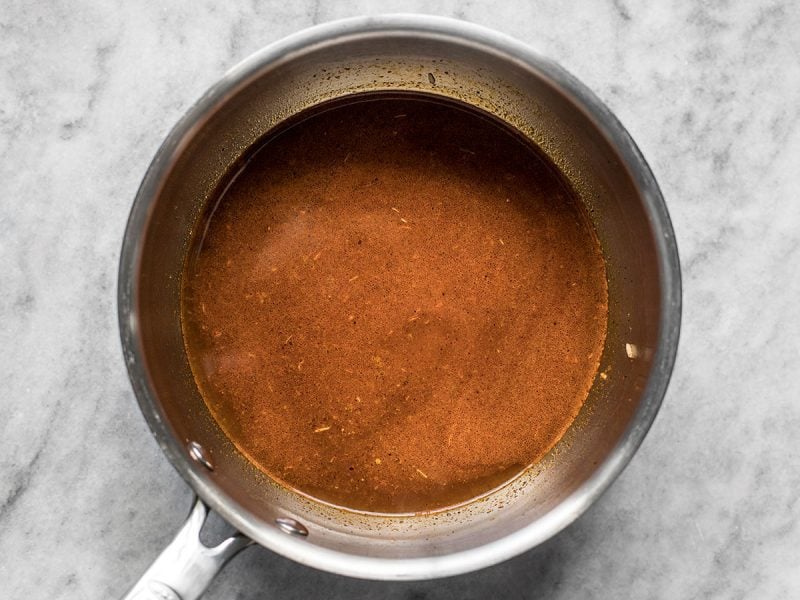
Next, add 1.5 cups water and 1/2 tsp salt. Place a lid on the pot, turn the heat up to high, and allow it to come to a boil. As soon as it reaches a boil, turn the heat down to low and let it simmer on low for 15 minutes.
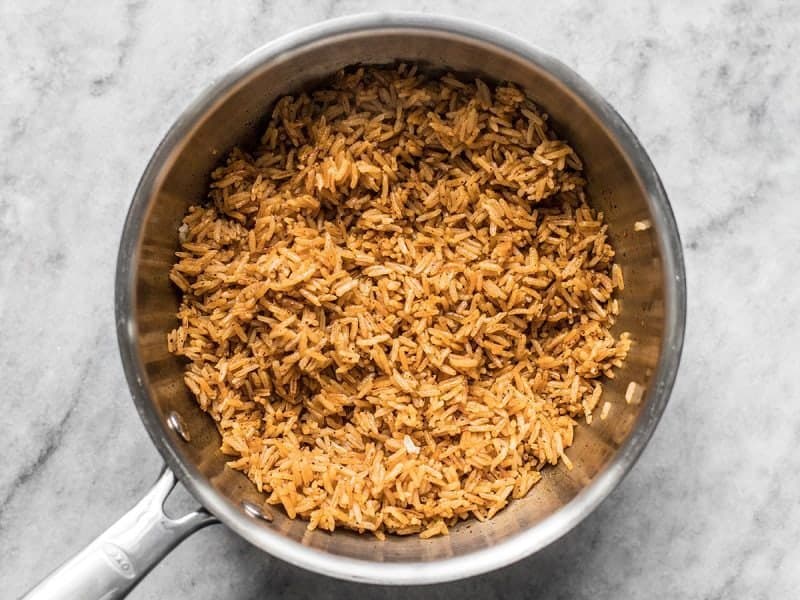
After simmering for 15 minutes, turn the heat off and let the rice rest undisturbed for another five minute. Finally, fluff the rice with a fork. While the rice is simmering and resting, rinse and drain two cans of black beans, and slice two green onions.
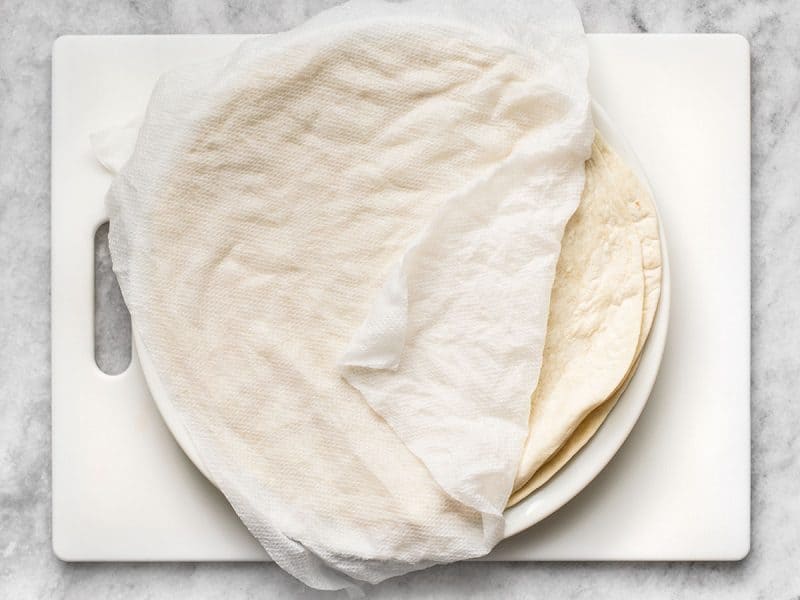
When you’re ready to assemble your burritos, place 4 large tortillas on a plate and cover them with a damp paper towel. Microwave for 30 seconds to steam the tortillas, which will make them more pliable and easy to roll (steam the second four when you’re ready for them).
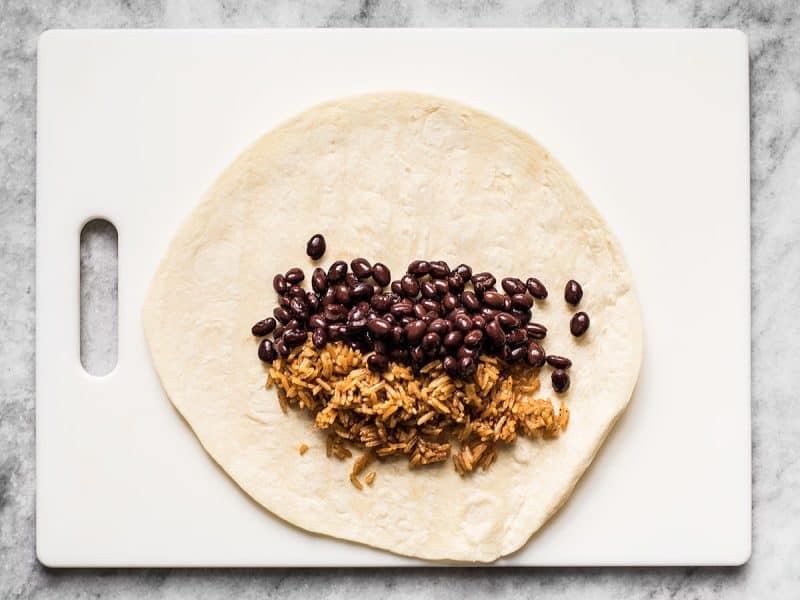
To make each burrito, place about 1/3 cup of the seasoned rice, and 1/3 cup of the black beans on each tortilla.
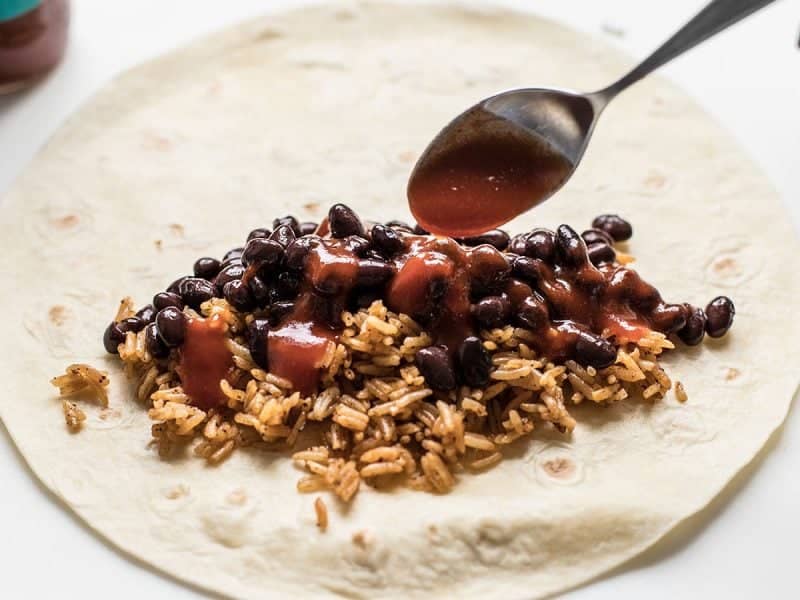
Then add 1 Tbsp taco sauce… (this helps keep the burritos moist)
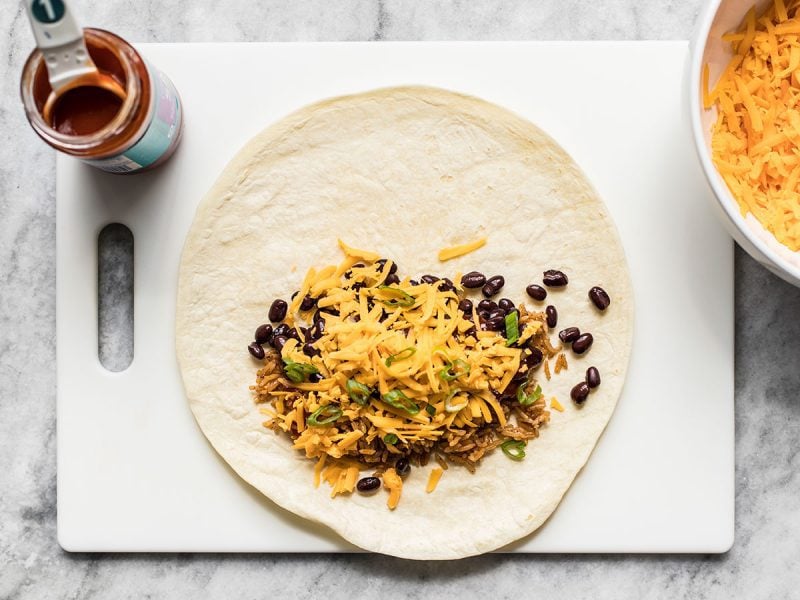
And finally, 1/4 cup shredded cheddar and a few slices of green onion. Roll the burritos up tightly, making sure to fold the sides in first to hold in the filling.
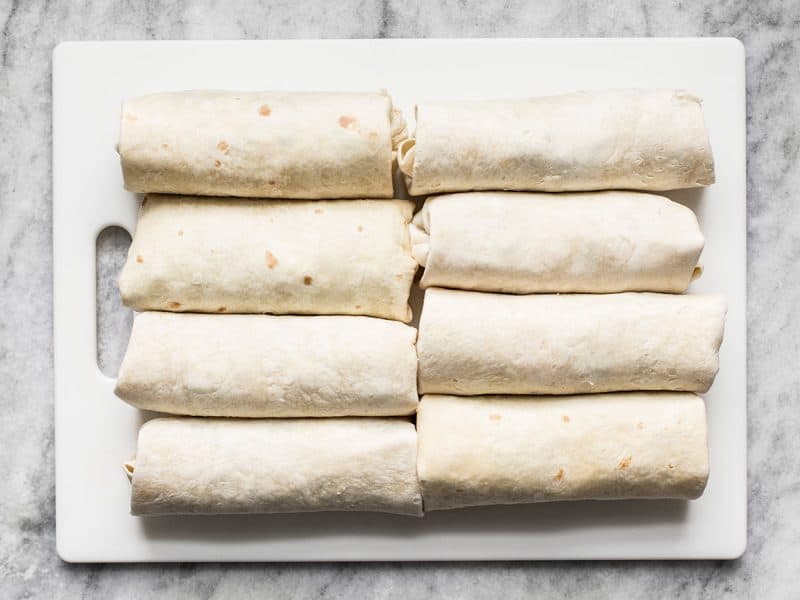
And now you’ve got eight burritos ready for eating or storing for later!
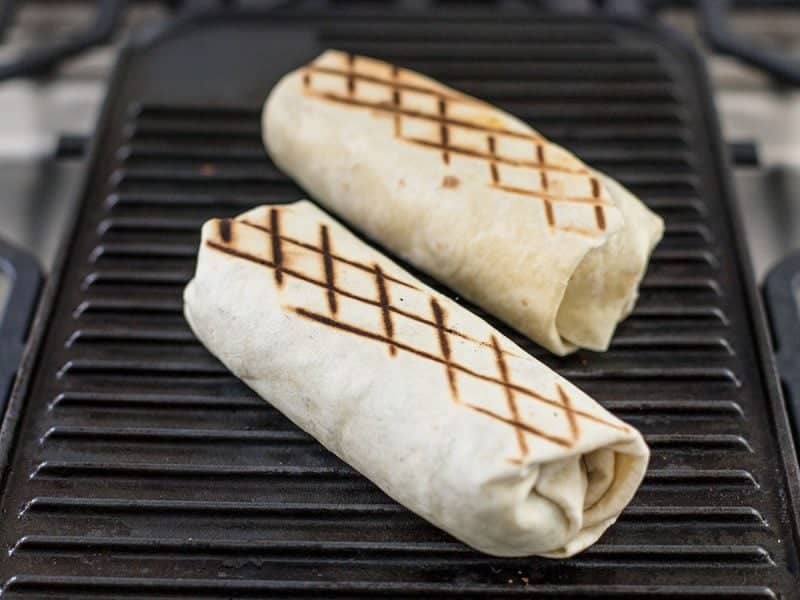
You can keep your burritos in the refrigerator for 4-5 days. To cook them from the refrigerator you can just place them in a skillet or on a grill pan and cook over medium until the tortillas are brown and crispy, and the cheese is melted on the inside.
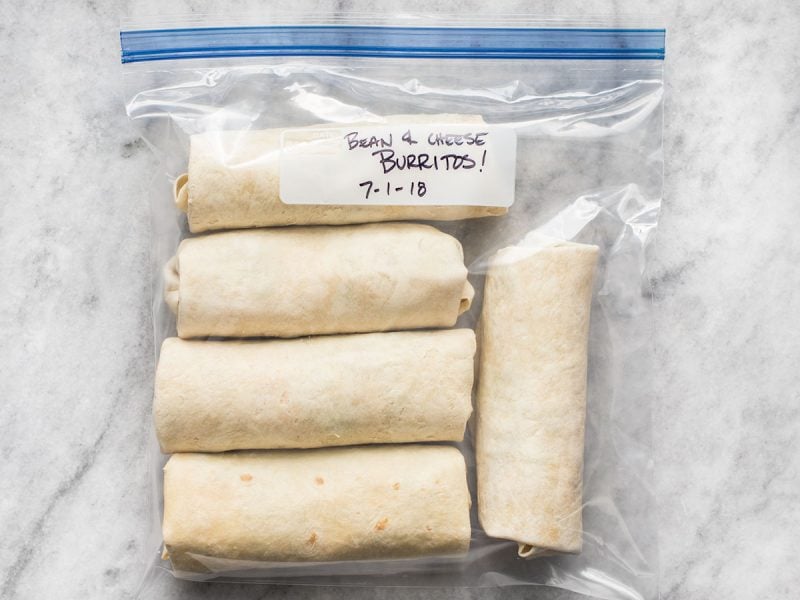
Or you can freeze them for about 3 months. Knowing that we’ll eat these up within a couple weeks, I took the lazy route and just popped them into a freezer bag. If you want to store for longer and prevent freezer burn, you will want to wrap each burrito individually in either plastic or parchment before placing them in the freezer bag.
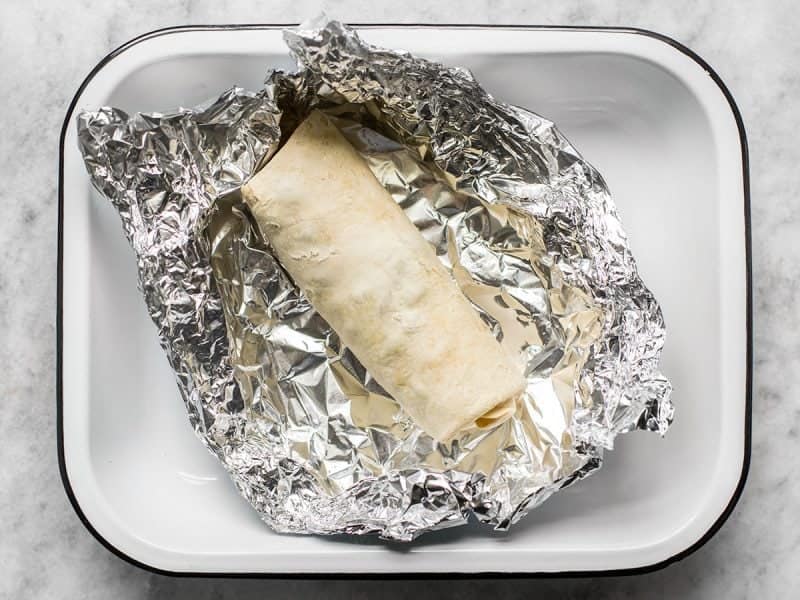
To reheat the burritos from frozen, you can either use your microwave’s defrost setting (mine took about 9 minutes on defrost) or reheat in the oven. Using the oven does take some time from frozen. Wrap your burrito in foil and place in a preheated 350ºF oven for about 40 minutes.
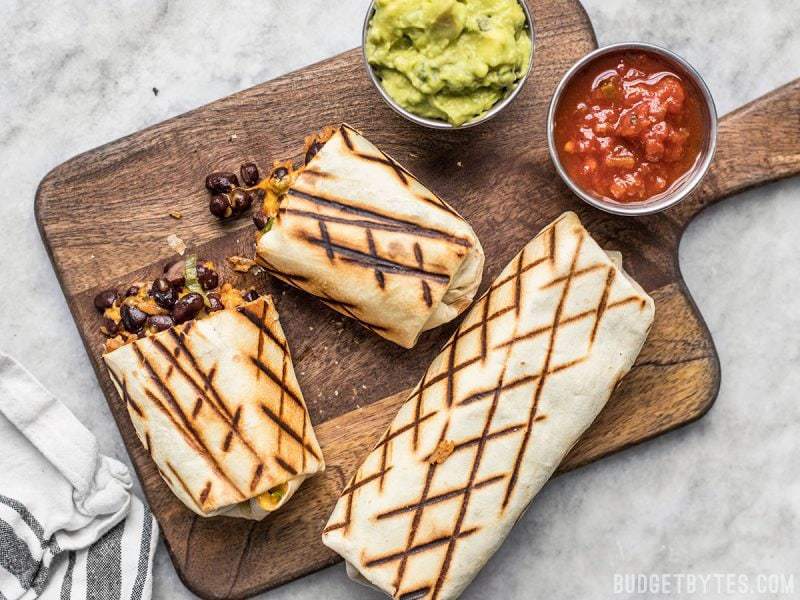
And then enjoy! If you want to reheat from frozen and still get that nice crispy exterior, I’d first do the defrost in the microwave and then crisp it up in a skillet at the end.


Delicious!!! We added shredded chicken (from the chicken taco bowls recipe actually) and our other favorite fillings and sauces, and this was an instant family favorite! We will be adding this to our regular rotation!
The burritos are simple to make and taste good. Satisfying. Beans and rice by themselves are an incomplete protein, but when combined make a complete protein.
I am not very imaginative and have used your recipes to cover for my culinary shortcomings.
These turned out great from the freezer! Super simple to put together and tasty. I ended up with extra rice and beans despite measuring them out according to the recipe, but maybe I was just being a bit too conservative! Next time I’ll be a bit more generous or divide it into eight equal portions before putting it in the tortillas. This time, I just had a post meal-prep lunch :)
I’m happy to find this recipe and reading the reviews . I am making freezer meals to prepare me for after my foot surgery coming up. I will be on a knee scooter for sometime and having these burritos in the freezer will be easy for me to heat up and have a healthy lunch while my boyfriend is at work. Today I’m making these, they sound so good, thanks for sharing.
What brand tortillas do you recommend? I am always disappointed with the tortillas I select so looking for a rec. Thanks!
I don’t think I have a favorite, actually! I just kind of grab whatever is available at the best price! 😆
I’m making ahead for dinner, after I pick my children up from school. Can I heat the burrito up from the refrigerator in the microwave?
Yep, absolutely. :)
Love this recipe, I’ve made it a few times. Any suggestions for reheating in an air fryer?
With some tweaking, I’m sure these burritos will be great reheated in the air fryer! Since we haven’t tried it ourselves, I’m a bit hesitant to give you specific instructions that might not be successful. Air fryers are essentially mini convection ovens, so I would start by following our recommendations for a regular oven. The general “rule” for converting to air fryer/convection is to reduce the baking temperature by 25*F and the cooking time by 20% (in this case, by 8 minutes). This isn’t a hard and fast rule, so I’d also keep a close eye on it to make sure it doesn’t burn or seriously overcook. Good luck! ~Marion :)
I had some leftover taco meat I used in place of the 2nd can of black beans. It was sooo good and filling!
I’ve made these a couple of times now, and they are such a lifesaver! I love that the only change that I need to make to make it vegan is the cheese. My use dairy cheddar for my husband, and Daiya for myself.
Using only taco sauce, instead of salsa, the burritos start compact and they don’t get soggy. My husband gleefully pours salsa on his plate.
He’s also not a huge fan of rice, but he enjoyed this! It’s a major win in my book.
Maybe next week I’ll make them for lunch and add some tofu scramble…
We really loved these! The rice was awesome. I didn’t have taco sauce so I mixed the black beans with a few tablespoons of green salsa and taco seasoning to up their flavor. Also, my burrito-size tortillas (homemade) weren’t as stuffed as I like so we sautéed up some frozen mixed bell peppers and corn with a bit of oil/taco seasoning at the last minute to fill them out. I’d really recommend adding that in, especially the corn as it adds a nice burst of sweet. Thanks for another budget, deliciously filling recipe!
I love this recipe and, since discovering it, always keep some burritos in hand in the freezer. I use a bit more cheese and taco sauce than the recipe calls for, and also add some frozen corn. Delicious!
So my favorite part about reviews on recipes is the part where the reviewer says, “I love this recipe- here’s how I changed it.” :D
In that spirit, because I had a bunch of stuff to use up…I used tomato and flour wraps, refried beans (as suggested optionally) mozzarella cheese (not my first choice), chipotle peppers, and white onion.
What blessed me the most was how many things you helped me clean up and turn into yumminess. But also, burritos in the freezer for snack ’emergencies’? Um, yes please! <3
So good! About to make yet another batch for grab and go lunches. Or breakfasts. Or snacks.
Would your portobello fajitas work for this if freezing? I’m obsessed with those and want to put them on everything.
On my list for a while! Do you have advice for making these without rice? Thanks
Potatoes! Sweet or regular are great imo.
i only got 6! did anyone else face this prob?
I made this and it was absolutely wonderful but I dry pan cooked some white onion to soften and blacken it and added that in as well.
So simple, yet so delicious! Love the spices with the rice. My husband devours these and to make them healthier, I use a low carb, high fiber wraps. I also make more burritos as I use the smaller wraps and not the burrito sized wraps. Thank you so much for this recipe.
Really good, surprisingly fast, and I just want to say that I love how accurate your measurements always are! I followed the indicated volumes for each type of filling and it fit 8 burritos perfectly. :) Looking forward to having these for lunch this week!
Love prepping these for a busy week. Subbed in your cumin rice and jazzed up a can of refried beans with some chopped onion, garlic, and tomato. Frugal/reducing waste tip – if your tortillas come in a plastic bag with a zip, you can just use that to store them in the freezer.
Love this recipe as a base for filling burritos! I personally added some beyond meat in it to make a more filling wrap but can absolutely see this burrito working with any meats.
How long would you reheat these from refrigerated in the oven?
I didn’t test that method, unfortunately.
I realize it’s a little late to be commenting on this lol but any tips on how to reheat it if it’s been thawing in the fridge for a couple hours at work and then I want to throw it in the microwave?
I would just follow the reheat instructions I have in there for frozen burritos because it’s not going to thaw that much in a fridge after only two hours. :)
How long in the oven from fresh or refrigerated?
This was my gateway recipe – I stumbled upon this online some years ago and discovered the whole world of Budget Bytes. Thanks!
These were amazing. I added about 1/2 cup of hatch chile salsa to the rice while cooking for some heat and adjusted the water amount. Otherwise followed the recipe exactly. Heated it up in my cast iron which gave a perfect crisp and served with some pepita salsa from Trader Joe’s. Froze half the batch. We will definitely be adding these to the regular rotation. It was a perfect lunch to have while working from home!
I love having burritos on hand for simple grab and go meals and these might be my new favorite! The taco rice is so flavorful! Simple ingredients, great for a tight budget
I made these for a coworker who has been out on maternity leave. A few of us made her freezer ready meals and I’m glad I made this! I managed to make 10 of these but gave her 9 since it’s 3 in her family that’ll be eating them. So hubby and I tried the remaining one after it sitting in the fridge for 2 days and mmm so good! Love the flavored rice, cheese, and taco sauce! The beans had nice depth to the burrito and I like the pop of color of the green onions. Yummy! Eats meal prep that I’ll have to make again some time!
i make burritos. beth makes burrito art. i make beans from dry every week in the pressure cooker, then after a few days, mix the leftovers with a can of refried beans, and shredded cheese, and wrap burritos and freeze them.
Instant classic in our house. Kids love them, and I can’t get enough. I ended up eating half of the recipe right away and the rest I put in the fridge. I just wish I had doubled the recipe!
This is a great recipe! I always wanted to know how to batch cook freezer burritos and am excited I did it for the first time. I added some chopped cilantro to the green onions, plus a little extra salt because otherwise the unsalted beans made mine taste bland. I cooked them on a grill pan too, for that delicious crunch. Perfect!
These are a staple in our freezer and I love them. BUT now we have an air fryer and that has been a freezer burrito game changerrrrr!!!! I put a frozen burrito in the air fryer for about 12-15 minutes on 400 and the tortilla gets soooo crunchy and I’m OBSESSED.
Oh and if you’re a vegetarian, try throwing in some cooked Soyrizo! That’s also upped my freezer burrito game…
Love your Recipes, thank you!
WHAT?! That’s awesome!
These were good! I do think the rice could use a little more salt. I may try this again adding some taco-seasoned ground beef. That might be enough to liven up the rice a bit. But overall, very tasty and filling and easy to make.
It’s definitely up to you and your taste! Beth has a great Cumin Rice or Cilantro Lime Rice that could spice things up the next time you make these.
These are delicious! They are quick and it’s easy to double to make a bunch for a crowd or for leftovers.
Love this recipe.
It also works great with smaller tortillas. The smaller burritos make great snacks for my teen boys.
I’m particularly pleased with this filling combo, which is sweet, savory, sour, and umami:
* Pinto beans cooked with smoked ham trimmings or hock
* Brown rice, seasoned or not (plain is fine)
* Cubed sweet potatoes, tossed with a little taco seasoning or chili powder, roasted and then drizzled with lime juice
* Homemade pickled jalapenos
* Manchego cheese
* Cilantro
These filling options all sound amazing! I’m going to try this for my 3 teen boys as well…..I can’t keep the freezer stocked fast enough!
How do you keep the tortillas from getting wet and mushy in the fridge?
I didn’t do anything special. I don’t think there is enough moisture in the filling for it to make the tortillas mushy.
Let the burritos cool before you seal them up in foil or a bag. Trapped heat will result in lots of moisture and soggy tortillas
We made a bunch of these and brought them along on a long camping trip. Threw a couple in the backpack in the am and they were ready to eat about lunch time. You saved us time and money, as you always do Beth. Thank you!
I saw this recipe and decided to do one of the other takes on this recipe that you suggested. You said try egg, so I tried this and it was a huge hit. I brought lots of eggs, and then added milk to make the eggs stretch. And I added turkey bacon and a little cheese to the egg. I formed 2 burritos per bag for my husband’s breakfasts and it made so many burritos that I could not believe it. My husband loved them!!! And now that we are entering the coldest months of the year, a hot breakfast is definitely more appealing than a cold bowl of cereal. Also, I normally purchase the pre-made frozen breakfast items, but Beth you helped me see that what I made here at home was sssoooo much better than the pre-made frozen breakfast stuff. My husband said the breakfast burritos tasted better and actually kept him fuller, so he avoids the mid morning hunger pangs. I will definitely be making these again. But what I may do to make this stretch even further is add bits of potatoes to the eggs, milk, and bacon. I may omit the cheese as cheese can be a little pricey. I also plan on making the lunch/dinner take on this recipe with beef, beans, and corn. Every recipe that I make from this website has been a delicious success. But this recipe was different in that I never thought about making my own homemade breakfast and that it could be so satisfying. Thanks again Beth and warm wishes to you for a great Christmas, Kwanzaa, New Year, etc!!!!
Awesome!! I’m so happy to hear that! :D
I found this recipe 6 weeks ago and I just made my fourth batch. Absolutely delicious, I enjoy them crisped up in the oven (I freeze then cook from frozen in parchment paper), or I take from the freezer and heat up in the microwave at work (not crispy, but still delicious). I love that I can have frozen food on hand with good ingredients and I know what’s in them! I’ve shared the link with many friends and family- everyone loves these! Yum- thank you!
i was hoping to make these for work lunches, but i will only have a microwave at my disposal for heating food. how would you recommend preparing these so i could easily reheat with only the microwave? cook fully and then reheat?
Actually, once they are filled and rolled the only reason you need to “cook” them further is to heat them through or to get the tortilla crispy. :) So if you only have a microwave, you won’t be able to get the tortilla crispy, but they’ll still be delicious! Once you have them filled and rolled you don’t need to cook them prior to refrigerating them. Just reheat them in the microwave at work once you’re ready to eat. I hope that made sense!
How do you make the seasoned rice using a rice cooker?
You should be able to just add all the ingredients to the rice cooker and use the usual setting to cook the rice.
How can I make this with brown rice instead of white rice?
Follow the water volume and cooking time recommendations listed on your package of brown rice, instead of using the 1.5 cups water and 15 minute cooking time I list in the recipe.
We love these burritos! They’re a lifesaver for our lunches during the week. One question: what brand of taco sauce do you prefer to use? We’ve tried a couple and have been on the hunt for the one that tastes best.
What are the rules for re-freezing frozen food? For example, I always stock up on tortillas and freeze them for when we need them. I also make your crockpot black beans and freeze the portions. Can I thaw those foods, make these burritos, then re-freeze? These would be awesome to have pre made for lunches and such!
Multiple freezing and thawing cycles can break down the texture of food each time, but as long as you are keeping the food below 40ºF throughout the thaw cycle, it does not pose a food safety danger. The danger usually comes when people leave the food out at room temperature or use warm water to thaw the food.
So tasty and so easy!!! I made some this week with the intent of saving them for a couple months, and then ended up having my work schedule shift so I didn’t have time to get to the grocery store when I wanted. These saved me! Not having to worry about lunch because I could simply grab one and go was such a stress reliever. Plus, they taste so. good.
Just curious, any alternatives to the cheese in this? It’s not that necessarily that I object to cheese or anything, but mainly interested in what else I could use as a means to hold these together?
I wouldn’t say that the cheese acts to hold the burritos together at all, so you could just leave it out. :)
I recently went vegetarian and my friend recommended Budget Bytes as a great source of recipes. These burritos were the first recipe that I made, and I was just as happy with burrito number one as I was with burrito number eight. These are cheap and easy work at home lunches. Cheers!
These sound great! I may also try with quinoa instead of rice for a different texture. I just love quinoa and black beans together. :)
Really tasty and so easy! I’ve made them two times already. The second time around I made my own sauce from cooking bell peppers and tomatoes. Allows me to include a bit more veggies and a great addition in taste.
Love these! I think they’re even better from frozen (I nuked em as instructed). So easy and delicious on a busy weeknight!
So good – trying one right now! I’ve got tons of black beans in the freezer thanks to you!
I really enjoy the photographs you include with the recipes (besides the fact that your recipes are out of this world good). I typically ‘read’ your posts first with a little food photo gazing, and then get to the meat of the matter.
Keep up the awesome photography work – the effort is well worth it and adds a well-appreciated dimension to your posts.
We smear refried beans across the wrapper, add a couple spoons of taco meat and diced onions. Tuck and roll, chill, freeze, and bag. To eat, thaw, place on a small plate, drench with enchilada sauce, sprinkle with shredded cheese. Nuke for a couple of minutes for an approximation of Taco Bell’s enchirito. Marvelous! Add a handful of sliced black olives to make it more like the original version.
These look really tasty! I might try to add pineapple to a filling featuring ham and cheese, i.e. a Hawaiian burrito! :)
Hmm. That sounds good to me. You’d better check with Janet below, though. She seems to have a lot of rules about what’s acceptable in a burrito 🤪
Made it twice in one week, it was awesome!
I like your suggestion for adding scrambled eggs, as this seems like it could be a quick grab-and-go breakfast. Would you still consider them freezable, and if so, would the freezing directions change at all?
Yep, you can still freeze them. I would make sure they are cooled completely in the fridge before transferring to the freezer, just to minimize the ice crystal formation as much as possible.
Yum!! Made these for our meal prep. We added a shredded bbq chicken. Next week we’ll add tinned corn & a bit more salsa. So easy and tasty!
These look incredible! I will definitely be making these soon, I love freeze ahead meals, and this is a good one because it’s so hearty! Thanks for sharing!!
What is taco sauce? As a Canadian, I am not familiar with this product.
Overall, this sounds delicious and it is officially on my list to try out.
It’s a slightly tangy sauce that has southwest spices in it.
I was going to use a thick salsa.
Is the rice to water ratio correct? I usually use 1 part rice to two parts water, so would use 2 cups of water for the one cup of rice.
A lot of people do 1:2 for rice, but I always do 1:1.5 and it turns out great. I would just stick to the ratio that you’re used to using.
When exactly did rice become a burrito component? When I ate them in Texas during 80s and 90s they were rice free, usually filled with refried beans and/or meat elements and cheese–often cilantro and raw onions added. The first time I ever saw rice in a burrito was my first visit to a Chipotle restaurant in Kansas in the early 2000s–also my last visit to a Chipotle. Anyway, a large flour tortilla, about 10-12 inches, has about 220-350 calories all by itself so adding rice seems like carbs only as filler. These look tasty, particularly the seasoned rice and I like the whole beans vs refried, but I’ll take the rice and beans in a bowl with just a little cheese and cilantro on top
Was this comment necessary? I’m half mexican – go ahead and eat rice in burritos if it makes you happy. It isn’t that big of a deal. Some people like to double up on carbs so they dont have to eat for several hours.
It may be a Cal-Mex thing. I grew up in LA County and we’ve always had bean and rice burritos. I’m in my late 40s, so “always” is about 40 years. ;)
There’s a Wikipedia page alllll about burritos including history and regional variations.
I’m making these this week!
If I am making these to freeze, should I let the rice cool before assembling?
Yes, that would probably a good idea. You can spread the rice out on a baking sheet to help it cool faster.
We love making breakfast burritos and freezing them. Egg and Bacon, egg and sausage and steak and eggs!!
This was filled under vegetarian but it call for pulled pork. Im confused. Still love you Beth :)
It doesn’t call for pulled pork. :) This is a rice, bean, and cheese burrito. In the introduction I listed some other things that people could put in their burritos if they want, like pulled pork, but this recipe does not include that.
Do you think short grain brown rice would work in this recipe?
Sure, just make sure to adjust the rice to water ratio and cooking time to that which is recommended for short grain brown rice.
I really love the new graphics that appear when I go to Pin your recipes…the photo labeled with the recipe title in a cute font is great. I will definitely be making these sometime in the next few weeks!
Thanks!